No Video in FPV: A Beginner Troubleshooting Checklist
A symptom-based checklist for the most common FPV problem: the goggles power on, but no usable video appears.
No Video in FPV: A Beginner Troubleshooting Checklist
The Dreaded Black Screen: Getting Your FPV Video Back
Introduction: The Dreaded Black Screen – Getting Your FPV Video Back
There are few things as frustrating in the FPV world as powering up your drone, donning your goggles, and being met with nothing but a blank, black screen. One moment you're soaring through the sky, the next you're grounded, staring into the void. This "no video" scenario is a common rite of passage for every FPV pilot, from beginner to seasoned veteran.
The Frustration of FPV No Video
Whether it's after a spectacular crash, a simple battery swap, or even a fresh build, the absence of an FPV feed can be incredibly disheartening. Is it the camera? The VTX? The flight controller? Or something simpler, like a loose connection? The sheer number of potential culprits can make troubleshooting feel like searching for a needle in a haystack. The urge to panic or immediately replace components is strong, but often unnecessary.
Why a Systematic Approach is Key
Jumping to conclusions or randomly swapping parts can waste time, money, and even introduce new problems. A systematic, step-by-step approach is crucial for efficiently diagnosing and fixing the issue. Think of it as a doctor diagnosing a patient – you start with the most common and least invasive checks before moving on to more complex procedures. This guide will help you methodically narrow down the possibilities, saving you headaches and getting you back in the air faster.
What This Guide Will Cover: Your Diagnostic Flowchart
This article will serve as your comprehensive diagnostic flowchart, guiding you through a series of checks, from the simplest external factors to intricate internal wiring and component testing. We'll cover both analog and digital FPV systems, ensuring you have the tools and knowledge to tackle any "no video" challenge. Let's get your FPV feed back!
Step 1: The FPV No Video Diagnostic Flowchart – Starting Simple
Before you grab your soldering iron or multimeter, let's start with the most basic, yet often overlooked, checks. These simple steps resolve a surprising number of "no video" issues.
Goggle & Receiver Checks: Are They Even On?
It sounds almost too simple, but ensure your FPV goggles are powered on and functioning correctly.
- Power Button: Is it pressed?
- Battery Charged: Is your goggle battery charged and properly connected? A low battery can cause intermittent issues or no display at all.
- Mode Selection: Are your goggles set to the correct input mode (e.g., AV IN for analog, or the correct digital mode like DJI O3, Walksnail, HDZero)?
- Receiver Module: If you're using an analog goggle with an external receiver module (like a RapidFire or TBS Fusion in Fat Shark HDO2 goggles), ensure the module is securely seated and powered. Check for any error lights on the module. For digital systems like DJI Goggles 2 or Walksnail Avatar HD Goggles, ensure they are powered on and displaying their internal menu.
Power & Battery Status: The Obvious Culprit
Your drone's battery is the lifeblood of your FPV system.
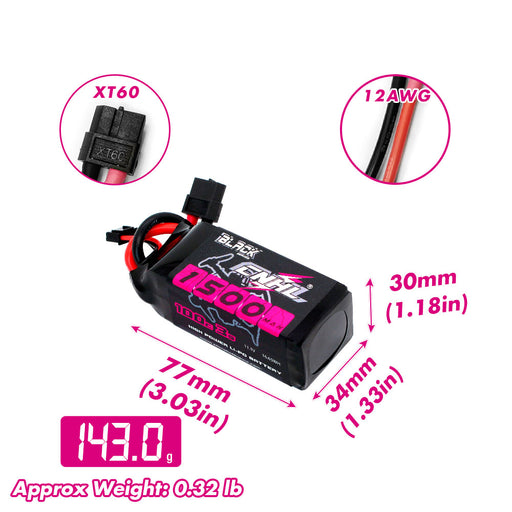
- Drone Battery Charged: Is the flight battery fully charged and properly connected to your drone? A completely depleted battery won't power anything.
- Battery Sag: Even if connected, a severely damaged or undercharged battery might not provide enough stable voltage for your VTX and camera, especially under load.
- Loose XT60/XT30: Double-check the main power connector on your drone. A loose or poorly soldered XT60/XT30 can cause intermittent power loss to all components.
Channel & Band Matching: The Most Common Oversight
This is arguably the most frequent cause of "no video" for analog pilots.
- Analog Systems: Your VTX (Video Transmitter) and VRX (Video Receiver, in your goggles) must be on the exact same channel and band. There are typically 8 channels per band (A, B, E, F, Raceband, and sometimes L).
- Check VTX: Many VTXs have small LEDs that indicate the current channel and band. Consult your VTX manual (e.g., a Rush Tank Mini or TBS Unify Pro32 will have distinct LED patterns).
- Check Goggles: Manually cycle through channels on your goggles or use the auto-scan feature. Sometimes, auto-scan can pick up noise rather than your actual signal, so manual selection is preferred once you know your VTX's setting.
- Digital Systems: For digital systems like DJI O3 Air Unit, Walksnail Avatar, or HDZero, ensure your goggles are linked to the correct air unit. This usually involves a binding process. Check for a "binding" or "pairing" status on your goggle screen. If you've changed air units or goggles, you might need to re-bind.
Basic Antenna Integrity: Secure and Undamaged?
Your antennas are critical for transmitting and receiving the video signal.
- VTX Antenna: Is the antenna securely screwed into your VTX (or air unit for digital)? A loose connection can severely degrade or completely block the signal. Check the connector type (SMA, RP-SMA, MMCX, U.FL) and ensure it's fully seated.
- Goggle Antennas: Are your goggle antennas (e.g., Lumenier AXII 2 or Foxeer Lollipop 4) securely attached to your receiver module or goggle ports?
- Physical Damage: Inspect both VTX and goggle antennas for bends, breaks, or internal damage. Even a slight crimp can ruin performance. For digital systems, ensure the delicate coaxial cables leading to the antenna elements are not cut or frayed.
Practical Tip: Always power on your VTX only with an antenna attached. Running a VTX without an antenna, even for a few seconds, can permanently damage it due to reflected power.
Step 2: Investigating Your FPV Camera – Is It Seeing Anything?
If the initial checks don't yield a solution, it's time to look at the first active component in the video chain: your FPV camera.
Camera Power & Wiring: Visual Inspection and Continuity
A camera needs stable power to operate.
- Visual Inspection: Carefully inspect the camera's wiring. Is the power wire (usually red) connected to a voltage source (often 5V or VCC on the FC), and the ground wire (usually black) connected to GND? Is the video signal wire (often yellow or white) connected to the correct video input pad on your Flight Controller (FC)?
- Soldering: Check all solder joints connected to the camera. Are they shiny and smooth, or dull and brittle (cold joint)? A cold joint can be intermittent or completely fail.
- Continuity Check (Multimeter): Use a multimeter in continuity mode to check the connections:
- From the camera's positive wire to its power source on the FC.
- From the camera's ground wire to a known ground on the FC.
- From the camera's video out wire to the video in pad on the FC.
- This helps identify internal breaks in the wire or poor solder joints.
Testing the Camera Independently: Bench Test Setup
The most definitive way to check a camera is to test it in isolation.
- Analog Camera Test: You'll need a spare VTX (even a cheap one), a small 5V power source (like a USB BEC or a dedicated 5V output from your FC if not connected to the drone's main power), and your FPV goggles.
- Connect the camera's power (5V) and ground to the 5V source.
- Connect the camera's video out to the VTX's video in.
- Connect the VTX's power and ground to a suitable power source (e.g., 5V or VBAT depending on VTX).
- Ensure the VTX has an antenna connected!
- Power everything up and tune your goggles to the VTX's channel. If you get a picture, your camera is likely fine. If not, the camera is probably faulty. Popular camera models like the RunCam Phoenix 2 or Caddx Ratel 2 are generally robust but can fail.
- Digital Camera Test: For digital systems, testing the camera independently is harder as it's often integrated with the air unit (e.g., DJI O3 Camera is part of the O3 Air Unit module). If you suspect the camera, the easiest test is to swap it with a known good camera if you have one.
OSD Overlay Issues: OSD Visible, But No Video Feed?
This is a very specific, yet common, troubleshooting scenario.
- OSD but No Video: If you see your On-Screen Display (OSD) elements (like battery voltage, flight mode, RSSI) in your goggles, but the background is black, then your camera is the most likely culprit. The OSD is generated by the Flight Controller and is overlaid on the video signal after it leaves the camera but before it reaches the VTX. This means the FC, VTX, and goggles are all working, but no video signal is coming from the camera itself.
- Solutions:
- Recheck camera wiring and power.
- Test the camera independently as described above.
- If the camera passes independent testing, there might be an issue with the video input pad on your FC, though this is less common.
Step 3: Troubleshooting the Video Transmitter (VTX) – The Signal Source
The VTX is responsible for broadcasting your video signal to your goggles. If your camera is working, the VTX is the next logical point of failure.
VTX Power & Signal Connection: From FC to VTX
Just like the camera, the VTX needs proper power and a video input.
- Power Wiring: Check the VTX's power and ground wires. Many VTXs (like the TBS Unify Pro32 HV or ImmersionRC Tramp HV) can take direct LiPo voltage (VBAT), while others require 5V or 9V regulated power. Ensure the correct voltage is supplied and the solder joints are solid. Use your multimeter to confirm voltage at the VTX's power pads.
- Video Input: Verify the video signal wire from the FC's video output pad (VOUT) is securely connected to the VTX's video input pad (VIN).
- Digital Air Unit Power: For digital systems, the air unit (e.g., DJI O3 Air Unit, Walksnail Avatar V2 Air Unit) typically draws power directly from the FC or a dedicated power source. Ensure the main power leads are properly soldered and receiving the correct voltage (usually 9-25V for DJI O3, 6-25.2V for Walksnail).
VTX Overheating & Damage: The 'Fried' VTX
VTX components can get hot, especially when transmitting at higher power, but excessive heat can indicate damage.
- Touch Test: Carefully touch the VTX after a minute or two of being powered on (ensure it has an antenna). If it's scorchingly hot to the touch, it might be damaged.
- Burnt Smell/Discoloration: Look for any signs of burnt components, discolored PCBs, or a distinct "burnt electronics" smell. This is a clear indicator of a fried VTX.
- No Antenna Operation: As mentioned, powering a VTX without an antenna is the quickest way to destroy it. If you suspect this happened, it's a strong candidate for replacement.
- Short Circuits: A short between the VTX's antenna output and ground can also destroy the VTX.
SmartAudio/TrampHV Issues: Control Link Problems
Many modern analog VTXs use SmartAudio (TBS) or TrampHV (ImmersionRC) protocols to allow you to change channels, bands, and power levels via Betaflight OSD.
- Configuration: In Betaflight's Ports tab, ensure the UART connected to your VTX's SmartAudio/TrampHV wire is configured correctly for "VTX (TBS SmartAudio)" or "VTX (IRC Tramp)".
- Wiring: Check the SmartAudio/TrampHV wire (often a dedicated pad on the VTX) is connected to a TX pad on your FC.
- Firmware: An outdated VTX firmware or Betaflight firmware could cause communication issues.
- Stuck on Wrong Channel: If the SmartAudio/TrampHV link isn't working, your VTX might be stuck on a channel you can't access or is not legal for your region, leading to a black screen even if it's otherwise functional.
Antenna Connection & Type: Right Antenna, Right Polarity?
This is crucial for both analog and digital.
- Secure Connection: Re-emphasize the importance of a tight antenna connection. A loose MMCX or SMA connection can cause signal loss.
- Polarization (Analog): Ensure your VTX antenna and goggle antennas have the same polarization – either both Left-Hand Circularly Polarized (LHCP) or both Right-Hand Circularly Polarized (RHCP). Mixing them will result in severe signal degradation and potentially a black screen.
- Antenna Type: While less likely to cause a complete black screen, using a linear antenna with a circular polarized antenna (or vice-versa) will also cause significant signal loss. For DJI O3 Air Unit, ensure the stock antennas or compatible third-party antennas are properly connected and oriented.
Step 4: Flight Controller (FC) & Wiring Deep Dive – The Central Hub
The Flight Controller acts as the central hub, routing power and video signals between your camera and VTX. Issues here can disrupt the entire video chain.
Video Signal Path on the FC: Checking VTX/Camera Pads
- Pinout Diagram: Refer to your FC's pinout diagram. Locate the "Video In" (VIN) pad where your camera connects and the "Video Out" (VOUT) pad where your VTX connects.
- Traces: Sometimes, a hard crash can damage the tiny traces on the FC's PCB that carry the video signal. While difficult to repair, visual inspection for cracks or scorch marks around these pads can be insightful.
- Dedicated 5V/9V Regulators: Many FCs provide regulated 5V or 9V outputs for the camera and VTX. If this regulator fails, the camera or VTX won't receive power. Test the voltage directly at these pads using your multimeter.
Soldering & Continuity Checks: Cold Joints and Breaks
This is where your multimeter becomes indispensable.
- All Solder Joints: Systematically check every solder joint involved in the FPV video chain: camera power/ground/video, VTX power/ground/video/SmartAudio. Look for:
- Cold Joints: Dull, lumpy solder that hasn't properly flowed.
- Solder Bridges: Solder accidentally connecting two pads that shouldn't be connected (e.g., video to ground).
- Broken Wires: Wires that have pulled out of a pad or are internally severed.
- Continuity: Use your multimeter's continuity mode (beeps when there's a connection) to trace the video signal path:
- From the camera's video output to the FC's Video In pad.
- From the FC's Video Out pad to the VTX's Video In pad.
- From the FC's power output (for camera/VTX) to the component's power input.
- From any ground point on the FC to the component's ground.
Ground Loops & Interference: Clean Power is Key
While more often causing noisy video than a complete black screen, severe ground loops can sometimes lead to video loss or instability.
- Shared Grounds: Ensure all components (camera, VTX, FC) share a common ground reference. Mixing grounds from different power sources can create ground loops.
- Filtering: If you have an LC filter installed, ensure it's wired correctly. While typically for noise, a faulty filter could block the signal.
Step 5: Analog vs. Digital FPV – System-Specific Checks
While many troubleshooting steps apply universally, there are nuances between analog and digital systems.
Analog System Specifics: Snow, Static, and Rolling Bars
Analog systems (like those using a Foxeer Reaper F4 VTX or AKK FX2 Ultimate) transmit a continuous, albeit noisy, signal.
- Snow/Static: If you see "snow" or static, it means your goggles are receiving some signal, but it's either very weak, on the wrong channel, or there's no actual video data. This is a good sign that your VTX is at least powered and transmitting. Recheck channel/band, antenna integrity, and VTX power.
- Rolling Bars: Rolling horizontal bars often indicate a power issue or ground loop.
- Black Screen with OSD: As discussed, this points strongly to a camera issue.
- Black Screen with No OSD: This usually points to a VTX issue, a complete break in the video signal path from the FC to the VTX, or a goggle/receiver problem.
Digital System Specifics: No Link, Low Bitrate, or Black Screen
Digital FPV systems like DJI FPV System (O3 Air Unit, Caddx Vista, DJI Goggles 2/V2), Walksnail Avatar HD System, and HDZero operate differently.
- "No Signal" / "No Link": This is the digital equivalent of a black screen. It means your goggles are not establishing a connection with the air unit.
- Binding: Re-perform the binding process between your air unit and goggles.
- Antenna Issues: Digital systems are very sensitive to antenna quality and connection. Double-check all antenna connections on the air unit.
- Firmware Mismatch: Ensure your air unit and goggles are running compatible firmware versions. An update might be necessary.
- Air Unit Power: Confirm the air unit is receiving proper power and its status LED indicates it's powered on and not in an error state.
- Low Bitrate / Blocky Video: While not a black screen, this can precede a complete loss. It indicates a weak signal. Check antennas, VTX power level settings, and ensure no obstructions.
- Black Screen (with OSD or Menu): If your digital goggles show their internal menus or OSD, but the FPV feed is black, it indicates the air unit is not transmitting video data, or the camera connected to the air unit is faulty. For DJI, this often means the camera cable is loose or the camera itself is damaged.
Compatibility & Firmware: Ensuring All Components Speak the Same Language
- Analog: While largely compatible, ensure your VTX and VRX support similar frequency ranges.
- Digital: Compatibility is paramount. DJI components work with DJI, Walksnail with Walksnail, HDZero with HDZero. You cannot mix and match. Always keep your firmware updated on both the air unit and goggles for optimal performance and to resolve potential bugs.
Essential Tools for FPV Troubleshooting
Having the right tools makes troubleshooting infinitely easier.
Multimeter & Smoke Stopper: Your First Line of Defense
- Multimeter: Absolutely essential. Use it for:
- Voltage Checks: Confirming power to your camera, VTX, and FC.
- Continuity Checks: Tracing wires, checking solder joints, and identifying shorts.
- Resistance Checks: While less common for "no video," useful for checking component health.
- Smoke Stopper: An invaluable safety device. It limits current in case of a short circuit, preventing damage to your components (and saving you from actual smoke) during initial power-ups or after repairs. Always use a smoke stopper after any soldering work or when powering up a drone you suspect has an electrical issue.
Spare Parts & Test Bench Setup: Quick Swaps for Diagnosis
- Spare Camera/VTX: Having a known working spare camera and VTX is the quickest way to isolate faults. If swapping out your drone's camera with a spare fixes the issue, you've found your culprit.
- Test Bench: A small setup with a spare FC, a 5V BEC, and basic wiring can allow you to test components like cameras and VTXs in isolation, as described in Step 2.
Visual Aids & Magnification: Spotting the Tiny Details
- Good Lighting: A well-lit workspace is critical.
- Magnifying Glass/Jeweler's Loupe: FPV components are tiny. A magnifier helps you spot dry joints, solder bridges, broken traces, or damaged components that are invisible to the naked eye.
- Smartphone Camera: Use your phone's camera to take close-up, magnified photos of suspicious areas. Zooming in on the photo can reveal details you might miss otherwise.
FAQ: Your FPV No Video Questions Answered
Why is my FPV feed suddenly black after a crash?
A crash is a prime suspect for video loss. The impact can:
- Dislodge Wires: Pull camera, VTX, or power wires loose from their solder pads.
- Damage Components: Physically break the camera lens, internal camera board, or VTX components.
- Break Antennas: Sever the VTX antenna or damage the internal antenna elements of digital air units.
- Create Shorts: Cause components to short circuit, potentially frying the VTX or FC. Start with physical inspection, then proceed through the diagnostic flowchart.
How do I know if it's my camera or VTX that's faulty?
The key differentiator is the OSD (On-Screen Display).
- OSD visible, but no video feed: Almost certainly a camera issue. The OSD is generated by the FC, meaning the FC, VTX, and goggles are all working, but the camera isn't sending a picture.
- No OSD, just a black screen (or static/snow for analog): This points to a VTX issue, a problem with the video signal path from the FC to the VTX, or a goggle/receiver problem. Test the camera independently to confirm.
Can incompatible components cause no video?
Yes, absolutely.
- Digital Systems: Most commonly in digital FPV, you cannot mix brands (e.g., DJI Goggles with a Walksnail Air Unit). Firmware mismatches can also cause incompatibility.
- Analog Systems: While less common for a complete black screen, an analog VTX and VRX that don't support the same frequency bands (e.g., a VTX only on Raceband and goggles only on Band A/B/E/F) will result in no signal. Also, ensure you're using the correct antenna polarization (LHCP/RHCP).
My OSD shows up, but no video feed. What gives?
As detailed above, this is the classic symptom of a faulty or unpowered camera. The Flight Controller (FC) generates the OSD and overlays it onto the incoming video signal from the camera. If the camera isn't providing a signal, the FC still overlays the OSD onto a blank (black) background. Recheck camera wiring, power, and consider testing or replacing the camera.
What are common signs of a fried VTX?
- Excessive Heat: The VTX becomes unusually hot very quickly.
- Burnt Smell/Discoloration: A distinct smell of burnt electronics, or visible scorch marks on the VTX board.
- No LED Indicators: The VTX's status LEDs (if it has them) don't light up as expected.
- No Signal Transmission: Even after confirming proper power, antenna connection, and channel settings, the goggles receive absolutely no signal (not even static for analog).
- Damage from No Antenna: If you powered it without an antenna, it's highly likely fried.
Conclusion: Get Back in the Air with Confidence
Experiencing a "no video" issue can be daunting, but with a structured approach and the right tools, it's a problem you can conquer.
Recap of Your Troubleshooting Journey
We've covered everything from the simplest checks like goggle power and channel matching, through detailed inspections of your camera, VTX, and FC wiring, to system-specific considerations for both analog and digital FPV. By following this diagnostic flowchart, you can systematically eliminate possibilities and pinpoint the exact cause of your black screen.
Empowering Your FPV Diagnostic Skills
Every time you troubleshoot and fix a problem, you gain invaluable experience and confidence. This guide isn't just about fixing one specific issue; it's about building your diagnostic skills, making you a more independent and capable FPV pilot. The ability to diagnose and repair your own drone is one of the most rewarding aspects of the hobby.
Call to Action: Share Your Fixes & Fly On!
Don't let a black screen keep you grounded. Use this guide, get your hands dirty, and get that FPV feed back! Once you've successfully diagnosed and fixed your issue, share your experience in the comments below. What was the culprit? What tips did you find most useful? Your insights can help countless other pilots facing the same frustrations. Now go forth, troubleshoot, and fly on!
Copyright-safe media generated locally by FPVLovers