FPV Drone Won't Arm: Betaflight Troubleshooting Checklist
An evergreen FPVLovers guide focused on isolating Betaflight arming blocks safely.
FPV Drone Won't Arm: Betaflight Troubleshooting Checklist
That sinking feeling when your FPV drone refuses to arm can be incredibly frustrating. You've built it, configured it, and you're ready to fly, but your motors remain stubbornly silent. This common issue plagues FPV pilots of all experience levels, often stemming from a myriad of potential causes, from simple software settings to complex hardware malfunctions. Don't let it ground your ambitions! This comprehensive guide is designed to help you systematically diagnose and fix why your FPV drone won't arm, getting you back in the air with confidence.
Understanding the Arming Process and Initial Safety Checks
Before we dive into the nitty-gritty of troubleshooting, it's crucial to understand what "arming" actually means for your FPV drone and to establish fundamental safety protocols. This understanding forms the bedrock of effective diagnosis.
What Does 'Arming' Mean for Your FPV Drone?
In the FPV world, "arming" refers to the process of enabling your drone's motors, making them ready to spin in response to throttle input from your radio transmitter. It's a critical safety feature, ensuring that your propellers don't spin up unexpectedly. When armed, your flight controller (FC) initiates communication with the Electronic Speed Controllers (ESCs), which then power the motors. Until armed, your drone is essentially in a safe, disarmed state, regardless of your throttle stick position.
Essential Pre-Arm Safety Protocols
Safety is paramount in FPV. Before attempting any troubleshooting or even simple arming, always follow these golden rules:
- Remove Propellers: This is non-negotiable. Even a slight motor spin can cause serious injury. Always remove your props when connecting to Betaflight, testing motors, or diagnosing arming issues.
- Clear Workspace: Ensure your drone is on a stable, clear surface, away from anything it could damage or get tangled in if motors were to suddenly spin up.
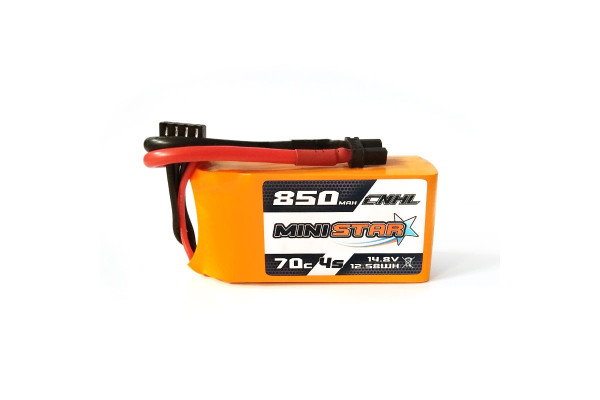
- Check Battery Voltage: Ensure your LiPo battery is adequately charged. Most flight controllers have a minimum voltage threshold below which they will refuse to arm. For example, a 4S LiPo should be at least 14.8V (3.7V/cell) for safe arming.
- Use a Smoke Stopper: Especially if you've recently built or re-wired your drone, a smoke stopper is an invaluable tool. It acts as a fuse, preventing catastrophic shorts and damage if something is wired incorrectly.
Decoding Arming Indicators: LEDs and Beeps
Your FPV drone communicates its status through various indicators. Learning to "read" these can provide vital clues:
- Flight Controller LEDs: Most FCs, like the SpeedyBee F405 V3 or a Matek H743-WING, feature status LEDs. A common pattern is a solid blue LED indicating a valid receiver signal and a solid green LED for successful gyro initialization. A rapidly blinking red LED might signify a critical error, while a solid red often indicates power. Consult your specific FC's manual for precise LED meanings.
- ESC Beeps: When you plug in your battery, your ESCs will typically emit a series of beeps. A common sequence is
beep-beep-beep(initialization) followed bybeep-beep(ready to arm). If you hear a continuous single beep or an irregular pattern, it could indicate an issue with ESC communication, motor detection, or a problem with the DSHOT signal from the FC. - Betaflight OSD Messages: If you're wearing your FPV goggles, Betaflight's On-Screen Display (OSD) can often show arming prevention messages directly (e.g., "ARMING DISABLED," "NO RX," "LOW VOLTAGE," "ACCEL CALIB"). This is often the quickest way to identify the immediate blocker.
The Role of Betaflight's Pre-Arm Feature
Betaflight offers a "Pre-Arm" feature, found in the Modes tab, which adds an extra layer of safety. When enabled, you need to activate a dedicated "Pre-Arm" switch on your radio before the main "Arm" switch will actually arm the motors. This prevents accidental arming. More importantly, Betaflight uses various internal "arming flags" to determine if it's safe to arm. Common conditions that prevent arming include:
- Throttle too high (
THROTTLE) - Receiver not connected or failsafe active (
NO_RX,FAILSAFE) - Accelerometer not calibrated or tilted too much (
BAD_ACC,CALIB) - Gyro not initialized or faulty (
NO_GYRO) - Low battery voltage (
LOW_VOLTAGE) - Motor output not configured (
NO_MOTORS)
Understanding these flags is key to using the status command in the CLI, which we'll cover shortly.
Betaflight Configuration: The Most Common Arming Blockers
The vast majority of arming issues stem from incorrect Betaflight configuration. Let's systematically go through the settings that often cause problems.
Verifying Your Arming Switch and Modes Tab Settings
The first place to check is how you've configured your arming switch in Betaflight:
- Connect to Betaflight Configurator: Plug your FC into your computer and open Betaflight Configurator.
- Go to the Modes Tab: Here, you'll see a list of available modes.
- Find the 'ARM' Mode: Ensure you have an 'ARM' mode configured and assigned to an auxiliary (AUX) channel on your radio, typically AUX1, AUX2, or AUX3.
- Check the Range: Move the assigned switch on your radio. Observe the yellow indicator in the Modes tab. It should move into and out of the designated 'ARM' range (e.g., 1700-2100). If the indicator doesn't move or doesn't enter the range, your switch isn't properly assigned or your radio's channel endpoints are off.
- Tip: Make sure your arming range isn't overlapping with another mode, especially "Angle" or "Acro" if you're using those. A clean, distinct range for ARM is best.
Receiver Tab: Channel Mapping, Endpoints, and Stick Ranges
Your flight controller needs to correctly interpret the signals from your radio receiver. The Receiver tab is where you verify this:
- Go to the Receiver Tab: Turn on your radio transmitter and ensure your drone's receiver is bound and powered.
- Check Channel Mapping: Most radios default to AETR1234 (Aileron, Elevator, Throttle, Rudder). Betaflight often defaults to TAER1234. If your stick inputs are mixed up (e.g., moving roll stick moves pitch in Betaflight), adjust the "Channel Map" setting to match your radio (e.g.,
AETR1234for FrSky/Spektrum,TAER1234for Futaba/some ExpressLRS setups). - Verify Stick Inputs: Move your throttle, yaw, pitch, and roll sticks to their full extents.
- Throttle: When the throttle stick is at its lowest position, the value in Betaflight should be around 1000 (min_check). If it's higher, the FC will prevent arming, thinking the throttle isn't fully down.
- Yaw, Pitch, Roll: These should be centered around 1500 when the sticks are at rest. Moving them should result in values ranging from approximately 1000 to 2000.
- Adjust Endpoints (if necessary): If your stick values don't reach 1000 and 2000, you might need to adjust your radio's channel endpoints or sub-trims to ensure the full range is covered. However, be careful not to over-adjust.
- CLI Command: In the CLI, the
set min_check = 1050andset max_check = 1950commands define the acceptable range for stick inputs. If your radio's minimum throttle is, for example, 1060, you'll need to adjustmin_checkto be higher than that, or preferably, adjust your radio's endpoint to get closer to 1000.
- CLI Command: In the CLI, the
Failsafe Configuration: Why a Bad Failsafe Prevents Arming
A properly configured failsafe is a critical safety feature that prevents your drone from flying away if it loses signal from your radio. Betaflight will not arm if it detects an invalid or unconfigured failsafe.
- Go to the Failsafe Tab:
- Set a Failsafe Type: For most FPV drones, "Drop" or "Land" (which attempts a controlled descent) is recommended. "Hold" is generally not advised for FPV setups.
- Receiver Failsafe: Ensure your receiver itself is configured for failsafe. For example, with ExpressLRS, you can set "Failsafe Mode" to "Cut" (no pulses) or "Hold" (last valid position) on the receiver side. Betaflight then detects the absence of pulses or the held position and triggers its own failsafe.
- Common Issue: If your receiver loses connection or isn't properly bound, Betaflight will detect a "FAILSAFE" condition and prevent arming. Check your receiver's binding status and wiring.
CLI Commands: Unlocking Hidden Arming Flags and Status
The Command Line Interface (CLI) is your most powerful diagnostic tool in Betaflight.
- Open the CLI Tab:
- Type
statusand press Enter: This command will output a wealth of information, including the current arming flags.- Example Output:
ARMING DISABLEDfollowed byFlags: NO_RX BAD_ACC - Decoding Flags:
NO_RX: No receiver signal detected.BAD_ACC: Accelerometer not calibrated or drone is not level.THROTTLE: Throttle stick is not at its lowest position.FAILSAFE: Failsafe active (no receiver signal, or receiver failsafe triggered).CALIB: Gyro or accelerometer calibration needed.NO_GYRO: Gyro sensor not detected or faulty.LOW_VOLTAGE: Battery voltage is below the minimum threshold.CLI: CLI is open, preventing arming.MSP: MSP (serial port protocol) is active, preventing arming.
- Action: Address any flags reported by the
statuscommand. This is often the quickest path to resolving your arming issue.
- Example Output:
- Other Useful Commands:
diff all: Shows all parameters that differ from the default Betaflight settings. Useful for reviewing your configuration.dump all: Shows your entire configuration.
Hardware and Connectivity: Receiver, ESCs, and Motors
Even with perfect Betaflight settings, hardware issues can still prevent arming. These often require a more hands-on approach.
Receiver Connection: Binding, Wiring, and Protocol Verification
Your flight controller needs a reliable signal from your radio receiver to arm.
- Binding: Ensure your receiver is correctly bound to your radio transmitter. Consult your receiver's manual (e.g., FrSky XM+, Crossfire Nano RX, ExpressLRS EP1) for the binding procedure.
- Wiring: Double-check the physical wiring from your receiver to your flight controller.
- Power: Ensure 5V and GND are correctly connected.
- Signal: Verify the signal wire (e.g., S.BUS, CRSF TX/RX, ELRS TX/RX) is connected to the correct UART on your FC.
- Ports Tab: In Betaflight's Ports tab, ensure the UART to which your receiver's signal wire is connected has "Serial RX" enabled. For example, if your ELRS receiver's TX is connected to FC's RX2, then UART2 should have Serial RX enabled.
- Configuration Tab: In the Configuration tab, under "Receiver," ensure the correct "Serial Receiver Provider" is selected (e.g., SBUS, CRSF, Spektrum 2048/1024, FPort). This must match your receiver type.
- Tip: If you see "NO_RX" in the CLI
status, revisit these steps thoroughly.
- Tip: If you see "NO_RX" in the CLI
ESC Calibration and Motor Protocol Settings
ESCs (Electronic Speed Controllers) are crucial for motor control.
- Motor Protocol: In Betaflight's Configuration tab, ensure you've selected the correct "DSHOT Bitrate" (e.g., DSHOT600, DSHOT300). DSHOT is the modern digital protocol and generally doesn't require calibration. Older analog protocols like OneShot125 or MultiShot do require calibration, but these are rarely used on modern FPV builds.
- Note: If you're using DSHOT, do NOT attempt traditional ESC calibration, as it can be detrimental.
- Firmware Compatibility: Ensure your ESC firmware (e.g., BLHeli_32, BLHeli_S) is up to date and compatible with your Betaflight version.
- Testing Motors (Props OFF!): In the Motors tab, with props OFF and battery connected, click the "I understand the risks" checkbox. Carefully test each motor slider individually. If a motor doesn't spin, or spins erratically, it points to an ESC or motor issue.
Motor Connection, Direction, and Continuity Checks
Faulty motor connections are a common culprit.
- Wiring: Visually inspect all solder joints where motor wires connect to the ESCs. Look for cold solder joints (dull, pitted appearance) or loose wires.
- Continuity: Use a multimeter in continuity mode to check the connection from each motor pad on the ESC to its corresponding wire on the motor.
- Motor Direction: While not an arming blocker, incorrect motor direction can cause immediate instability upon arming. In the Motors tab (again, props OFF!), ensure motors spin in the correct direction (CW or CCW) as indicated by Betaflight's motor diagram. You can reverse motor direction in the BLHeli_32 or BLHeli_S Configurator if needed.
- Motor Malfunction: A shorted or faulty motor can sometimes prevent arming, though usually, it would just prevent that specific motor from spinning.
Power System Integrity: Battery, PDB, and Wiring
A stable power supply is fundamental.
- Battery Voltage: As mentioned, Betaflight won't arm if the battery voltage is too low. Check the voltage reported in Betaflight's Power & Battery tab.
- XT60/XT30 Connector: Inspect your battery connector for damage, corrosion, or loose pins. A poor connection can lead to voltage sag or intermittent power.
- PDB/FC Wiring: Carefully inspect all power wires (VCC, GND) leading to your flight controller, ESCs, and receiver. Look for any frayed wires, exposed copper, or signs of a short circuit.
- Current Sensor: A faulty current sensor can sometimes report incorrect battery voltage or current, leading Betaflight to believe there's a problem and prevent arming.
Sensor and Calibration Issues: Gyro, Accelerometer, and Orientation
Your drone relies heavily on its internal sensors to know its orientation and maintain stability. Issues here are definite arming blockers.
Accelerometer Calibration: Ensuring a Level Horizon
The accelerometer tells your drone its pitch and roll angles relative to gravity.
- Go to the Setup Tab:
- Place Drone Level: Ensure your drone is perfectly level on a flat surface.
- Click 'Calibrate Accelerometer': This teaches the FC what "level" means.
- Why it blocks arming: If the accelerometer is uncalibrated or detects the drone is significantly tilted (e.g., more than 25 degrees), Betaflight will prevent arming with the
BAD_ACCflag, as it can't guarantee stable flight from an unlevel start.
- Why it blocks arming: If the accelerometer is uncalibrated or detects the drone is significantly tilted (e.g., more than 25 degrees), Betaflight will prevent arming with the
Flight Controller Orientation: Correct Board Alignment
Your FC needs to know how it's physically mounted in your frame.
- Go to the Configuration Tab:
- Board and Sensor Alignment: If your FC is mounted with a rotation (e.g., rotated 90 degrees clockwise), you need to specify this here. For example, if the arrow on your FC points to the right of your drone's front, you'd set "Yaw Degrees" to 90.
- Impact: Incorrect orientation will cause wild, uncontrollable drift immediately upon arming (or prevent arming altogether if the initial "level" check is too far off). Verify by tilting your drone and observing the 3D model in the Setup tab – it should mirror your physical movements accurately.
Gyro Errors and IMU Malfunctions
The gyroscope (IMU) detects rotational movement, crucial for flight stability.
NO_GYROFlag: If the CLIstatuscommand showsNO_GYRO, it means the FC cannot communicate with its gyroscope sensor.- Causes: This is often a hardware fault on the flight controller itself. Less commonly, it could be a firmware corruption.
GYRO_CALIB_FAIL: This flag indicates the gyro failed its initial calibration upon boot-up.- Causes: Could be physical damage, extreme vibrations during boot, or a faulty sensor.
Addressing 'No Gyro' or 'Gyro Not Found' Messages
If you encounter NO_GYRO or similar messages:
- Re-flash Firmware: Sometimes, a corrupted firmware flash can lead to this. Try flashing the latest stable Betaflight firmware for your FC, ensuring "Full chip erase" is selected.
- Physical Inspection: Inspect the FC for any visible damage around the gyroscope chip (usually a small square chip, often MPU6000, MPU6500, ICM20602, or BMI270).
- Hardware Fault: Unfortunately, if re-flashing doesn't help, a
NO_GYROmessage often points to a damaged or faulty FC. This might necessitate replacing the flight controller.
Advanced Troubleshooting and Diagnostic Tools
For persistent or complex arming issues, you might need to dig a little deeper.
Interpreting Betaflight's Blackbox Logs for Clues
Blackbox logging records detailed flight controller data, including sensor readings, stick inputs, and arming attempts.
- Enable Blackbox: In Betaflight's Blackbox tab, enable logging and select a logging device (onboard flash, SD card).
- Recreate Issue: Attempt to arm your drone and generate the error.
- Analyze Logs: Use the Blackbox Explorer software to analyze the log. You can look for "ARMING DISABLED" events and see the state of various sensors and flags at that moment. This can reveal subtle issues not immediately apparent from the
statuscommand.
Firmware Incompatibility and DSHOT Beacons
Ensuring all components are running compatible firmware is important.
- FC Firmware: Always use the latest stable Betaflight firmware for your specific FC target.
- ESC Firmware: If you're using BLHeli_32 or BLHeli_S ESCs, ensure they have reasonably up-to-date firmware. In rare cases, very old ESC firmware might have quirks with newer Betaflight DSHOT implementations.
- DSHOT Beacons: DSHOT ESCs can emit "beacons" (motor beeps) even without a motor connected. If your motors aren't spinning, but your ESCs respond to the DSHOT beacon command in Betaflight's Motors tab, it confirms the FC-to-ESC DSHOT communication path is mostly functional.
Identifying Physical Damage, Shorts, and Cold Solder Joints
A thorough physical inspection can reveal hidden problems.
- Visual Inspection: Look for burnt components, discolored PCBs, loose wires, or bent pins on connectors.
- Solder Joints: Examine all solder joints, especially on the FC and ESCs. Cold solder joints (dull, rough, or rounded blobs) can cause intermittent connections. Re-solder any suspicious joints.
- Short Circuits: Use a multimeter in continuity mode to check for accidental shorts between power and ground lines, or between signal lines and ground. A common culprit is a stray strand of wire. A smoke stopper is invaluable here.
The Step-by-Step Troubleshooting Flowchart
Here's a logical flow to guide your troubleshooting process:
- Safety First: Remove props. Use a smoke stopper.
- Check CLI
status:- Are there arming flags? Yes -> Go to step 3. No -> Go to step 4.
- Address Arming Flags:
NO_RX/FAILSAFE: Check receiver binding, wiring, Ports tab (Serial RX), and Configuration tab (Receiver Provider).BAD_ACC/CALIB: Go to Setup tab, calibrate accelerometer. Ensure drone is level.THROTTLE: Go to Receiver tab, ensure throttle is at 1000. Adjust radio endpoints if needed. Checkmin_checkin CLI.LOW_VOLTAGE: Check battery charge. Verify voltage in Power & Battery tab.NO_GYRO: Re-flash FC firmware. If still present, suspect faulty FC hardware.CLI/MSP: Close CLI, disconnect MSP tools.- After addressing, retry
statusand arm. If still failing, go back to step 2.
- No Arming Flags (but still won't arm):
- Check Modes Tab: Verify Arm switch range is correct and not overlapping.
- Check Receiver Tab: Ensure all stick inputs are correct (1000-1500-2000 range).
- Check Configuration Tab: Verify FC orientation (3D model in Setup tab matches physical movement).
- Check Motors Tab: (Props OFF!) Test individual motors. Do they spin?
- Check Ports Tab: Ensure Serial RX is enabled on the correct UART.
- Physical Inspection: Look for loose wires, cold solder joints, physical damage.
- Battery & Power: Confirm battery voltage, XT60/XT30 integrity.
- Try Re-flashing FC Firmware: With full chip erase.
- Still no arm? Consider Blackbox logs for deeper insight, or consult FPV community forums with your
dump alloutput andstatusflags.
Frequently Asked Questions About FPV Drone Arming
Why won't my FPV drone arm in Betaflight even with the switch on?
Even if your arming switch is correctly set, Betaflight employs numerous safety checks. The most common reasons are an uncalibrated accelerometer (BAD_ACC), no receiver signal (NO_RX), throttle not at minimum (THROTTLE), or an incorrectly configured failsafe (FAILSAFE). Use the status command in Betaflight's CLI to identify the specific arming flag preventing it.
How do I troubleshoot FPV drone arming problems systematically?
Start with safety (props off, smoke stopper). Then, the most efficient method is to open the Betaflight CLI and type status. This will reveal any specific arming flags. Address those flags one by one. If no flags are present, then systematically check your Betaflight Modes, Receiver, and Configuration tabs, followed by hardware checks (receiver, ESCs, motors, power).
What are the most common reasons an FPV drone won't arm?
The top reasons include:
- Incorrect Arming Switch Setup: Wrong range or channel in the Modes tab.
- Receiver Issues: Not bound, bad wiring, wrong serial port, or incorrect protocol selected in Betaflight.
- Throttle Not at Minimum: Throttle stick not at its lowest point, or
min_checkvalue is too low for your radio's output. - Uncalibrated Accelerometer: Drone isn't level or accelerometer needs calibration in the Setup tab.
- Failsafe Not Configured: Betaflight detects an unsafe failsafe state.
- Low Battery Voltage: Battery is below the minimum arming threshold set in Betaflight.
How can I fix my FPV drone arming switch if it's not working?
First, ensure your radio is transmitting on the correct auxiliary channel for your arming switch. In Betaflight's Receiver tab, verify that moving the switch on your radio causes the corresponding AUX channel slider to move. Then, in the Modes tab, ensure the 'ARM' mode is assigned to that AUX channel and that the yellow indicator moves clearly into and out of the set range when you flip the switch. Adjust your radio's channel endpoints if the range is insufficient.
What do the different FPV drone arming beeps mean?
The initial beeps when you plug in the battery are usually from the ESCs indicating they've powered on and detected motors. A common sequence is beep-beep-beep (initialization) followed by beep-beep (ready to arm). If you hear continuous single beeps, irregular patterns, or no beeps from one or more motors, it often signifies an issue with ESC communication, motor connection, or a problem with the DSHOT signal from the flight controller. Betaflight itself might also emit beeps for certain statuses, but ESC beeps are more indicative of arming readiness.
Get Back in the Air: Conquering Arming Issues
Troubleshooting an FPV drone that won't arm can be a daunting task, but by following a systematic approach and understanding the underlying causes, you can often pinpoint and resolve the issue yourself. Remember to always prioritize safety during your diagnostic process. With patience and the detailed steps outlined in this guide, you'll soon have your motors spinning and be ready to take flight once again. Don't let a stubborn arming issue keep you grounded – apply these fixes and soar!
Did this guide help you fix your FPV drone's arming issue? Share your success story or ask further questions in the comments below!
Copyright-safe media generated locally by FPVLovers