FPV Motor Spins the Wrong Direction: Safe Fix Checklist
An evergreen FPVLovers guide focused on fixing motor direction with props removed and clear safety steps.
FPV Motor Spins the Wrong Direction: Safe Fix Checklist
Building an FPV drone is an exhilarating journey, culminating in that first throttle punch. But few things are more disheartening than hitting the throttle only to have your drone flip uncontrollably, spin wildly, or simply refuse to take off. More often than not, the culprit is one or more motors spinning in the wrong direction.
Don't panic! This is a surprisingly common issue for FPV pilots, from beginners to seasoned builders. An incorrectly spinning motor can lead to unstable flight, crashes, and a lot of frustration. Fortunately, it's usually an easy fix that doesn't require complex diagnostics or expensive tools.
This comprehensive guide will walk you through diagnosing the problem and provide step-by-step solutions using Betaflight, BLHeliSuite, and even a simple wiring swap. We'll ensure your drone flies perfectly and safely, transforming your frustration into the joy of a perfectly configured quad.
Why Correct Motor Direction is Crucial for FPV Drones
Before diving into solutions, let's understand why motor direction is so fundamental to FPV flight. It's not just a minor detail; it's the difference between controlled flight and an instant crash.
The Physics of Lift: Propellers and Thrust
At its core, an FPV drone flies by generating lift. This lift comes from its propellers, which are essentially rotating airfoils. Each propeller blade is designed with a specific pitch – an angle that, when rotated, pushes air downwards, creating an equal and opposite upward thrust.
For a propeller to generate effective lift, it must spin in a specific direction relative to its blade's leading edge. Imagine a screw: it only moves forward when turned in the correct direction. Similarly, if a propeller spins the wrong way, instead of pushing air down efficiently, it might push it up, create turbulence, or simply generate very little to no useful thrust. This is why getting motor direction right is paramount.
Understanding Standard Motor Layouts (Props In/Props Out)
FPV drones typically adhere to one of two common motor/propeller configurations, both of which require a precise pattern of motor rotation:
-
"Props In" (Standard Configuration): This is the most common and often recommended setup, especially for beginners. The front motors spin inwards towards the center of the drone, and the rear motors also spin inwards. This means the front-left and rear-right motors spin counter-clockwise (CCW), while the front-right and rear-left motors spin clockwise (CW).
- Pros: Propellers are slightly more protected in a crash as they're pushing air away from the frame. Less grass/debris gets flung onto your camera lens.
- Cons: Slightly less yaw authority in some extreme maneuvers.
-
"Props Out" (Reverse Configuration): In this setup, the front motors spin outwards, and the rear motors also spin outwards. So, the front-left and rear-right motors spin clockwise (CW), while the front-right and rear-left motors spin counter-clockwise (CCW).
- Pros: Can offer slightly better yaw authority. Some argue it provides cleaner air over the flight controller in certain situations, reducing prop wash effects.
- Cons: Propellers are more exposed to impact, potentially leading to more broken props or bent motor shafts in crashes. More debris flung onto the camera.
Betaflight's Expectation: The Betaflight flight controller expects a specific motor order and direction pattern. By default, it's configured for "Props In." If you choose "Props Out," you'll need to explicitly tell Betaflight this in the Configuration tab by enabling "Motor direction is reversed" (for all motors). However, for individual motor direction fixes, we'll use other methods.
Immediate Consequences of Incorrect Rotation
If even one motor spins the wrong way, the consequences are immediate and often dramatic:
- Uncontrolled Flips on Arming: The most common symptom. As soon as you arm and give a tiny bit of throttle, the drone will flip over violently in the direction of the incorrectly spinning motor. This is because the flight controller detects an imbalance in thrust it can't correct.
- Inability to Take Off: If multiple motors are wrong, or if the thrust generated is insufficient due to incorrect propeller orientation, the drone simply won't lift.
- Severe Instability in Flight: Even if it somehow gets airborne, an incorrectly spinning motor will lead to uncontrollable drift, oscillations, and a high likelihood of crashing.
Safety Risk: Always remember that incorrectly spinning motors are a safety hazard. Always remove your propellers before any bench testing or troubleshooting involving powering up your drone.
Diagnosing the Wrong Spin: Your First Steps
Before you start changing settings or desoldering wires, you need to accurately diagnose which motor(s) are spinning incorrectly and what your desired configuration is.
Visual Inspection: Propeller Orientation vs. Motor Spin
This is your crucial first step, even before connecting to Betaflight:
- Remove Propellers: This cannot be stressed enough. ALWAYS REMOVE YOUR PROPELLERS before connecting your drone to a battery or performing any motor tests. A spinning propeller can cause severe injury.
- Determine Your Desired Configuration: Decide whether you're going for "Props In" or "Props Out." For this guide, we'll assume "Props In" as it's the standard.
- Mentally Map Directions:
- Motor 1 (Front Right): Should spin CW (Clockwise)
- Motor 2 (Rear Right): Should spin CCW (Counter-Clockwise)
- Motor 3 (Rear Left): Should spin CW (Clockwise)
- Motor 4 (Front Left): Should spin CCW (Counter-Clockwise) (This is the Betaflight default motor order, starting from the front right and going clockwise around the quad.)
- Examine Propellers: Look at your propellers. The leading edge (the thicker, rounded edge) should always be the one cutting through the air first in the direction of rotation. If you're using "Props In," you'll typically have two CW props and two CCW props. Ensure you know which is which.
Safe Bench Testing with Betaflight Motors Tab
With propellers safely removed, connect your drone to your computer via USB and open Betaflight Configurator.
- Connect to Betaflight: Click the "Connect" button in the top right corner.
- Navigate to Motors Tab: On the left-hand sidebar, click on the "Motors" tab.
- Acknowledge Warning: Betaflight will display a warning about removing propellers. Read it, understand it, and check the box confirming you have removed them.
- Connect Battery (Optional but Recommended for Testing): While motors can sometimes twitch with just USB power, for reliable testing of actual spin, it's best to connect your LiPo battery after you've removed props and are in the Motors tab.
- Test Each Motor Individually:
- Master Slider: Do not use the "Master" slider; this spins all motors simultaneously.
- Individual Sliders: Carefully move the slider for Motor 1 up slightly (e.g., to 1050-1100). Observe its rotation direction.
- Compare to Desired: Does Motor 1 spin CW as it should for "Props In"?
- Repeat: Move the slider back down to 1000. Then repeat for Motor 2, Motor 3, and Motor 4, carefully observing each one.
Practical Tip: Use a small piece of tape or a marker dot on the motor bell to make the direction of spin more obvious.
Pinpointing the Specific Culprit Motor(s)
As you test each motor, note down which ones are spinning incorrectly. For example:
- Motor 1 (Front Right): Should be CW, but is CCW.
- Motor 2 (Rear Right): Should be CCW, and is CCW (correct).
- Motor 3 (Rear Left): Should be CW, but is CCW.
- Motor 4 (Front Left): Should be CCW, and is CW.
This clear identification will guide you to apply the correct fix.
Method 1: Reversing Motor Direction in Betaflight (DShot)
For modern ESCs running DShot protocols (DShot300, DShot600, DShot1200), Betaflight offers a convenient software-based solution to reverse individual motor directions. This is often the easiest and preferred method.
Connecting to Betaflight Configurator
- Connect your Flight Controller: Plug your FPV drone into your computer via a USB cable.
- Open Betaflight Configurator: Launch the Betaflight Configurator application.
- Connect: Click the "Connect" button in the top right corner.
Locating the 'Motor Direction Reversed' Toggle
- Navigate to the Motors Tab: Click on the "Motors" tab in the left-hand sidebar.
- Acknowledge Propeller Warning: Confirm you have removed your propellers by checking the box.
- Identify the Toggles: Below the individual motor sliders, you'll see a section titled "Motor Direction." For each motor (Motor 1, Motor 2, Motor 3, Motor 4), there will be a checkbox labeled "Motor Direction Reversed."
- Important Note: This feature works by sending a specific command over the DShot protocol to your ESC. If your ESCs don't support DShot (e.g., older ones running OneShot or MultiShot), or if they're not configured for DShot, this option might not be available or effective.
- Toggle the Incorrect Motors: For any motor you identified as spinning in the wrong direction during your diagnosis, simply check the "Motor Direction Reversed" box next to its corresponding number.
- Example: If Motor 1 should be CW but is CCW, check the "Motor Direction Reversed" box for Motor 1. This will make it spin CW.
Applying Changes and Verifying Spin
- Save and Reboot: After checking the necessary boxes, click the "Save and Reboot" button in the bottom right corner of the Configurator. Your flight controller will restart.
- Reconnect: Once it reboots, click "Connect" again.
- Re-test Motor Direction: Go back to the "Motors" tab. Connect your LiPo battery (props still off!). Use the individual motor sliders to re-test the rotation direction of each motor, paying special attention to the ones you just changed.
- Verification: Ensure all motors now spin in their correct desired directions (e.g., CW for Motor 1, CCW for Motor 2, etc., for "Props In").
If all motors are now spinning correctly, congratulations! You've fixed the issue. If not, proceed to the next method.
Method 2: Changing Direction with ESC Firmware (BLHeli_S/32, JESC, BlueJay)
When the Betaflight DShot reversal isn't an option, or for more granular control, you'll need to configure the ESCs directly using their respective firmware configurator tools. This method is universal for BLHeli_S, BLHeli_32, JESC, and BlueJay ESCs.
Understanding ESC Firmware Configurator Tools
ESCs (Electronic Speed Controllers) have their own firmware that controls how they drive the motors. Popular firmware options include:
- BLHeli_S: Common on many 4-in-1 and individual ESCs. Configured using BLHeli Configurator (a Chrome app) or BLHeliSuite167 (desktop app).
- BLHeli_32: Newer, more powerful firmware often found on higher-end ESCs. Configured using BLHeliSuite32 (desktop app).
- JESC & BlueJay: Alternative, often open-source firmware for BLHeli_S ESCs, offering features like RPM filtering. Configured using JESC Configurator or BlueJay Configurator (Chrome apps or desktop versions).
These tools allow you to change various ESC parameters, including motor direction, typically through a "passthrough" connection via your flight controller.
Step-by-Step with BLHeliSuite (or similar)
We'll use BLHeliSuite32 as an example, but the steps are very similar for other configurators.
- Remove Propellers: Crucial safety reminder!
- Connect Flight Controller: Plug your FC into your computer via USB.
- Open Betaflight Configurator: Connect to your FC.
- Enable ESC Passthrough: Go to the "CLI" tab in Betaflight. Type
resource listand press Enter to ensure your ESCs are recognized. Then typeblhelipassor similar commands if needed (though modern Betaflight often enables passthrough automatically when you open an ESC configurator). - Launch ESC Configurator: Close Betaflight Configurator. Open the appropriate ESC configurator (e.g., BLHeliSuite32).
- Connect to ESCs:
- In BLHeliSuite32, select your interface (usually "BETAFLIGHT / CLEANFLIGHT (USB)").
- Click "Connect."
- Connect LiPo Battery: The software will prompt you to "Connect battery" to power the ESCs. Do this now.
- Click "Read Setup." The software will connect to each ESC and display its current settings.
Adjusting Individual Motor Direction Settings
- Identify the Motor: In BLHeliSuite, you'll see a list of your ESCs (e.g., "ESC1," "ESC2," etc.). These correspond to your Betaflight motor numbers (ESC1 = Motor 1, ESC2 = Motor 2, etc.).
- Locate 'Motor Direction': For each ESC, look for a parameter called "Motor Direction" or similar.
- The options are typically "Normal," "Reversed," or sometimes "Bidirectional" (which allows both, but you want a fixed direction).
- Change Direction: For any motor that needs its direction reversed, select "Reversed" from the dropdown menu for that specific ESC.
- Example: If Motor 1 needs to spin CW but is spinning CCW, change "Motor Direction" for ESC1 to "Reversed."
- Repeat for all Incorrect Motors: Go through each identified culprit motor and change its corresponding ESC's direction setting.
Flashing Firmware and Testing
- Write Settings: After making all necessary changes, click the "Write Setup" button. This will apply the new settings to your ESCs.
- Disconnect Battery: Once the write process is complete, disconnect your LiPo battery immediately.
- Close ESC Configurator: Close BLHeliSuite32 (or your chosen configurator).
- Re-test in Betaflight: Open Betaflight Configurator, connect your FC, go to the "Motors" tab, connect your LiPo (props still off!), and re-test each motor using the individual sliders to confirm they now spin in the correct direction.
Method 3: The Hardware Fix – Swapping Motor Wires
Sometimes, software solutions aren't available, or you might prefer a physical fix. Swapping motor wires is a tried-and-true method that works for any brushless motor and ESC combination.
When a Wire Swap is Necessary
A physical wire swap is typically used in these scenarios:
- Older ESCs/Firmware: If your ESCs don't support DShot or their firmware doesn't offer a motor direction setting (less common with modern setups, but possible).
- Specific Motor/ESC Combinations: Rarely, some combinations might be finicky with software reversal.
- Failed Software Methods: If you've tried Betaflight and BLHeliSuite without success.
- Personal Preference: Some pilots simply find it more straightforward to swap wires than navigate software.
The Simple 3-Wire Swap Technique
Brushless motors have three phase wires that connect to the ESC. The motor's direction of rotation is determined by the sequence in which these phases are energized. To reverse the direction, you simply need to change the order of any two of these three wires.
- Identify the Wires: Each motor will have three wires (usually black, white, and yellow, or just three of the same color) soldered to three pads on your ESC.
- Choose Two Wires to Swap: Pick any two of the three wires connected to the ESC for the motor that needs its direction reversed. It doesn't matter which two, as long as you swap them.
- Example: If you have wires A, B, and C, you could swap A and B, or B and C, or A and C. All will achieve the same result.
- De-solder: Carefully de-solder the two chosen wires from their pads on the ESC.
- Swap and Re-solder: Solder wire A to where wire B was, and wire B to where wire A was. Ensure clean, strong solder joints.
Visual Aid: Imagine three pads on the ESC: Pad 1, Pad 2, Pad 3. If Motor 1 spins wrong, you can de-solder the wire from Pad 1 and Pad 2. Then, solder the wire that was on Pad 1 to Pad 2, and the wire that was on Pad 2 to Pad 1. The third wire (on Pad 3) remains untouched.
Soldering Best Practices and Precautions
Soldering correctly is crucial for reliability and safety.
- Safety First: ALWAYS DISCONNECT YOUR LIPO BATTERY before performing any soldering work on your drone.
- Tools:
- Soldering Iron: A good quality iron with adjustable temperature (e.g., Hakko FX-888D or TS100) is recommended. Set temperature between 350-400°C (660-750°F).
- Solder: Rosin core, leaded solder (e.g., 60/40 tin/lead) is easier to work with.
- Flux: Liquid or paste flux significantly helps solder flow and creates cleaner joints.
- Solder Wick/Solder Sucker: For removing old solder.
- Third Hand/Helping Hands: Invaluable for holding components steady.
- Ventilation: Work in a well-ventilated area or use a fume extractor.
- Technique:
- Tinning: "Tin" both the wire and the pad with a small amount of solder before joining them.
- Heat Management: Apply heat to both the pad and the wire simultaneously, then feed in solder. The solder should flow smoothly and create a shiny, concave joint. Avoid "cold" (dull, lumpy) joints.
- Avoid Shorts: Be extremely careful not to bridge solder between pads. After soldering, visually inspect for any tiny solder balls or strands that could cause a short. Use a multimeter in continuity mode to check for shorts if unsure.
- Insulation: After soldering, ensure any exposed wire is insulated with heat shrink tubing or electrical tape if necessary, though motor wires usually go directly to pads.
Post-Wiring Test Procedures
- Visual Inspection: Carefully inspect all your solder joints for cleanliness and strength.
- Continuity Check (Optional but Recommended): Use a multimeter to check for any shorts between the motor pads or between motor pads and ground/power.
- Connect to Betaflight: Plug your FC into your computer, open Betaflight Configurator, and navigate to the "Motors" tab.
- Connect LiPo (Props Off!): Connect your LiPo battery (with propellers still removed!).
- Re-test Motor Direction: Use the individual motor sliders to confirm that the motor(s) you worked on, and indeed all motors, are now spinning in the correct direction.
Verifying Your Fix and Essential Pre-Flight Checklist
Once you've applied a fix, thorough verification is critical to ensure a safe and successful maiden flight.
Comprehensive Bench Test Protocol
Before even thinking about props, perform a full bench test:
- Props OFF: This is non-negotiable.
- Connect to Betaflight Configurator: Go to the "Motors" tab.
- Power Up: Connect your LiPo battery.
- Individual Motor Spin Test:
- Test each motor individually using its slider, confirming it spins in the correct direction (CW/CCW) for your chosen layout ("Props In" or "Props Out").
- Listen for any abnormal noises (grinding, scraping).
- Feel the motor bell for smooth rotation and excessive vibration.
- Check for any unusual heat buildup on the motor or ESC after a brief spin.
- Master Slider Test (Briefly): If all individual motors spin correctly, you can briefly use the master slider to spin all motors at a low RPM (e.g., 1100-1200) to ensure they all ramp up smoothly and in unison. Immediately bring the slider back down.
Correct Propeller Installation and Direction
This is where many beginners make a mistake, even if their motors are spinning correctly. Propellers themselves have a direction!
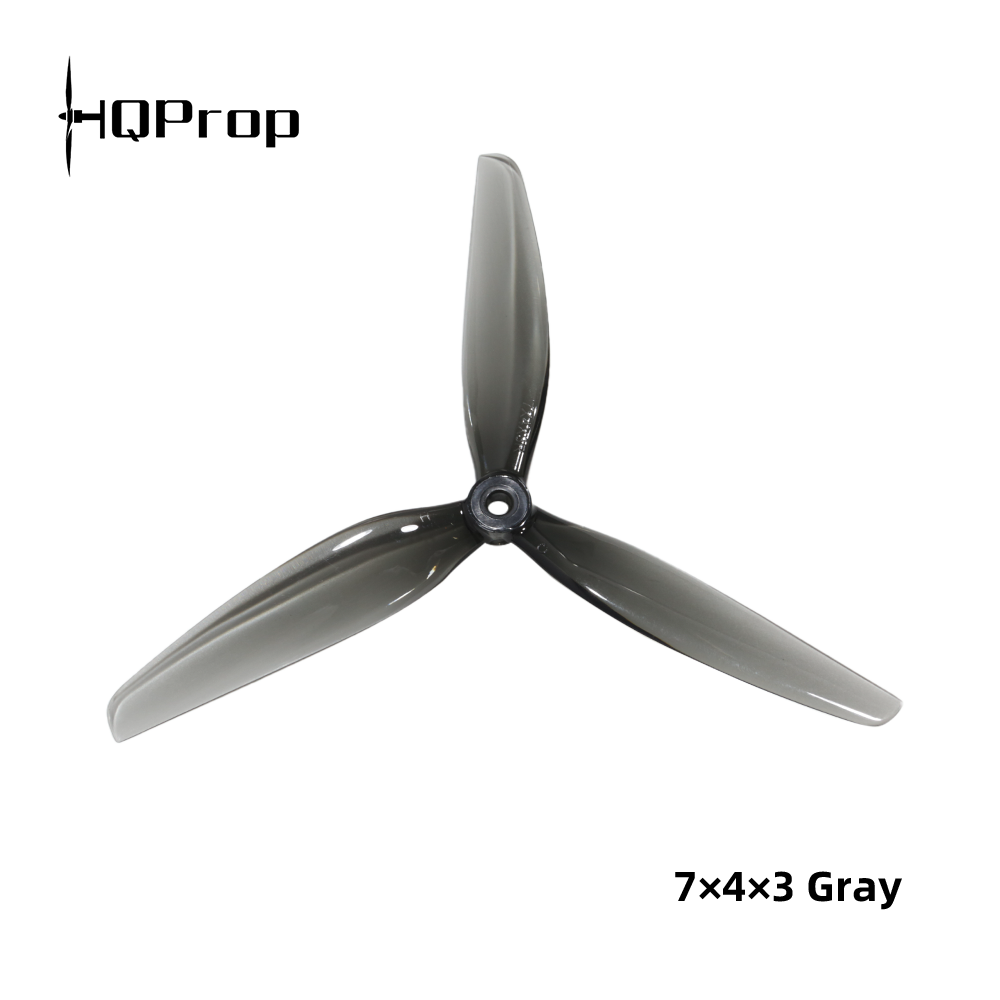
- Identify Propeller Type: Each propeller is marked (usually on the hub) with its diameter and pitch (e.g., "5x4x3" for 5-inch diameter, 4-inch pitch, 3 blades) and its rotation direction (CW or CCW).
- Match Prop to Motor Direction:
- For a CW spinning motor, install a CW propeller.
- For a CCW spinning motor, install a CCW propeller.
- Leading Edge Rule: When installed, the leading edge (the thicker, rounded edge) of the propeller blade should always be the one cutting through the air first as the motor spins. The trailing edge (thinner, sharper) follows. If you install a prop backwards, it will generate very little or negative thrust, leading to a crash.
- Secure Installation: Ensure all prop nuts are tightened securely (but don't overtighten to strip threads). Use prop nuts with nylon inserts for added security.
Arming Safely and First Hover Test
Once you're absolutely confident in your motor and propeller directions:
- Find a Safe Environment: Go to a wide-open, clear area, away from people, animals, and obstacles. A large grassy field is ideal.
- Arming Sequence: Place your drone on a flat, level surface. Perform your arming sequence.
- Gentle Throttle: Slowly and gently increase the throttle.
- Observe: The drone should lift off smoothly and level.
- Be Ready to Disarm: If the drone immediately tries to flip, drifts uncontrollably, or acts strangely, immediately disarm (throttle down and arm switch off). Do not try to fight it.
- Initial Hover: If it lifts off well, hover at a low altitude (e.g., waist height) for a few seconds. Check for stability, responsiveness, and any unusual sounds or vibrations.
- Land Safely: Gently bring it down and disarm.
The Importance of Double-Checking
FPV drones are powerful machines. Rushing through checks can lead to costly crashes or even injury. A few extra minutes of careful verification can save you hours of repair work and a lot of frustration. Double-checking your motor directions, prop orientations, and basic flight behavior is a habit every FPV pilot should cultivate.
Frequently Asked Questions (FAQ)
How do I reverse FPV motor direction in Betaflight?
For DShot-enabled ESCs, connect to Betaflight Configurator, go to the "Motors" tab, and toggle the "Motor Direction Reversed" checkbox for the specific motor that needs its direction changed. Remember to click "Save and Reboot."
What are the steps to change motor direction using BLHeliSuite?
Connect your flight controller to your PC, close Betaflight, open BLHeliSuite (or similar configurator like JESC/BlueJay), connect your LiPo battery, click "Connect" and then "Read Setup." Locate the "Motor Direction" setting for the incorrect ESC, change it to "Reversed," then click "Write Setup." Disconnect the battery and re-test.
Can I fix wrong motor direction by swapping wires?
Yes, absolutely. By swapping any two of the three phase wires that connect a motor to its ESC, you will reverse the motor's direction of rotation. This is a hardware solution often used when software options are not available or preferred. Ensure safe soldering practices.
Why is my FPV motor spinning opposite to the others?
Common reasons include:
- Incorrect Default ESC Setting: The ESC might have been configured with a reversed direction from the factory or a previous build.
- Wiring Mistake: During assembly, the motor wires might have been soldered in a different order than intended for that specific motor's position.
- Betaflight/ESC Config Error: A setting was accidentally toggled or misconfigured in Betaflight or an ESC configurator.
How do I properly test FPV motor direction before flight?
Always remove propellers! Connect your drone to Betaflight Configurator, navigate to the "Motors" tab, and confirm you've removed props. Connect your LiPo battery, then use the individual motor sliders to spin each motor at a low RPM. Observe and confirm each motor spins in its desired direction (CW/CCW) according to your drone's layout.
Conclusion: Fly Straight, Fly Safe
Encountering an FPV motor spinning in the wrong direction can be a frustrating hurdle, but as you've seen, it's a common issue with straightforward solutions. Whether you opt for the convenience of Betaflight's DShot reversal, the detailed control of an ESC configurator like BLHeliSuite, or the hands-on approach of a wire swap, you now possess the knowledge and steps to diagnose and rectify the problem.
Remember the golden rules: always remove propellers for bench testing, understand your desired motor layout ("Props In" or "Props Out"), and thoroughly verify your changes. These diagnostic and verification steps are your best friends in preventing crashes and ensuring a perfectly configured, safe, and enjoyable flight experience.
You've transformed a potential disaster into a valuable learning opportunity. Now that you've mastered motor direction, get out there and fly with confidence! Share your success stories with the fpvlovers.com.tr community, and let the skies be your playground.
Copyright-safe media generated locally by FPVLovers