Betaflight Firmware Tuning: Complete Setup Guide
Step-by-step Betaflight configuration, filter setup, and PID tuning workflow.
Betaflight Firmware Tuning: Complete Setup Guide
Merhaba FPV tutkunları!
The 'Fix My Drone' Betaflight Tuning Guide: Troubleshooting Common Flight Issues
Is your FPV drone feeling sluggish, oscillating wildly, or suffering from dreaded prop wash? You're not alone. A poorly tuned drone can turn an epic flight into a frustrating struggle. But what if you could transform your quad into a buttery-smooth, responsive machine that flies exactly how you want it to? This comprehensive Betaflight tuning guide is your roadmap to fixing common flight issues and unlocking the true potential of your FPV drone.
Understanding Betaflight Tuning: Why It Matters for FPV Flight
What is Betaflight Tuning and Why Do We Do It?
At its core, Betaflight tuning is the art and science of optimizing your drone's flight controller software to achieve the best possible flight performance. Think of it like tuning a high-performance race car; you're adjusting various parameters to ensure stability, responsiveness, and efficiency. For FPV pilots, this translates directly into a more enjoyable and predictable flying experience – whether you're ripping through a race track, performing intricate freestyle maneuvers, or capturing cinematic shots. A well-tuned drone feels locked-in, predictable, and incredibly satisfying to fly.
The Anatomy of a Smooth Flight: PID, Filters, and Rates
To achieve that butter-smooth flight, we primarily focus on three pillars:
- PID Controllers (Proportional-Integral-Derivative): These are the brain of your drone's stability system. They constantly calculate how to adjust motor power to maintain your desired attitude.
- Filters: FPV drones are inherently noisy machines, generating vibrations from motors, props, and the environment. Filters clean up these noisy signals before they reach the PID controller, preventing it from overreacting and causing oscillations.
- Rates: These dictate how your drone responds to your stick inputs. They define the angular velocity (how fast your drone rotates) and the curve of that response, allowing you to personalize the "feel" of your quad.
These three components work in harmony. A well-tuned drone has clean sensor data, a PID controller that reacts precisely, and rates that match your flying style.
Common Flight Issues Solved by Tuning
Many frustrating flight characteristics can be traced back to tuning deficiencies. This guide will help you tackle:
- Prop Wash: A wobbly, unstable feeling, especially after sharp turns or dives, often accompanied by a distinct "fluttering" sound.
- Oscillations/Wobbles: High-frequency jitters or low-frequency wobbles, sometimes visible in the FPV feed or felt through the sticks.
- Jitters: Small, rapid, uncontrolled movements, making the drone feel "nervous."
- Hot Motors: Motors getting excessively hot, even during normal flight, often a sign of too much noise or aggressive D-term settings.
- Sluggish Response: The drone feeling slow to react to stick inputs.
- Drifting: The drone not holding its desired attitude perfectly.
Your Pre-Tuning Checklist: Preparing for Success
Before diving into Betaflight Configurator, a thorough physical and software check is crucial. Trying to tune a mechanically unsound drone is like trying to fix a flat tire by adjusting the radio – it won't work!
Hardware Health Check: Props, Motors, & Frame
- Props: Always start with fresh, undamaged propellers. Even a slightly bent or nicked prop can introduce significant vibrations and make tuning impossible. Keep a spare set handy!
- Motors: Check for any loose motor bells, bent shafts, or rough-spinning bearings. Gently wiggle each motor bell; there should be minimal play. Ensure motor screws are tight.
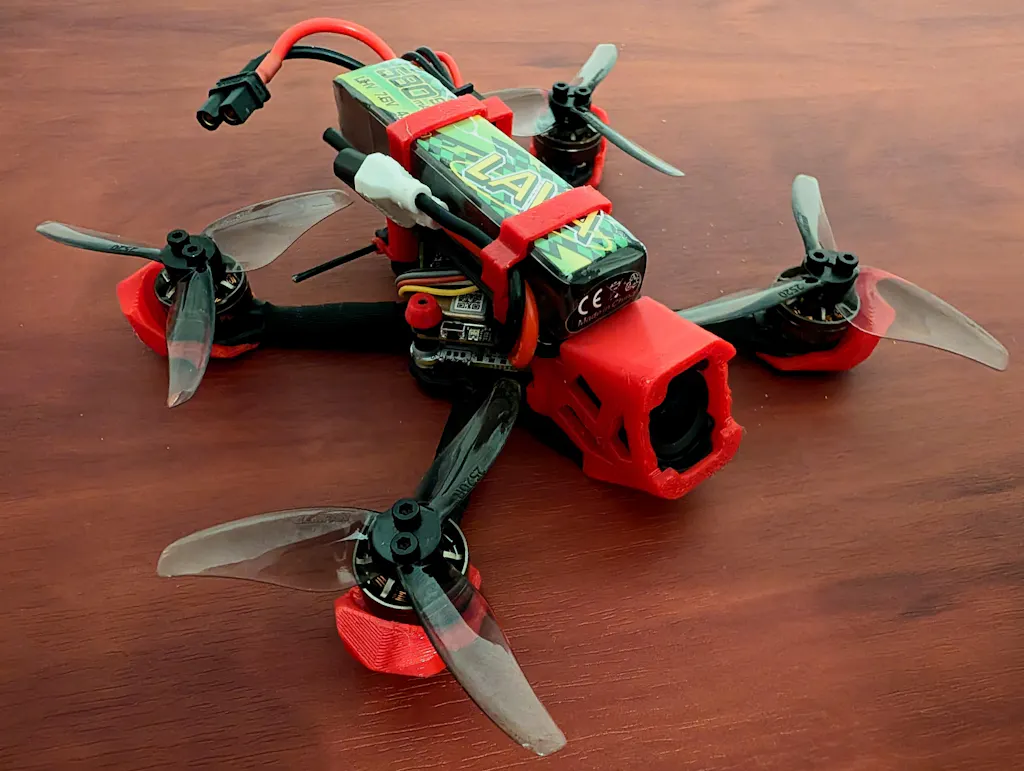
- Frame: Inspect for any cracks, loose standoffs, or screws. A flexible or damaged frame can introduce unwanted vibrations. Ensure your flight controller (FC) is soft-mounted (isolated with rubber grommets or O-rings) to minimize vibrations reaching the gyro.
- Battery Straps: Make sure your battery is securely strapped down. A wobbling battery can also induce oscillations.
Betaflight Firmware & Configurator Setup
- Latest Firmware: Ensure you're running the latest stable version of Betaflight firmware on your flight controller. New versions often include performance improvements and better default tuning.
- Latest Configurator: Download the latest Betaflight Configurator from GitHub.
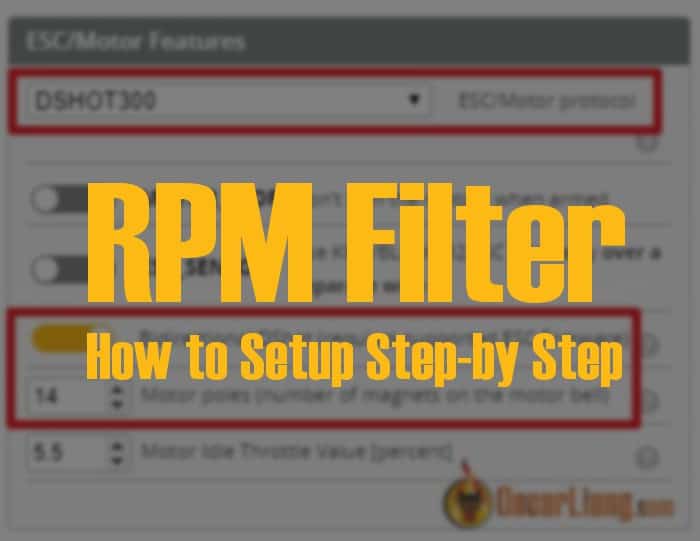
- Basic Settings: Confirm accelerometer calibration is done. Check motor direction (using the Motors tab with props off!) and ensure they match the Betaflight diagram. Set your DShot protocol (DShot300, 600, or 1200 are common; DShot600 is a good starting point for most).
The Indispensable Tool: Blackbox Logging
Blackbox is your window into your drone's soul. It records detailed flight data, showing you exactly what your gyro, motors, and PID controller are doing. Without it, tuning is largely guesswork.
- Enable Blackbox: Go to the "Blackbox" tab in Betaflight Configurator.
- Logging Device: Select your logging device (Dataflash on most F7/H7 boards, or SD Card for boards with an SD slot).
- Logging Rate: For tuning, a logging rate of 1kHz or 2kHz is usually sufficient. Higher rates capture more detail but fill up storage faster.
- Debug Mode: For general tuning, "NONE" is fine. For advanced noise analysis, "GYRO_SCALED" or "PID" can be useful.
- Blackbox Explorer: Download the Blackbox Explorer application – this is what you'll use to analyze your logs.
Diagnosing Flight Issues with Blackbox Analysis
Recording Your First Blackbox Log for Tuning
To get meaningful data, you need to perform specific maneuvers:
- Arm and Hover: A brief stable hover to establish a baseline.
- Gentle Flight: Fly around normally for 30-60 seconds.
- Full Throttle Punch-Outs: Perform 2-3 rapid, full-throttle punch-outs, holding at the top for a second, then dropping. This reveals high-frequency motor noise and P-gain oscillations.
- Fast Turns & Rolls: Execute quick, sharp turns, rolls, and flips. This will highlight prop wash and D-term issues.
- Hard Stops & Direction Changes: Quickly change direction or stop abruptly to stress the PID controller.
- Disarm: Land and disarm.
- Download Log: Connect to Betaflight Configurator, go to the Blackbox tab, and download your log.
Interpreting Blackbox Data: Gyro & D-Term Noise
Open your log in Blackbox Explorer. The most important traces for tuning are usually gyro_raw (or gyro_scaled) and D_term.
- Gyro Noise: Look at the
gyro_rawtraces (roll, pitch, yaw). A clean trace should look relatively smooth. Spikes, consistent high-frequency "fuzziness," or repeating patterns indicate noise. Use the spectrum analyzer (press 's' in Explorer) to identify specific noise frequencies coming from your motors or props. - D-Term Noise: The
D_termtrace should also be relatively clean. Excessive noise on D-term can lead to hot motors and poor flight performance. If D-term is very noisy, it means your filters aren't doing enough.
Spotting Prop Wash & Oscillations in Blackbox
- Prop Wash: This typically appears as low-frequency oscillations (often around 10-30Hz) in the gyro and D-term traces after a sharp maneuver (like a fast turn or dive recovery). The drone struggles to settle back into a stable state. You'll see the traces "wobble" for a moment.
- High-Frequency Oscillations: These look like rapid, consistent, small-amplitude waves on the gyro traces, often most prominent during punch-outs or high-throttle situations. They typically indicate too high P-gain or insufficient filtering.
- Low-Frequency Oscillations/Wobbles: Broader, slower oscillations that make the drone feel loose or unstable. These can also be P-gain related, or sometimes I-gain if the drone drifts then corrects too slowly.
Mastering PID Tuning: Eliminating Prop Wash & Oscillations
Betaflight PID tuning uses P I D terms. P for proportional response, I for steady-state, D for dampening. Tune P first, then D, finally I. Remember to make small, incremental changes and test after each adjustment!
Understanding P, I, and D Terms
- Proportional (P): This term provides immediate correctional force based on the current error (how far off your drone is from the desired attitude). Higher P-gain means a snappier, more responsive drone. Too much P leads to high-frequency oscillations.
- Derivative (D): This term anticipates future error by looking at the rate of change of the error. It acts as a dampener, smoothing out movements and preventing overshoots. D-gain is crucial for combating prop wash. Too much D can lead to hot motors and sluggish response; too little can cause oscillations and prop wash.
- Integral (I): This term corrects for accumulated past error, ensuring the drone holds its desired attitude over time and compensates for external forces (like wind or uneven weight distribution). It's vital for steady-state flight and smooth cornering. Too much I can cause slow, low-frequency oscillations or "wobbles" after sustained maneuvers.
Tuning P-Gain: Responsiveness vs. Oscillations
- Start with defaults: Betaflight's default PID values are a good starting point for most quads.
- Increase P-gain incrementally: In the Betaflight Configurator's PID Tuning tab, increase P-gain (e.g., by 5-10 points) on Roll and Pitch.
- Test flight: Perform punch-outs. If you see high-frequency oscillations (a fast flutter), your P-gain is too high. If the drone feels sluggish, increase P.
- Find the sweet spot: Increase P until you start seeing very slight oscillations, then back it off a few points until they disappear. This is your maximum stable P-gain.
Tuning D-Gain: Dampening & Prop Wash Fix
D-gain is critical for dampening oscillations and eliminating prop wash.
- Address Prop Wash: If you experience prop wash, increase D-gain (e.g., by 5-10 points) on Roll and Pitch.
- Test flight: Perform fast turns, dives, and sudden direction changes. Observe if the prop wash lessens.
- Watch for D-term heat: Too much D-gain can cause motors to run hot, especially the front motors. If your motors are hot to the touch after a flight, your D-gain might be too high or your D-term filters insufficient.
- Balance: Increase D until prop wash is minimized, but stop if motors get hot or the drone feels "sticky" or sluggish. You want the drone to feel locked-in and smooth after maneuvers.
Tuning I-Gain: Holding Attitude & Smooth Corners
I-gain helps your drone hold its attitude and track smoothly through corners.
- Increase I-gain: If your drone drifts, doesn't hold its angle well, or feels "loose" in turns, increase I-gain (e.g., by 5-10 points).
- Test flight: Fly long, sweeping turns and see if the drone tracks smoothly without slipping or requiring constant corrections. Hover and observe if it maintains its attitude without drifting.
- Watch for wobbles: Too much I-gain can cause slow, low-frequency wobbles, especially after long, sustained maneuvers. If you see this, reduce I-gain.
Taming Noise with Betaflight Filters
Filters are your first line of defense against vibrations and noise. They clean the raw gyro data before it even reaches the PID controller, allowing the PIDs to work more efficiently and run higher gains without oscillating.
The Role of Filters: Protecting Your PIDs
Imagine trying to read a book in a noisy factory. That's what your PID controller experiences with unfiltered gyro data. Filters remove the irrelevant "noise" (vibrations) so the PID controller can focus on the real "signal" (your drone's actual movement). This prevents the PID controller from reacting to phantom movements, which would otherwise cause oscillations and make motors run hot.
Dynamic Notch Filters & Gyro Lowpass Filters
- Dynamic Notch Filter (DNF): This is a powerful filter that dynamically identifies and removes specific noise frequencies generated by your motors and props, which can change with RPM. Betaflight's default settings for DNF are often very good. Ensure it's enabled and configured correctly (usually
Dynamic Notch Qaround 500-700,Min Hzaround 100-150,Max Hzaround 500-600 for 5-inch quads). Blackbox's spectrum analyzer is key to verifying its effectiveness. - Gyro Lowpass Filters: These filters remove noise above a certain frequency. Betaflight offers different types (PT1, BiQuad).
- Gyro RPM Filter: Works in conjunction with the DNF, using motor RPM data to precisely filter out motor noise. This is usually the most effective filter. Ensure your ESCs support RPM filtering (BLHeli_32 or BLHeli_S with JESC firmware) and it's enabled in Betaflight.
- Gyro Lowpass 1/2: If RPM filtering isn't enough, you can adjust these. Start with Betaflight's defaults. If Blackbox shows persistent high-frequency noise, you can lower the cutoff frequency (e.g., from 250Hz to 200Hz). Be cautious, as lowering these too much introduces latency, making the drone feel sluggish.
D-Term Filters: Reducing Heat & Improving Flight
D-term is very sensitive to noise, and noisy D-term can quickly lead to hot motors and poor flight characteristics.
- D-Term Lowpass Filters: Similar to gyro lowpass filters, these clean up the D-term signal. Betaflight defaults are usually a good starting point. If your D-term trace in Blackbox is still noisy after cleaning up gyro noise, or your motors are hot, try lowering the D-term filter cutoff frequencies (e.g., from 150Hz to 100Hz). Again, too much filtering introduces latency.
Practical Tip: Always try to get your gyro signal as clean as possible with RPM filtering and Dynamic Notch first. Only then adjust your fixed lowpass filters incrementally. The goal is to filter just enough to clean the signal without introducing excessive latency.
Fine-Tuning for Feel: Rates, Expo & Advanced Settings
Once your drone is stable and free of oscillations, you can personalize its feel.
Personalizing Your Flight: Betaflight Rates Tuning
Rates determine how your drone responds to your stick inputs.
- RC Rate: Controls the overall rotation speed at the center of your stick travel. Higher values mean faster rotation.
- Super Rate: Increases the rotation speed exponentially as you move towards the edge of your stick travel, giving you more precise control around the center and crazy fast flips/rolls at the extremes.
- Expo (Exponential): Softens the stick response around the center, making small movements less sensitive, while still allowing full rotation speed at the stick ends. This is great for smooth cinematic flying or precise freestyle.
Freestyle vs. Racing:
- Freestyle: Many pilots prefer lower RC Rates (e.g., 0.8-1.0) with higher Super Rates (e.g., 0.7-0.8) and some Expo (e.g., 0.1-0.2) for a smooth, predictable feel around the center and fast flips/rolls when needed.
- Racing: Racers often prefer higher RC Rates (e.g., 1.0-1.2) with less or no Expo for a very linear, direct response to inputs, allowing for precise line control.
Experiment with these settings in the Betaflight Configurator's "Rates" tab. You can adjust them independently for Roll, Pitch, and Yaw.
Feedforward and Anti-Gravity: Advanced PID Enhancements
- Feedforward: This setting directly adds stick input to the motor commands, bypassing the PID loop. It makes the drone feel snappier and more directly connected to your sticks, reducing perceived latency. Start with default values and increase incrementally if you want a more "locked-in" feel.
- Anti-Gravity: This feature helps maintain a consistent feel during rapid throttle changes. When you quickly increase throttle, Anti-Gravity temporarily increases I-gain to prevent the drone from "sinking" or losing its desired angle. It's excellent for maintaining stability during aggressive throttle management. Enable it and keep the default value unless you notice issues.
CLI Commands for Quick Adjustments & Presets
The Command Line Interface (CLI) offers powerful control over Betaflight settings.
dump: Shows all your current Betaflight settings.diff all: Shows only the settings that differ from the default Betaflight settings – incredibly useful for sharing or backing up your tune.set <variable> = <value>: Allows you to change individual settings quickly. E.g.,set p_gain = 45.save: Saves your CLI changes.defaults: Resets all settings to Betaflight defaults (use with caution!).
You can also copy and paste entire tuning presets from other pilots or your own saved configurations using the CLI.
Frequently Asked Questions About Betaflight Tuning
How do I start tuning my FPV drone in Betaflight if I'm a beginner?
Start with stock Betaflight settings. Ensure your hardware is sound (no bent props, loose motors). Enable Blackbox logging from day one. Fly your drone and focus on identifying major issues like clear oscillations or severe prop wash. Then, make small, incremental changes to PIDs or filters based on Blackbox analysis. Don't try to change everything at once! Patience and systematic testing are key.
What are the best Betaflight PID settings for freestyle vs. racing?
There are no 'best' universal settings because every drone, pilot, and flying style is unique. For freestyle, pilots often prefer slightly lower D-gain for a smoother, less aggressive feel and higher I-gain to help hold lines and smooth out transitions. For racing, higher P-gain might be favored for maximum responsiveness and quick corrections, with D-gain carefully tuned for aggressive cornering and rapid direction changes. Always tune to your specific drone's characteristics and your personal flying style.
How do I use Blackbox for Betaflight tuning effectively?
Record flights with specific maneuvers: full throttle punch-outs (for P-gain and high-frequency noise), fast turns and dives (for D-gain and prop wash). Analyze gyro_raw and D_term traces in Blackbox Explorer for noise and oscillations. Use the spectrum analyzer to pinpoint noise frequencies for filter adjustments. Look for repeating patterns or specific signatures (like the low-frequency wobble of prop wash) to guide your PID and filter changes.
How do I eliminate prop wash or oscillations with Betaflight tuning?
Prop wash is often addressed by increasing D-gain on Roll and Pitch, or by ensuring your D-term filters are adequately cleaning the signal. Sometimes, slightly reducing I-gain can also help if the drone is over-correcting. Oscillations usually indicate too high P-gain or insufficient filtering. Use Blackbox to pinpoint the frequency of the oscillation. High-frequency jitters during punch-outs often mean P-gain is too high or gyro filters aren't cutting enough noise. Slower wobbles after maneuvers might point to I-gain issues. Adjust P/D gains and filters (especially Dynamic Notch and Gyro RPM filter) accordingly.
What are the essential Betaflight filters and how do I set them?
The essential Betaflight filters are the Dynamic Notch Filter (for targeting specific, shifting motor/prop noise) and Gyro Lowpass Filters (for overall noise reduction). The Gyro RPM Filter, if your ESCs support it, is incredibly powerful. D-term filters are also crucial for reducing D-term noise and preventing motor heating. Start with Betaflight's robust defaults. Use Blackbox analysis to identify residual noise frequencies. If necessary, incrementally lower the cutoff frequencies of your lowpass filters, but be mindful of introducing latency. The goal is to clean signals effectively without making the drone feel sluggish.
Achieve Butter-Smooth FPV Flights with Expert Betaflight Tuning
Congratulations, FPV pilot! You've just armed yourself with the knowledge to transform your drone from a frustrating struggle into a buttery-smooth, responsive extension of your will. Betaflight tuning is a journey, not a destination. It requires patience, systematic testing, and a willingness to learn from your Blackbox logs. But the reward – a drone that flies exactly how you want it to – is immeasurable.
Ready to take your FPV flying to the next level? Grab your drone, connect to Betaflight, and start applying these tuning principles today. Share your tuning journey and 'before & after' flight videos in the comments below, or join our community forum for personalized advice! Happy flying!
Copyright-safe media generated locally by FPVLovers