ExpressLRS Binding and Flashing Guide: Step-by-Step for EdgeTX & Betaflight
A step-by-step tutorial explaining how to configure ExpressLRS (ELRS) on FPV drones, compile firmware via ELRS Configurator, flash receivers via Wi-Fi/Passthrough, and bind using a binding phrase.
ExpressLRS Binding and Flashing Guide: Step-by-Step for EdgeTX & Betaflight
The 'No-Fail' ExpressLRS Binding Guide: Step-by-Step for Every Method
Welcome, FPV pilots! If you're diving into the world of ExpressLRS, you're on the path to experiencing one of the most revolutionary radio control links in FPV history. With its incredible range, low latency, and robust signal, ExpressLRS (ELRS) has quickly become the gold standard for many pilots, from freestyle enthusiasts to long-range explorers. But like any powerful technology, getting started can sometimes feel a bit daunting, especially when it comes to the crucial step of binding your receiver to your transmitter.
Unlock Your FPV Potential with ExpressLRS
Gone are the days of worrying about signal loss just a few hundred meters out. ExpressLRS, an open-source RC link, leverages LoRa technology to deliver unparalleled performance. Whether you're ripping through a tight gap with a tinywhoop or cruising miles away with a 7-inch long-range beast, ELRS provides the confidence you need for a truly immersive flight experience. Brands like Happymodel, Radiomaster, BetaFPV, and Jumper have embraced ELRS, offering a wide array of excellent TX modules and receivers.
What This Comprehensive Guide Will Cover
This guide is designed to be your ultimate resource for ExpressLRS binding. We'll walk you through every popular binding method – from the recommended bind phrase approach to convenient WiFi binding and the traditional button method. More importantly, we'll equip you with a comprehensive troubleshooting checklist to tackle common issues, ensuring you spend less time scratching your head and more time in the air. By the end of this article, you'll be binding your ELRS receivers with confidence and expertise.
Understanding ExpressLRS Binding Fundamentals
Before we dive into the "how-to," let's clarify some core concepts that are essential for a smooth ExpressLRS binding experience.
Transmitter (TX) vs. Receiver (RX): The Communication Duo
At the heart of your FPV setup are two key components:
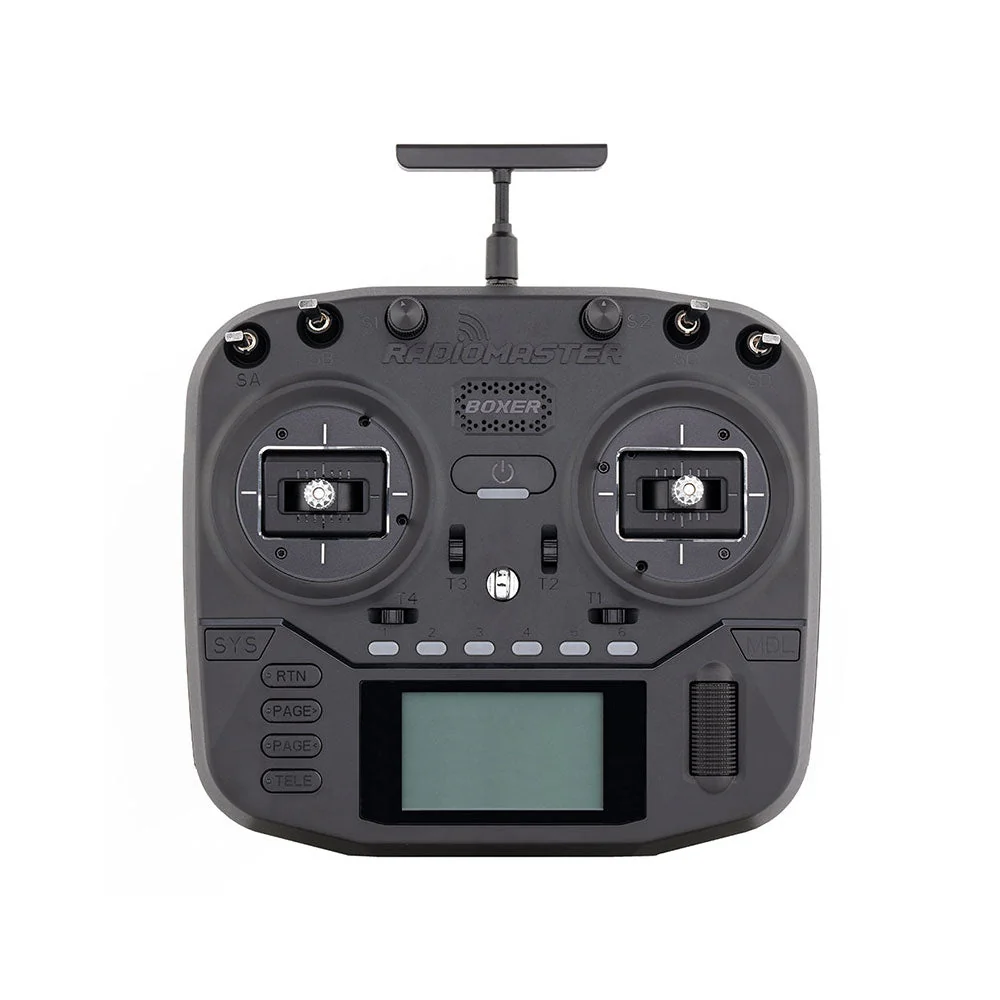
- Transmitter (TX) Module: This is the part of your radio that sends the control signals. Examples include external modules like the Radiomaster Ranger Micro, Happymodel ES24TX, or internal modules found in radios like the Radiomaster Zorro ELRS or Jumper T-Pro ELRS.
- Receiver (RX): This tiny module lives on your drone and receives the signals from your TX, relaying them to the flight controller. Popular receivers include the Happymodel EP1/EP2, BetaFPV ELRS Lite, and SuperD ELRS Nano.
For them to communicate, they need to be "bound" – essentially, paired to each other using a unique identifier.
The Power of the Bind Phrase: Your Unique Connection Key
The bind phrase is ExpressLRS's most powerful and recommended binding mechanism. Think of it as a password for your radio link. It's a unique string of 16 random characters (or more) that you generate.
- TX and RX must share the exact same bind phrase.
- Once set, your TX will only connect to RXs flashed with that specific bind phrase. This means you can flash multiple receivers with the same phrase, and they will all automatically connect to your TX without needing to re-bind each time. This is incredibly convenient for managing multiple quads!
- It eliminates the need to physically press a bind button on the receiver for subsequent connections, making field swaps a breeze.
Why Firmware Consistency is Absolutely Crucial
ExpressLRS is a rapidly evolving open-source project. New features, bug fixes, and performance improvements are constantly being released. For a successful bind and stable link, your TX module and RX must be running compatible firmware versions.
- It's highly recommended to always update both your TX and all your RXs to the latest stable release of ExpressLRS firmware.
- Mixing older and newer versions can lead to binding failures, intermittent connections, or unexpected behavior. The ExpressLRS developers work hard to maintain backward compatibility where possible, but staying current is always the safest bet.
Pre-Binding Checklist: Setting Up for Success
A little preparation goes a long way. Before you attempt to bind, ensure you've covered these essential steps.
Updating ExpressLRS Firmware (TX & RX) to the Latest Version
This is the most critical step. Using the ExpressLRS Configurator is the easiest and most reliable way to manage your firmware.
- Download and Install: Get the latest ExpressLRS Configurator from the official GitHub page.
- TX Module Firmware:
- Connect your TX module (e.g., Radiomaster Ranger, Happymodel ES24TX) to your computer via USB, or if it's an internal module (like in a Radiomaster Zorro), connect your radio.
- Open the Configurator.
- Select your Device Category (e.g., "Radiomaster 2.4Ghz").
- Select your Device (e.g., "Zorro ELRS 2.4Ghz" or "Ranger Micro 2.4Ghz").
- Choose the Target (usually default).
- Select the Latest Stable Release.
- Crucially, generate or enter your Bind Phrase here. Make it unique, and WRITE IT DOWN! You'll need it for your receivers.
- Select your Flashing Method (e.g., "UART" for internal modules, "USB" for external modules).
- Click "Build & Flash."
- RX Firmware:
- For receivers, you'll typically flash them via WiFi. Power up your receiver (e.g., by plugging in your drone's battery). After about 60 seconds, it should emit a WiFi hotspot (SSID: "ExpressLRS RX").
- Connect your computer/phone to this WiFi network.
- In the ExpressLRS Configurator, select your Device Category (e.g., "Happymodel 2.4Ghz").
- Select your Device (e.g., "EP1/EP2 2.4Ghz").
- Choose the Target and Latest Stable Release.
- Enter the exact same Bind Phrase you used for your TX module.
- Select "WiFi" as the flashing method.
- Click "Build & Flash." The Configurator will generate the firmware file, and you'll then upload it via the receiver's web interface (which you access by navigating to
10.0.0.1in your browser while connected to the RX's WiFi).
Pro Tip: Always make sure the "Regulatory Domain" or "Region" settings in the Configurator match for both your TX and RX (e.g., "ISM 2G4" for 2.4GHz in most regions).
Initial Betaflight Configuration for ExpressLRS Receivers
Once your receiver is physically connected to your flight controller, you need to tell Betaflight how to communicate with it.
- Connect to Betaflight Configurator: Plug your flight controller into your computer via USB.
- Ports Tab: Navigate to the "Ports" tab.
- Identify the UART your ELRS receiver is connected to (e.g., UART2, UART3).
- For that UART, enable "Serial RX" under the "Serial RX" column.
- Click "Save and Reboot."
- Configuration Tab: Go to the "Configuration" tab.
- Under "Receiver," select "Serial-based receiver" for "Receiver Mode."
- For "Serial Receiver Provider," choose "CRSF."
- Click "Save and Reboot."
Ensuring Proper Power to Your Receiver
A common reason for binding failures is insufficient or intermittent power to the receiver.
- Always power your receiver from a stable 5V source on your flight controller. Most modern flight controllers have dedicated 5V pads for receivers.
- Avoid powering directly from a 3.3V source unless your specific receiver explicitly states it requires 3.3V (most 2.4GHz ELRS receivers are 5V tolerant).
- When flashing via WiFi, ensure your drone's battery is connected to provide continuous power to the receiver. A USB connection to the flight controller might not always supply enough power for WiFi mode on the RX.
Method 1: Binding with the ExpressLRS Bind Phrase (The Recommended Way)
This is the most reliable and convenient method once set up. It leverages the power of the unique bind phrase you defined during firmware flashing.
Setting Your Bind Phrase on the TX Module via Lua Script
Once your TX module is flashed with your chosen bind phrase, you need to ensure the module itself is configured to use it.
- Access the ELRS Lua Script: On your radio (e.g., Radiomaster Zorro, TX16S), navigate to the "TOOLS" menu. You should see "ELRS" or "ExpressLRS" as an option. Select it.
- Verify Bind Phrase: Inside the Lua script, scroll down to find the "Bind Phrase" field. It should display the phrase you flashed onto your TX module. If it's empty or incorrect, you can enter it here.
- Bind: With the correct bind phrase entered, select the "Bind" option within the Lua script. Your TX module will now enter bind mode, actively looking for a receiver with the matching phrase.
Pro Tip: The Lua script offers many other useful settings like packet rate, telemetry ratio, and dynamic power. Familiarize yourself with it!
Flashing Your Receiver with the Exact Same Bind Phrase
As covered in the "Pre-Binding Checklist," this is crucial.
- Power your receiver (e.g., by plugging in your drone's battery).
- After about 60 seconds, the receiver should enter WiFi mode (often indicated by a slow, double-blink LED pattern).
- Connect your computer to the "ExpressLRS RX" WiFi network.
- Open the ExpressLRS Configurator, select your RX device, and enter the exact same 16-character bind phrase you used for your TX.
- Select "WiFi" as the flashing method, "Build," and then upload the generated
.binfile via the RX's web interface (at10.0.0.1). - Once flashing is complete, the receiver will reboot. If your TX is already in bind mode (from the Lua script), your receiver should connect automatically.
Verifying a Successful Bind and Receiver Status
- Receiver LED: A solid LED on your ExpressLRS receiver indicates a successful bind and a stable connection to your transmitter. A slow blink usually means no connection, and a fast blink often indicates bind mode.
- Betaflight Receiver Tab: Connect your flight controller to Betaflight Configurator. Go to the "Receiver" tab. If bound, you should see your stick inputs (roll, pitch, yaw, throttle) moving the corresponding bars. This confirms not only a bind but also proper communication between the RX and FC.
Method 2: WiFi Binding (Convenient for Updates and Initial Setup)
WiFi binding is fantastic for quickly updating receiver firmware or setting the bind phrase without needing to connect wires to a PC.
Accessing Your Receiver's WiFi Hotspot
- Power Cycle 3 Times: To force most ELRS receivers into WiFi mode, quickly power cycle your drone (plug in the battery, unplug, plug in, unplug, plug in and leave on) three times. The receiver's LED should start a slow, double-blink pattern, indicating it's broadcasting its WiFi hotspot.
- Connect to WiFi: On your computer or smartphone, search for WiFi networks. You should see one named "ExpressLRS RX". Connect to it. The password is
expresslrs. - Access Web Interface: Open your web browser and navigate to
http://10.0.0.1. This will bring up the ExpressLRS web interface for your receiver.
Configuring the Bind Phrase and Settings via Web Interface
- Settings Page: On the web interface, you'll see options to configure your receiver.
- Bind Phrase: Locate the "Bind Phrase" field. Enter the exact same bind phrase you used for your TX module.
- Save & Reboot: Click "Save" or "Apply Settings," then "Reboot." The receiver will restart with the new bind phrase.
Initiating the Bind Process from Your Transmitter
Once your receiver has rebooted with the correct bind phrase:
- On your radio, open the ELRS Lua script (TOOLS > ELRS).
- Select "Bind."
- Your transmitter will now enter bind mode. Because the receiver has the matching bind phrase, it should automatically connect to your TX, and its LED will turn solid.
Method 3: Button Binding (The Traditional Fallback)
While the bind phrase method is superior, sometimes you might have an older receiver, or you just prefer the traditional button approach. This method requires both the TX and RX to be in bind mode simultaneously.
Entering Bind Mode on Your Receiver Using the Bind Button
- Locate Bind Button: Find the tiny bind button on your ExpressLRS receiver (e.g., on a Happymodel EP2, it's a small black button).
- Power Cycle with Button Press: Power on your drone while holding down the bind button on the receiver.
- Release Button: Once the receiver's LED starts blinking rapidly, release the button. This indicates the receiver is in bind mode.
Initiating Bind Mode on Your ExpressLRS Transmitter
- Access Lua Script: On your radio, navigate to the ELRS Lua script (TOOLS > ELRS).
- Bind Option: Select the "Bind" option within the Lua script. Your TX module will now enter bind mode, typically indicated by a flashing LED on the module itself.
Confirming the Connection and LED Indicators
- With both the TX and RX in bind mode, they should quickly find each other.
- The receiver's LED will change from a rapid blink to a solid light, indicating a successful bind.
- The TX module's LED will also likely stop flashing and become solid or return to its normal operating state.
- Always verify in Betaflight's "Receiver" tab that stick inputs are registered.
Troubleshooting: When Your ExpressLRS Receiver Won't Bind
It happens to the best of us! If your ELRS receiver isn't binding, don't panic. Here's a systematic approach to diagnose and fix the problem.
Firmware Mismatch: The #1 Culprit and How to Fix It
- Symptom: Receiver blinks slowly, TX says "No Telemetry" or "Disconnected."
- Solution: This is almost always the issue. Ensure both your TX module and RX are running the exact same stable version of ExpressLRS firmware. Use the ExpressLRS Configurator to flash both, making sure to select the "Latest Stable Release" for both. Remember, even minor version differences (e.g., 3.3.0 vs 3.3.1) can cause issues.
Power and Wiring Issues: Double-Checking Your Connections
- Symptom: Receiver LED is off, or only briefly flashes upon power-up.
- Solution:
- 5V Power: Confirm your receiver is correctly wired to a stable 5V pad on your flight controller. Use a multimeter to verify 5V is present.
- Ground: Ensure the ground wire is securely connected.
- Soldering: Check all solder joints for cold joints, bridges, or breaks. Re-solder if necessary.
- Damaged Receiver: In rare cases, the receiver itself might be faulty. Try a known good receiver if you have one.
Common Betaflight Misconfigurations and UART Setup
- Symptom: Receiver LED is solid (bound), but no stick inputs in Betaflight "Receiver" tab.
- Solution:
- Ports Tab: Re-check the "Ports" tab in Betaflight. Is "Serial RX" enabled on the correct UART that your receiver is wired to? (e.g., RX wire from ELRS to TX pad on FC, and TX wire from ELRS to RX pad on FC – though typically only RX is needed from ELRS to FC TX).
- Configuration Tab: Is "Serial-based receiver" selected, and "CRSF" chosen as the "Serial Receiver Provider"?
- UART Inversion: For some older F3/F4 flight controllers, you might need to use
set serialrx_inverted = ONin the CLI for the specific UART. However, this is rare with modern ELRS and F4/F7/H7 FCs. - Resource Remapping: In very custom builds, a UART might be remapped. Check your FC's wiring diagram and Betaflight's "Resources" tab.
Interference and Range Checks for a Stable Link
- Symptom: Intermittent connection, "Telemetry Lost/Recovered" messages.
- Solution:
- Antenna Placement: Ensure your receiver antenna is correctly positioned, away from carbon fiber, VTX, and motors. A "V" or "L" shape for diversity antennas is ideal.
- Antenna Type: Use the correct antenna for your frequency (2.4GHz for 2.4GHz ELRS).
- Proximity: Avoid binding with your TX module directly next to your receiver; give it some distance (1-2 meters).
- Power Output: Ensure your TX module's power output is not set too low (e.g., 10mW). Increase it to 100mW or 250mW for binding and initial testing.
- Environment: Try binding in an open area away from other strong WiFi signals or electronic interference.
Advanced Tips for a Rock-Solid ExpressLRS Link
Once you're comfortably binding, here are some tips to optimize your ELRS experience.
Understanding Packet Rates and Telemetry Options
- Packet Rate: This determines how often your TX sends control updates to your RX. Higher rates (e.g., 500Hz, 1000Hz) offer lower latency, ideal for racing and freestyle. Lower rates (e.g., 50Hz, 100Hz) provide maximum range and penetration, great for long-range. Adjust this in the ELRS Lua script.
- Telemetry Ratio: This dictates how often the receiver sends data (like battery voltage, RSSI) back to your TX. Higher ratios (e.g., 1:2, 1:4) mean more frequent telemetry but can slightly reduce control range. Lower ratios (e.g., 1:32, 1:64) save bandwidth for control, sacrificing some telemetry updates.
Optimizing Antenna Placement for Maximum Range
- Orientation: For diversity receivers with two antennas, try to orient them at 90 degrees to each other (e.g., one vertical, one horizontal) to maximize signal reception regardless of your drone's orientation.
- Clear Line of Sight: Keep antennas away from carbon fiber frames, which can block RF signals. Mount them on plastic standoffs or use antenna tubes.
- Avoid VTX: Keep receiver antennas as far away as possible from your Video Transmitter (VTX) and its antenna to minimize interference.
Exploring ExpressLRS Lua Script Advanced Settings
The ELRS Lua script on your radio is a powerful tool. Beyond binding and basic settings, you can:
- Change Dynamic Power Settings: Automatically adjust TX power based on signal quality.
- Configure Failsafe: Set specific outputs for your channels in case of signal loss.
- View Telemetry Data: Monitor RSSI (Received Signal Strength Indicator), LQ (Link Quality), and other vital stats directly on your radio screen.
- Adjust FAN Thresholds: For modules with fans, control when they activate.
Frequently Asked Questions (FAQ)
Do I need to update firmware every time I bind?
No, not if your TX and RX are already on compatible firmware versions and share the same bind phrase. You only need to update when a new stable version is released or if you encounter binding issues due to a suspected firmware mismatch.
Can I use the same bind phrase for multiple quads?
Absolutely, and it's highly recommended! Once your TX and multiple RXs are flashed with the exact same bind phrase, any of those receivers will automatically connect to your TX without needing to re-bind. This is one of ELRS's best features for multi-quad pilots.
My receiver LED is blinking slowly, what does it mean?
A slow blink (often a single blink every second or two) typically means your receiver is powered on but is not connected to your transmitter. It could be looking for a connection, or in some cases, indicating it's ready for WiFi mode (especially a double slow blink).
What if I forget my ExpressLRS bind phrase?
If you forget your bind phrase, you'll need to re-flash both your TX module and all your receivers with a new bind phrase using the ExpressLRS Configurator. This is why it's crucial to write down your bind phrase in a safe place!
How do I know if my receiver is successfully bound?
The most definitive signs are:
- Solid LED on your ExpressLRS receiver.
- Stick inputs visible and responding in the "Receiver" tab of Betaflight Configurator.
- No "Telemetry Lost/Recovered" messages on your radio.
Conclusion: Fly with Confidence and a Perfect Connection
Congratulations! You've navigated the ins and outs of ExpressLRS binding. By understanding the fundamentals, diligently following the pre-binding checklist, and mastering each binding method, you're now equipped to establish a rock-solid connection every time.
Recap of Your Binding Journey
We've covered everything from the critical role of the bind phrase and firmware consistency to step-by-step instructions for bind phrase, WiFi, and button binding. You're also armed with a comprehensive troubleshooting guide to tackle any snags along the way. Remember, the ExpressLRS community is vast and supportive, so don't hesitate to seek help if you encounter unique issues.
Your Next FPV Adventure Awaits: Get Out and Fly!
With your ExpressLRS system perfectly bound, you're ready to unlock the full potential of your FPV drone. Experience the incredible range, low latency, and robust link that ELRS offers. Go out there, fly further, fly faster, and fly with the ultimate confidence that your connection is secure. Happy flying, pilot!
Copyright-safe raster media generated locally by FPVLovers