GPS Rescue Mode Setup in Betaflight: Never Lose a Drone to a Failsafe
A step-by-step configuration tutorial detailing how to wire a GPS module, enable UBLOX/NMEA protocols in Betaflight, configure GPS ports, set up GPS Rescue failsafe, and test the return-to-home behavior.
The Ultimate Betaflight GPS Rescue Blueprint: Your Drone's Guardian Angel
Imagine soaring through the skies, pushing the limits of your FPV drone, when suddenly, you lose video signal or control. Panic sets in. Is your prized quad gone forever? Not if you've armed it with the ultimate safety net: Betaflight GPS Rescue Mode. This isn't just a feature; it's a game-changer, offering a lifeline that can guide your drone safely back home when all else fails. Whether you're a long-range explorer, a freestyle enthusiast pushing boundaries, or simply want peace of mind, mastering GPS Rescue is non-negotiable.
This comprehensive guide will walk you through every step, from selecting the perfect GPS module to advanced configuration, critical troubleshooting, and real-world testing strategies, ensuring your FPV drone always finds its way back to you. We'll cover everything you need to know about Betaflight GPS setup, FPV GPS module configuration, and even Betaflight GPS rescue troubleshooting to make your drone return home reliably.
The Lifeline for Your FPV Drone: Understanding Betaflight GPS Rescue
What is GPS Rescue Mode and Why is it Essential?
Betaflight GPS Rescue Mode is an intelligent failsafe procedure designed to bring your FPV drone back to its launch point in the event of signal loss. Unlike a basic failsafe that might simply cut motors or gently land, GPS Rescue actively navigates your drone home using satellite positioning data. It's an absolutely essential feature for anyone flying beyond visual line of sight (BVLOS), in challenging environments, or simply wanting to protect their investment. Think of it as an "intelligent Return to Home FPV drone" system, dramatically reducing the chances of losing your quad.
How Betaflight GPS Rescue Works: A Technical Overview
When enabled and configured correctly, GPS Rescue operates on a few core principles:
- Home Point Acquisition: Upon arming, once a sufficient number of satellites are acquired, your drone records its current GPS coordinates as the "home point."
- Failsafe Trigger: If your radio signal is lost (or another failsafe condition is met), Betaflight detects this and initiates the GPS Rescue sequence.
- Altitude Climb: The drone first ascends to a pre-defined "rescue altitude" to clear any potential obstacles.
- Return Flight: It then flies directly towards the recorded home point, maintaining the set altitude and speed.
- Descent & Disarm: Once it reaches a certain proximity to the home point (or a pre-set distance from it), it begins a controlled descent, lands, and disarms its motors.
This entire process is managed by the Betaflight flight controller, using data from your GPS module.
GPS Rescue vs. Traditional Failsafe: Key Differences
Understanding the distinction is crucial:
- Traditional Failsafe: This is a basic safety measure. Upon signal loss, it might cut motors (drop out of the sky), attempt a gentle landing (if configured), or just disarm. It does not involve any navigation or active return. The drone stays where it loses signal or descends without guidance.
- GPS Rescue: This is an advanced failsafe. It leverages GPS data to actively pilot the drone back to a known safe location. It's about intelligent recovery, not just reacting to signal loss. This makes Betaflight RTH vs GPS rescue a bit of a misnomer, as GPS Rescue is Betaflight's robust RTH implementation.

Choosing Your Guardian Angel: Selecting the Right GPS Module
The heart of your GPS Rescue system is the GPS module itself. A good module ensures fast satellite fixes and reliable positioning.
Essential Features: Protocols, Sensitivity, and Size
When selecting a GPS module, consider these factors:
- Protocol: Most FPV flight controllers running Betaflight use the UBLOX protocol. Ensure your chosen module supports this.
- Sensitivity & Performance: Look for modules with high sensitivity and multi-constellation support (GPS, GLONASS, Galileo, BeiDou). Newer generation chipsets like UBLOX M10 are significantly better than older M8N chips, offering faster fixes, more satellites, and improved accuracy.
- Update Rate: A 5Hz or 10Hz update rate is standard and sufficient for FPV.
- Size & Weight: FPV drones are sensitive to weight. Choose the smallest, lightest module that still offers good performance. For micro drones, every gram counts. For 5-inch quads and larger, you have a bit more flexibility.
- Compass (Magnetometer): While some GPS modules include a compass, it's generally not recommended to use them with Betaflight FPV setups due to severe interference from ESCs, motors, and VTXs, which often leads to erratic behavior. Betaflight GPS Rescue relies solely on GPS for navigation, not a compass for yaw.
Top Recommended GPS Modules for FPV (UBLOX Focus)
For the best performance, especially with UBLOX GPS Betaflight setup, consider these popular options:
- HGLRC M100 MINI / M80PRO: Excellent performance, compact size, often includes a capacitor for clean power. The M100 uses the latest UBLOX M10 chip.
- GEPRC GEP-M10Q / GEP-M8Q: Another highly regarded series known for quick fixes and reliability. The GEP-M10Q is the newer, superior choice.
- Radiolink M10 Series: Good value and reliable performance, also featuring the UBLOX M10 chip.
Always opt for an M10 series module if possible, as they offer significant improvements over the older M8N generation.
Understanding GPS Module Compatibility and Limitations
- Flight Controller (FC) Compatibility: Your FC needs at least one free UART (Universal Asynchronous Receiver/Transmitter) port to connect the GPS module. Most modern F4, F7, and even some F3 flight controllers will have multiple UARTs.
- Voltage: Most GPS modules operate on 5V. Ensure your FC can provide a clean 5V supply.
- Antenna: The ceramic patch antenna on the module needs a clear line of sight to the sky for optimal satellite reception.
- Limitations: GPS performance can be degraded by dense tree cover, tall buildings (urban canyons), heavy cloud cover, or strong electromagnetic interference. GPS Rescue is a powerful tool, but it's not magic and relies on a good satellite signal.
Hardware Installation: Wiring Your GPS Module for Success
Proper installation is paramount for reliable GPS performance.
Optimal Mounting Locations for Signal Integrity
The placement of your GPS module is critical to minimize interference and maximize signal reception:
- Clear Line of Sight: Mount the GPS module with its ceramic patch antenna facing upwards, completely unobstructed by carbon fiber, batteries, or other electronics.
- Away from Noise Sources: Position it as far as possible from noise-generating components like ESCs, motors, VTXs, and RX antennas. The rear of the top plate, or on a dedicated mast, are common and effective locations.
- Carbon Fiber Shielding: Carbon fiber can block GPS signals. If mounting on a carbon plate, ensure the antenna is elevated or extends beyond the plate.
- Consider a Mast: For maximum signal integrity, mounting your GPS on a short mast can elevate it above potential interference.
Step-by-Step Wiring to Your Flight Controller (UART, 5V, GND)
Connecting your GPS module is straightforward:
- Identify UART: Choose a free UART port on your flight controller. Common choices are UART2 or UART3.
- GPS TX to FC RX: Connect the
TXpin of your GPS module to theRXpin of the chosen UART on your FC. - GPS RX to FC TX: Connect the
RXpin of your GPS module to theTXpin of the chosen UART on your FC. - Power (5V): Connect the
5V(orVCC) pin of your GPS module to a5Vpad on your FC. - Ground (GND): Connect the
GNDpin of your GPS module to aGNDpad on your FC.
Example: If using UART2 on your FC, you'd connect GPS TX to FC RX2, GPS RX to FC TX2, GPS 5V to FC 5V, and GPS GND to FC GND.
Best Practices for Noise Reduction and Interference Mitigation
Noise is the enemy of good GPS performance.
- Twisted Wires: Twist the signal wires (TX/RX) and power wires (5V/GND) together. This helps reduce electromagnetic interference.
- Shielding: If you suspect significant noise, you can wrap the GPS module and its wires in copper foil tape, ensuring the foil is grounded to the FC's GND.
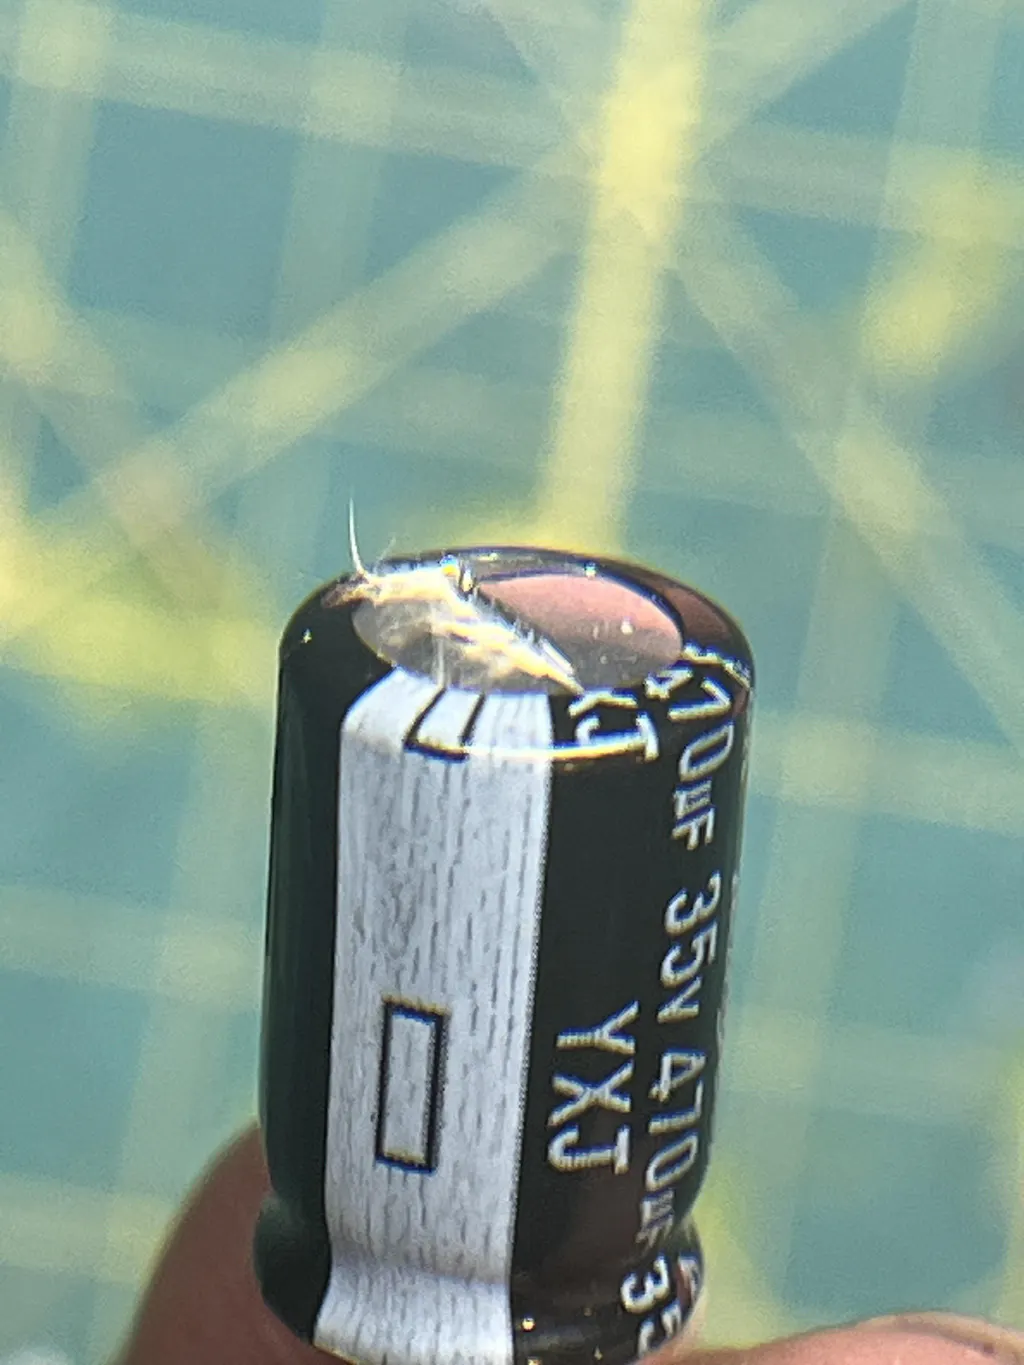
- Capacitors: While many modern FCs have good filtering, adding a low ESR capacitor to your main battery leads can further clean up power and reduce noise affecting all electronics, including GPS.
- Separate Power: If possible, power the GPS from a clean 5V regulator, though most FC 5V pads are sufficient.
Betaflight Configuration: Bringing GPS Rescue to Life
With hardware installed, let's configure Betaflight. This is where you'll use Betaflight GPS setup commands and settings.
Enabling GPS in the Ports & Configuration Tabs
- Connect to Betaflight Configurator: Plug in your FC and connect.
- Ports Tab:
- Find the UART you connected your GPS module to (e.g., UART2).
- In the "Sensor Input" column for that UART, select
GPS. - Set the Baud Rate to
AUTO(recommended for UBLOX) or a specific rate like57600or115200if auto-detection fails. - Click
Save and Reboot.
- Configuration Tab:
- Scroll down to the "Features" section.
- Enable the
GPSfeature. - For
GPS Protocol, selectUBLOX. - Click
Save and Reboot.
Essential CLI Commands for GPS Setup (UBLOX, Baud Rates, etc.)
For optimal performance and to fine-tune your UBLOX module, enter the CLI tab and use these commands:
set gps_provider = UBLOX(This should be set automatically if you chose UBLOX in the Configurator)set gps_baudrate = AUTO(Ensures Betaflight tries to detect the correct baud rate)set gps_auto_config = ON(Crucial! This allows Betaflight to send configuration messages to the UBLOX module for optimal performance, including enabling more satellite constellations like Galileo if supported by your M10 module.)set gps_ublox_use_galileo = ON(Only if your M10 module supports Galileo, highly recommended for faster fixes and more satellites)set gps_set_home_point_once = OFF(Recommended for most uses. Home point is set every time you arm, allowing you to move your drone and re-arm. Set toONonly if you always launch from the exact same spot and don't want the home point to ever update after the first arm.)save(Don't forget this!)
These GPS rescue CLI commands will significantly improve your module's performance.
Configuring Failsafe for Automatic GPS Rescue Engagement
This is the critical step to ensure GPS Rescue activates when needed.
- Failsafe Tab: Navigate to the
Failsafetab in Betaflight Configurator. - Failsafe Procedure: For the "Failsafe Procedure," select
GPS RESCUE. - Failsafe Delay: Set this to
0for immediate GPS Rescue engagement upon signal loss. - Save: Click
Saveat the bottom.
You can also set up a custom failsafe switch on your radio to manually trigger GPS Rescue for testing purposes. This is a key part of Betaflight failsafe settings.
Setting Up OSD Elements for Critical GPS Data
Having GPS data visible on your OSD is invaluable for monitoring performance and understanding rescue status. In the OSD tab:
- Add
GPS Satellites(shows the number of satellites acquired). - Add
GPS Coordinates(shows your current location). - Add
Home Direction(an arrow pointing back to your home point). - Add
Distance to Home(shows how far you are from home). - Add
Altitude(essential for monitoring rescue climb/descent). - Add
GPS Fix(a simple icon indicating a 3D fix).
Fine-Tuning Your Safety Net: Optimal GPS Rescue Settings
Now let's dive into the parameters that dictate how your drone behaves during a rescue. These are often found in the CLI or the Failsafe tab in newer Betaflight versions (4.3+).
Understanding and Adjusting Rescue Altitude & Home Point
gps_rescue_altitude = 50(Default is 50 meters. Adjust based on your flying environment. If you have tall trees or buildings, set it higher, e.g.,80or100meters. This is the altitude the drone will climb to before heading home. This is your primary GPS rescue altitude settings parameter.)gps_rescue_min_sats = 6(Minimum number of satellites required to arm the drone and set the home point. Default is usually 5-6. We recommend6-8for better reliability.)gps_rescue_angle = 0(The angle at which the drone will face relative to the home point during the return phase.0means it flies directly forward. You can adjust this if you prefer it to yaw to a specific direction.)
Calibrating Return Speed, Descent Rate, and Landing Behavior
gps_rescue_return_speed = 2000(Default is 2000 cm/s, which is 20 m/s or about 72 km/h. Adjust to your preference – faster for long range, slower for more gentle return.)gps_rescue_descent_dist = 10000(Default is 100 meters. This is the distance from home at which the drone will begin its descent. Adjust based on your landing zone size.)gps_rescue_descent_rate = 100(Default is 100 cm/s, or 1 m/s. This is how fast the drone descends. Slower is safer for landing.)gps_rescue_landing_angle = 150(The angle at which the drone will descend and disarm. Default is 150 degrees, which means it will typically disarm when it detects landing at a slight angle. Some pilots prefer180for a more direct vertical descent detection.)gps_rescue_disarm_delay = 500(Default is 500ms. Delay after landing detection before disarming. Increase if your drone disarms too quickly or bounces.)
Advanced Parameters: Yaw Correction, RTH Angle, and Deadband
gps_rescue_yaw_p = 0(Yaw proportional gain during rescue. Keep this low or0as yaw control is generally less critical than direct return, and high values can cause oscillation.)gps_rescue_sanity_checks = RESCUE_SANITY_ON(Highly recommended! This enables checks like preventing arming without a GPS fix or if the home point is too far. Options areRESCUE_SANITY_ONorRESCUE_SANITY_OFF.)gps_rescue_stick_override = ON(Default isON. This allows you to regain control of your drone if you get your radio signal back during a GPS Rescue. Crucial for safe testing and mid-flight emergencies.)gps_rescue_throttle_threshold = 1000(The throttle value below which the drone is considered to be landing. Adjust if your drone is having trouble detecting a landing.)
Testing, Troubleshooting, and Real-World Scenarios
Configuration is only half the battle; thorough testing is paramount. This section addresses "How do I test Betaflight GPS rescue mode safely?" and "Betaflight GPS rescue troubleshooting."
Safe Bench Testing Procedures (No Props, GPS Fix Required!)
NEVER TEST WITH PROPS ON!
- Outdoors with Clear Sky: Take your drone outside to get a good GPS fix. Connect it to Betaflight Configurator via USB.
- Verify GPS Fix: In the
GPStab of the Configurator, ensure you have a 3D fix and a sufficient number of satellites (ideally 8+). Check your OSD for satellite count. - Arm the Drone (No Props!): Arm your drone. Observe the "Home Point Set" message on your OSD.
- Trigger Failsafe: Turn off your radio transmitter.
- Observe Behavior: In the Configurator's
Setuptab, you'll see the drone's mode change toFAILSAFEand thenGPS RESCUE. Observe the virtual drone's behavior. Its motors should spin up, simulating the climb, and then attempt to "fly" towards the home point on the map. You can also monitor motor output on theMotorstab. - Regain Control: Turn your radio back on. If
gps_rescue_stick_overrideisON, you should be able to regain control by moving the sticks.
First Flight Testing: Gradual Approach and Observation
Once bench testing is successful, it's time for real-world flight:
- Choose a Safe Location: A large, open field with no obstacles, people, or water bodies.
- Power Up & Get Fix: Power up your drone, place it in the open, and wait for a solid GPS fix (8+ satellites and "Home Point Set" on OSD).
- Arm and Fly: Arm and fly your drone to a moderate altitude (e.g., 50-100m) and a safe distance (e.g., 50-100m) away from your launch point.
- Trigger Rescue: While at a safe altitude and distance, either flip a pre-configured failsafe switch on your radio or, carefully, turn off your radio.
- Observe & Be Ready: Watch your drone closely. It should climb to your set
gps_rescue_altitude, turn towards home, and start flying back. Be ready to regain control immediately if anything looks wrong (thanks togps_rescue_stick_override). - Analyze: Note the return path, speed, descent, and landing. Does it behave as expected? Repeat tests at different distances and altitudes.
Common GPS Rescue Issues and How to Diagnose Them
"Why is my Betaflight GPS rescue not engaging or working correctly?" Here are common issues:
- No GPS Fix / Low Satellites:
- Diagnosis: Check OSD, GPS tab in Configurator.
- Fix: Relocate module, check wiring, ensure
gps_auto_config = ON, update module firmware if necessary, fly in a clear area.
- Home Point Drifting / Incorrect:
- Diagnosis: OSD shows home direction/distance changing erratically at home.
- Fix: Ensure
gps_rescue_min_satsis sufficiently high (6-8), wait longer for a solid fix before arming, ensuregps_set_home_point_once = OFF(unless specifically desired otherwise).
- Rescue Not Engaging:
- Diagnosis: Drone just drops or lands without active navigation.
- Fix: Check
Failsafetab settings, ensuregps_rescue_sanity_checksisn't preventing arming due to low sats, verifyGPSfeature is enabled.
- Erratic Flight During Rescue:
- Diagnosis: Drone wobbles, spirals, or flies wildly.
- Fix: Check
gps_rescue_yaw_p(keep it low or 0), ensure no compass is enabled causing interference, check PIDs (though rescue uses simplified PIDs, extreme tuning issues can sometimes manifest).
- Disarms Too Early/Late:
- Diagnosis: Drone bounces or disarms mid-air.
- Fix: Adjust
gps_rescue_landing_angleandgps_rescue_throttle_threshold, increasegps_rescue_disarm_delay.
What to Do When GPS Rescue Engages Mid-Flight
If GPS Rescue unexpectedly engages:
- Stay Calm: Panic will only make it worse.
- Assess: Is it a genuine failsafe (e.g., radio battery died)? Or did you accidentally trigger it?
- Observe: Let the drone begin its climb and turn. Watch its behavior.
- Regain Control: If your radio signal returns and
gps_rescue_stick_overrideisON, you can immediately take back control by moving the sticks. This is usually the best course of action if you are confident in your ability to fly it back manually. - Manual Landing: If the drone is close and you can see it, you might choose to disarm and land manually if it's safe to do so rather than letting the rescue sequence complete.
FAQ: Your Burning Questions About Betaflight GPS Rescue
How do I know if my GPS module is working correctly in Betaflight?
You can verify this in several ways:
- OSD: Look for the satellite count (e.g., "S:8") and a GPS fix icon.
- Betaflight Configurator - GPS Tab: This tab will display your current coordinates, satellite count, HDOP (Horizontal Dilution of Precision), and indicate a 3D fix.
- CLI: Type
statusin the CLI. It will showGPS: SAT:X(where X is the number of satellites).
Can I use GPS Rescue with any flight controller?
Most modern Betaflight-compatible flight controllers (F4, F7, and some F3) with at least one free UART port can support GPS Rescue. It also requires Betaflight firmware version 4.0 or newer.
What's the minimum number of satellites needed for GPS Rescue?
A 3D fix usually requires at least 4 satellites. However, for a reliable home point and accurate navigation during rescue, Betaflight generally recommends a minimum of 6-8 satellites. You can configure this with the gps_rescue_min_sats CLI command.
How do I update my GPS module firmware (e.g., UBLOX)?
For UBLOX modules, you can use the official U-Center software. You'll need a USB-to-UART adapter to connect the GPS module directly to your computer. Download the latest firmware from the UBLOX website or your module manufacturer. While possible, for most users, this is not a routine procedure, and the gps_auto_config = ON command in Betaflight is usually sufficient for optimal performance. Only attempt a firmware update if you are experiencing persistent issues that cannot be resolved otherwise.
Is GPS Rescue reliable enough to completely prevent drone loss?
GPS Rescue is an incredibly reliable and powerful tool, significantly reducing the risk of drone loss. However, it is not foolproof and cannot prevent all types of losses. It relies on a consistent GPS signal, correct configuration, and functional hardware. Factors like catastrophic hardware failure, extreme electromagnetic interference, flying in areas with no GPS signal, or incorrect settings can still lead to a lost drone. It's your best safety net, but always fly responsibly and within your skill limits.
Conclusion
Implementing Betaflight GPS Rescue Mode is one of the most impactful upgrades you can make to your FPV drone, transforming potential losses into successful recoveries. By following this ultimate blueprint, you're not just setting up a feature; you're investing in peace of mind and extending the life of your quad. Don't wait for a critical moment to realize its value. Take action today, configure your GPS Rescue, and fly with confidence knowing your drone has a guardian angel watching over it.
Have you successfully used GPS Rescue in a sticky situation? Share your stories and tips in the comments below, or explore our other guides for more FPV mastery!
Copyright-safe media generated locally by FPVLovers