How to Clean and Maintain Your FPV Drone: Bearings, Motors, and Electronics
A checklist-based tutorial covering bearing lubrication, cleaning mud/grass out of motors, waterproofing electronics with conformal coating, checking carbon fiber stress fractures, and re-torquing screws.
Unleash Your Inner FPV Mechanic: The Ultimate Guide to Deep Cleaning Your Drone
Your FPV Drone: More Than Just a Toy
Your FPV drone isn't just a collection of parts; it's a finely tuned precision machine that endures countless impacts, dirt, dust, and sometimes, even water. From the high-speed dives through dusty trails to the occasional unplanned encounter with a muddy field, your quadcopter faces brutal conditions. Just like any high-performance vehicle, it demands meticulous care to maintain peak performance and extend its lifespan. Ignoring grime and debris can lead to anything from reduced flight efficiency and overheating to catastrophic component failure. Think of yourself not just as a pilot, but as the FPV mechanic responsible for keeping this aerial beast in prime condition.
What This Deep Maintenance Guide Will Cover
This comprehensive guide will transform you into an FPV cleaning pro, teaching you how to meticulously clean every component of your quadcopter. We'll approach this from the perspective of an FPV mechanic, meticulously inspecting and restoring your machine. From routine post-flight tidying to full disassembly for deep cleaning after a brutal crash or water immersion, we'll cover the essential tools, proven techniques, and crucial steps to ensure your FPV drone is always ready to rip, looking and flying its absolute best. Consider this your ultimate FPV drone maintenance guide.
Why a Clean Drone Matters & Your Essential Cleaning Arsenal
Beyond Aesthetics: The Performance & Longevity Benefits
A clean FPV drone isn't just about looking good; it's fundamental to its performance and longevity. Dirt, dust, grass, and even tiny pebbles can impede motor efficiency by adding drag or getting into bearings, cause overheating in vital electronics like your ESCs or VTX, obscure camera lenses leading to blurry footage, and even cause signal interference if antennas are compromised. Regular, thorough cleaning helps prevent these issues, ensuring consistent flight performance, extending the life of expensive components (like your flight controller or powerful motors such as the T-Motor F60 Pro IV), and allowing for early detection of potential problems like loose screws, frayed wires, or hairline cracks in your carbon fiber frame. This proactive FPV drone care is what separates the casual flyer from the dedicated FPV mechanic.
Essential Tools for the FPV Mechanic
Before you begin your FPV drone cleaning mission, gather your arsenal. Having the right tools makes the job easier and safer.
- Brushes: A variety is key.
- Soft-bristled brush: For general dusting and delicate electronics.
- Stiff brush (e.g., an old toothbrush): Great for dislodging dried mud and grime from the frame.
- Anti-static brush: Crucial for cleaning circuit boards without risking static discharge.
- Compressed Air / Blower: A can of compressed air (hold upright to prevent propellant discharge) or, even better, a dedicated anti-static air blower (like the Giottos Rocket Blower) to remove dust from tight spaces.
- Isopropyl Alcohol (99%): Your best friend for cleaning electronics. It evaporates quickly and leaves no residue.
- Cotton Swabs / Q-tips: Perfect for precise cleaning of small components and tight corners.
- Microfiber Cloths: For delicate surfaces like camera lenses and wiping down the frame.
- Small Vacuum (optional): A small USB-powered vacuum can be handy for sucking up loose debris.
- Magnifying Glass / Jeweler's Loupe: Invaluable for inspecting solder joints, small components, and checking for hairline cracks.
- Standard FPV Toolkit: Your hex drivers (1.5mm, 2mm usually), small pliers, and precision tweezers are essential for systematic disassembly and reassembly.
Recommended Cleaning Agents & Solvents
While 99% isopropyl alcohol is your primary solvent for electronics, consider specific cleaners for other parts. For tough grime on carbon fiber, a mild soap solution (a drop of dish soap in water) or even denatured alcohol can be used, but always test in an inconspicuous area first. When cleaning FPV drone components, avoid harsh chemicals like acetone, nail polish remover, or strong household detergents, as these can damage plastics, coatings, wire insulation, or even corrode solder joints. For cleaning quadcopter motors, especially the inside of the bell, a dedicated electrical contact cleaner (like CRC QD Electronic Cleaner) can be beneficial, but be extremely careful to avoid getting it into the motor bearings.
The Pre-Cleaning Protocol & Safe Disassembly
Power Down & Prop Removal: Safety First
The absolute first step before any FPV drone maintenance, cleaning, or inspection is to disconnect the battery. This eliminates any risk of accidental motor spin-up, protecting both you and your drone from injury or damage. Next, remove all propellers. Even with the battery disconnected, it's good practice to remove them to prevent accidental cuts if you were to reconnect power for testing. Work in a well-lit, clean, and organized space to prevent losing small parts – a magnetic mat or small labeled containers are excellent for keeping screws organized.
Initial Inspection: Spotting the Obvious
Before you dive into deep cleaning, perform a quick visual inspection. Look for bent props (even if removed), cracked arms, loose screws, frayed wires, or obvious signs of impact damage. Pay close attention to the solder joints on your ESCs and FC – a hard crash can sometimes crack them. This initial assessment helps you prioritize areas for cleaning and identify any repairs needed alongside the maintenance. It's a key step in post-crash FPV cleaning.
Systematic Disassembly for Deep Access
For a true FPV mechanic's deep clean, partial or full disassembly is often necessary. This allows you to reach every nook and cranny.
- Document: Take photos or videos as you go, especially of wiring and component orientation, to aid in reassembly. This is crucial for complex builds like the GEPRC CineLog35 or racing quads like the iFlight Nazgul5 V3.
- Organize: As you remove screws and components, keep them organized. Use small containers, a parts tray, or even a piece of tape to stick screws down in the pattern they were removed. Label them if necessary (e.g., "top plate screws," "motor screws").
- Careful Removal: Carefully remove components like the top plate, arms, motors, and even the flight stack (FC, ESC) if accessible. Disconnect small connectors (camera, VTX, RX) gently to avoid damaging pins or wires.
The FPV Mechanic's Deep Clean: Component by Component
Frame & Carbon Fiber: Scrubbing the Foundation
Start with the frame, the backbone of your quad. Use a stiff brush (like an old toothbrush) to dislodge dried mud, dirt, and grass from the carbon fiber. For stubborn grime, a damp cloth with a mild soap solution or 99% isopropyl alcohol can work wonders. Wipe down all surfaces. Pay particular attention to screw holes, edges, and areas where arms connect to the main body, as these are common places for dirt to accumulate and cracks to form. While cleaning, inspect for hairline cracks, especially after a hard crash – a magnifying glass can be very helpful here.
Motor Maintenance: Brushing Away the Grime & Inspecting Bearings
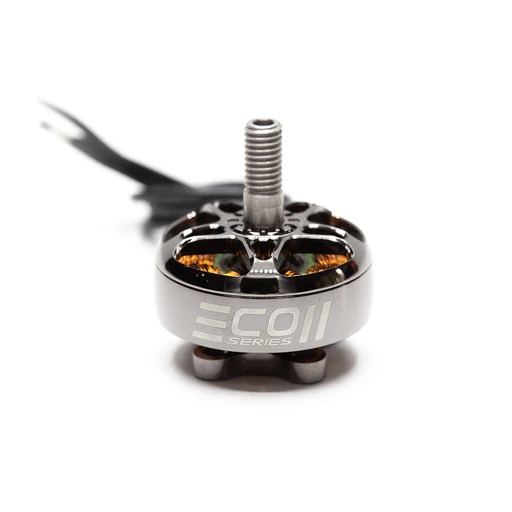
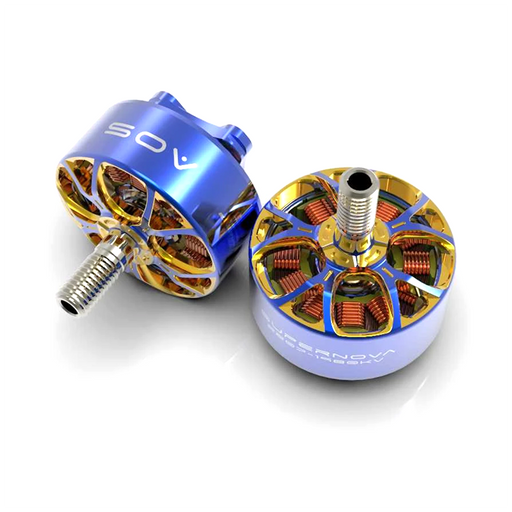
FPV drone motors are dirt magnets.
- External Cleaning: Use a soft brush or compressed air to clean out dirt, grass, hair, and small debris from the motor bell and stator. Spin the bell gently by hand to ensure smooth rotation.
- Internal Cleaning (if needed): If you notice significant resistance or grinding, or if the motors are extremely dirty (e.g., after a mud crash), you might need to carefully remove the motor bell. Use a cotton swab lightly dampened with 99% isopropyl alcohol to clean the inside of the bell and the stator windings.
- Bearing Inspection: Gently spin the motor again. Any grinding, excessive play, or rough spots indicate damaged bearings. While you can sometimes flush bearings with WD-40 Specialist Electrical Contact Cleaner and re-oil them with specific motor bearing oil, replacement is often the best solution for optimal performance. Avoid getting any liquids into the motor bearings directly unless you are specifically flushing them for replacement/re-lubrication.
Electronics TLC: FC, ESC, VTX, RX - The Delicate Touch
This is where precision matters most.
- Dust Removal: Use an anti-static brush and compressed air (or blower) to remove dust, grass, and debris from circuit boards (Flight Controller, ESC, VTX, Receiver).
- Stubborn Dirt/Flux: For stubborn dirt, mud residue, or old flux residue around solder joints, use cotton swabs or a soft brush lightly dampened with 99% isopropyl alcohol. Gently scrub the affected areas. Be extremely gentle around tiny surface-mount components (SMD) and delicate connectors.
- Connectors: Clean any connectors (e.g., USB port, camera connector) with a cotton swab and isopropyl alcohol.
- Drying: Ensure all alcohol has completely evaporated before even thinking about powering on your drone. Isopropyl alcohol evaporates quickly, but give it a few minutes, especially in tight spots.
Camera Lens & Antenna Care: Clear Vision, Strong Signal
A dirty FPV camera lens means blurry, compromised footage, while damaged antennas can lead to significant signal loss.
- Camera Lens: Use a microfiber cloth specifically designed for optics, or a dedicated lens cleaning pen (like a LensPen), to gently wipe the lens. For stubborn spots or smudges, a tiny drop of lens cleaning fluid (designed for camera lenses, not household cleaners!) on a microfiber cloth can help. Never use harsh paper towels or abrasive materials.
- Antennas: Clean antenna elements (both FPV video and radio receiver antennas) with a damp cloth to remove dirt and grime. Inspect them closely for any bends, kinks, or damage to the plastic housing or the active element itself. A bent antenna or a damaged coaxial cable can significantly degrade your signal strength and range, impacting reliability. Ensure that your VTX antenna (e.g., Rush Cherry antenna or Immortal T for RX) is securely connected and undamaged.
Emergency Recovery: Post-Crash & Water Damage Protocols
Immediate Actions After a Hard Landing
After any significant crash, immediately disarm your drone and disconnect the battery. Do not wait. This prevents further damage from short circuits or runaway motors.
- Assess: Perform a quick visual inspection for obvious damage like bent arms, loose wires, or a punctured LiPo battery (which requires immediate safe disposal).
- Clean: Clean off any mud, dirt, or foreign objects as soon as possible. Allowing them to dry makes them harder to remove and can trap moisture, leading to corrosion. Use brushes and compressed air for this initial clean.
The Water Immersion Protocol: Saving Your Electronics
If your FPV drone takes an unexpected swim – whether in a puddle, a lake, or even saltwater – time is absolutely critical!
- Disconnect Immediately: The absolute first step is to immediately disconnect the battery. Do NOT attempt to power it on, even for a second, as this can instantly short circuit and permanently damage components.
- Rinse with Distilled Water: If it was saltwater or dirty water, rinse the entire drone thoroughly with distilled water. The goal is to flush out conductive impurities (especially salt, which is highly corrosive) before they dry and cause shorts. Do not use tap water, as it contains minerals that can leave conductive residue.
- Shake Out Excess: Gently shake the drone to dislodge as much water as possible.
Drying Techniques & Rust Prevention Strategies
After rinsing (if applicable) and shaking, the drying process begins.
- Disassemble: Disassemble the drone as much as possible. Separate the flight controller, ESCs, VTX, RX, and camera. The more exposed the electronics are, the faster they will dry.
- Compressed Air: Use compressed air or an air blower to blow water out of all crevices, under components, and from connectors. Pay special attention to ports (like USB) and small chips.
- Desiccant Drying: Place the disassembled electronics in a sealed container with a desiccant. Silica gel packets (often found in new electronics packaging) are ideal. Uncooked rice can also work, but it's less effective and can leave dusty residue. Leave them in the desiccant for 24-72 hours, depending on the severity of the immersion.
- Gentle Heat/Fan: A gentle fan can aid drying, but avoid direct heat sources like hair dryers set to high, as excessive heat can damage electronics or solder joints.
- Inspection & Cleaning: Once completely dry, meticulously inspect all components for any signs of corrosion (greenish or whitish residue). Clean any corroded areas with 99% isopropyl alcohol and a cotton swab.
- Conformal Coating: For future rust prevention, consider applying a thin, even layer of conformal coating (like MG Chemicals 422B Silicone Modified Conformal Coating) to your flight controller, ESCs, and other sensitive electronics. This creates a protective, non-conductive barrier against moisture and dust.
Reassembly, Testing & Proactive Maintenance
Meticulous Reassembly & Wiring Management
Reassemble your drone carefully, referring to your photos or videos.
- Screws: Ensure all screws are tightened appropriately. Don't overtighten carbon fiber, as it can strip or crack. Use blue Loctite on metal-to-metal screws if they tend to vibrate loose.
- Wiring: Pay close attention to wiring. Ensure no wires are pinched between components, snagged on frame edges, or too close to spinning propellers. Proper wire management (using zip ties or heat shrink) not only improves durability and aesthetics but also reduces potential electrical interference and makes future maintenance easier.
- Connectors: Double-check all connectors (FC to ESC, camera, VTX, RX) are securely seated.
Post-Cleaning Bench Testing & Flight Checks
Before taking to the skies, a thorough testing phase is crucial.
- Bench Test: Connect your drone to Betaflight/INAV/ArduPilot. Check motor direction and spin-up without props. Verify ESC calibration. Check sensor readings (accelerometer, gyroscope, barometer) for abnormalities. Test all controls and functions (switches, modes, OSD elements).
- VTX/RX Test: Power on your video system and check for a clear signal. Confirm your radio link is solid and failsafe is configured correctly.
- Hover Test: Only after successful bench testing, perform a short, cautious hover test in a safe, open area. Listen for unusual noises, observe flight characteristics, and ensure everything feels right.
Establishing a Regular Cleaning & Inspection Schedule
Prevention is always better than cure. Implement a routine to keep your quadcopter in peak condition:
- After Every Few Flights: A quick brush-off of motors and frame, and a wipe of the camera lens.
- Every 10-15 Flights: A more thorough external clean, checking for loose screws and visible damage.
- Every 30-50 Flights or After Any Significant Incident (Crash/Water): A deep disassembly clean as outlined in this guide.
This proactive approach will keep your drone performing optimally, prevent small issues from becoming big problems, and extend the lifespan of your valuable FPV gear.
Frequently Asked Questions About FPV Drone Cleaning
How often should I deep clean my FPV drone?
A deep clean involving disassembly is recommended every 30-50 flights, or immediately after any significant crash, exposure to water/mud, or if you notice performance degradation. For general FPV drone maintenance, a quick brush-off after every few flights and a more thorough external clean every 10-15 flights is a good practice.
Can I use compressed air directly on FPV electronics?
Yes, but with caution. Use short bursts and hold the can upright to prevent propellant discharge, which can be very cold and potentially damaging. Keep a safe distance (several inches) to avoid damaging delicate components. An anti-static air blower is often a safer and more effective alternative as it doesn't introduce moisture or chemicals.
What should I absolutely AVOID when cleaning my drone?
Avoid using harsh chemicals like acetone, strong detergents, or petroleum-based cleaners as they can damage plastics, coatings, wire insulation, and solder. Never use tap water directly on electronics without immediately following the water damage protocol with distilled water. Avoid excessive force when cleaning or disassembling, and never, ever power on a wet drone.
Is it safe to wash FPV motors with water?
Generally, no. While some pilots might rinse extremely muddy motors with distilled water, it's risky and should only be done if absolutely necessary, followed by immediate and thorough drying. Water can get into bearings and cause rust or damage. It's better to use compressed air, brushes, and 99% isopropyl alcohol for cleaning motor bells and stators, avoiding direct water exposure to the motor bearings.
What's the best way to prevent rust on my FPV drone?
The best prevention is to keep your drone dry and clean. After any exposure to moisture, follow the water damage recovery protocol diligently. For extra protection, consider applying a conformal coating to your flight controller, ESCs, and other sensitive electronics. Regularly inspect metal components (screws, motor shafts) for early signs of corrosion and address them promptly.
Fly Cleaner, Fly Longer: The Reward of a Well-Maintained Drone
The Reward of a Well-Maintained Drone
Mastering the art of FPV drone cleaning is an essential skill for any serious pilot. By treating your quad like the precision machine it is, you'll not only extend its life and ensure consistent performance but also gain a deeper understanding of its intricate components. This hands-on FPV drone repair and maintenance knowledge will empower you to diagnose issues faster and keep your drone flying at its peak. A clean drone is a happy drone, ready to tackle any gap, dive, or race with confidence and reliability.
Keep Your Quad Pristine – Share Your Tips!
Now that you're equipped with the knowledge to perform a professional-grade deep clean, put these techniques into practice! What are your go-to cleaning hacks or essential tools for keeping your drone in top shape? Do you have any specific tips for how to clean FPV drone components after a particularly nasty crash? Share your FPV maintenance tips in the comments below and help other pilots keep their quads pristine and ready to rip!
Copyright-safe raster media generated locally by FPVLovers