Field Repair Kit for FPV Pilots: What to Carry Without Overpacking
An evergreen FPVLovers guide focused on building a practical repair kit for real flying days.
Don't Let a Crash Ground You: Build Your Ultimate FPV Field Repair Kit
Picture this: You're out at your favorite flying spot, nailing those perfect gaps and power loops. Suddenly, a misjudgment, a branch, a hard landing – and your quad is down. The propellers are mangled, a wire is torn, or worse, something's bent. The frustration sets in, and you're left packing up, your flying day cut short. But what if it didn't have to be that way? What if you could diagnose and fix most common issues right there, on the spot, and get back in the air within minutes? That's the power of a well-equipped FPV field repair kit.
This comprehensive guide will walk you through building 'The Stay in the Air' FPV Field Repair Kit. We'll cover essential tools, critical spare parts, and smart organization strategies, all designed to tackle common failure points and get you back to flying with minimal downtime. From electrical mishaps to structural damage, learn what to pack, how to prioritize multi-use tools, and how to make quick, effective repairs away from your workshop.
Why Every FPV Pilot Needs a Field Repair Kit
Minimizing Downtime and Maximizing Flight Time
The primary goal of a field repair kit is to keep you flying. Every minute spent troubleshooting or packing up is a minute not spent enjoying your hobby. A well-prepared kit drastically reduces the time between a crash and your next successful takeoff, ensuring you get the most out of every flying session. Imagine the difference between ending your day after one bad crash and being able to quickly swap a motor or re-solder a wire, continuing to fly for hours. That's the tangible benefit of being prepared.
The Frustration of a Grounded Quad
There's nothing quite like the disappointment of a broken drone when you're miles from your workbench. You've driven all the way out, set up your gear, and then a simple issue brings everything to a halt. A field kit transforms that frustration into problem-solving, empowering you to tackle issues confidently and independently, without having to call it a day prematurely. It turns a potential disaster into a minor speed bump, allowing you to maintain your flow and enjoyment.
Beyond the Workshop: Repairing On-the-Go
Your home workshop offers comfort and every tool imaginable, with perfect lighting and ample space. But the field demands portability, efficiency, and resilience. This section emphasizes the unique challenges of outdoor repairs – uneven surfaces, wind, dirt, and limited light – and how a specialized kit addresses them, focusing on compact, multi-functional tools and essential spares that can withstand the rigors of being carried around. You won't have your bench vise, so every tool needs to be easy to handle in less-than-ideal conditions.
Core Components: Essential Tools for Every Field Fix
The foundation of any great field repair kit lies in its tools. Choose quality over quantity, focusing on durability and multi-functionality.
Precision Drivers and Wrenches
A good set of hex drivers (1.5mm, 2.0mm, 2.5mm are most common for FPV) is non-negotiable. Many FPV pilots swear by brands like Wiha or HGLRC for their durability and comfortable grips. A small Phillips head screwdriver is also essential for various components, and a nut driver set (5.5mm for prop nuts, 7mm for some standoffs, 8mm for others) will save you from stripped nuts. Opt for high-quality, magnetic tips where possible; this makes handling tiny M2 and M3 screws in tight spaces significantly easier, especially when you're not in a pristine workshop environment. Consider a multi-tool driver like the iFixit Mako Driver Kit to save space and weight, offering a wide array of bits in a compact form factor.
Cutting and Stripping Tools
Small, sharp wire snips are crucial for cutting zip ties, motor wires, and even trimming carbon fiber edges after a crash. A hobby knife (X-Acto style) is invaluable for precise cutting, stripping insulation, cleaning up carbon edges, or carefully prying open components. Compact wire strippers (e.g., Engineer PA-09 or similar compact models) ensure clean, precise insulation removal for electrical repairs, preventing shorts and ensuring strong solder joints. Don't underestimate the utility of a good pair of small, sharp scissors for heat shrink and tape.
Portable Soldering Essentials
For intermediate pilots, a portable soldering iron is a game-changer. The TS100 or its successor, the TS101, powered by a 4S-6S LiPo battery (the same ones you fly with!), is the gold standard. It heats up incredibly fast and offers precise temperature control. Include a small spool of thin solder (e.g., 60/40 or 63/37 leaded solder, 0.8mm diameter), a flux pen for ensuring clean solder joints, and desoldering braid to correct mistakes. This setup allows for re-attaching motor wires, replacing XT30/XT60 connectors, or even repairing delicate ESC pads, potentially saving your flight controller or ESC. Pro tip: Practice field soldering at home a few times before you need to do it under pressure!
Diagnostic & Measurement Tools
A compact multimeter is essential for checking continuity, voltage (e.g., to diagnose a dead VTX or receiver), and identifying shorts after a crash. A simple continuity tester can also be incredibly useful for quickly verifying connections without needing a full multimeter display. Don't forget a small pair of precision tweezers for handling tiny components, manipulating wires, or picking up dropped screws. A small flashlight or headlamp (many phones have this, but a dedicated one is better for hands-free operation) is also invaluable for working in low-light conditions or peering into tight spaces.
Critical Spares: Getting Back in the Air Fast
Tools are useless without the right parts to fix things. Your spares kit should reflect the most common failure points of your specific drones.
Electrical Spares
Always carry extra silicone wire (18-22AWG is common for motor wires, 14-16AWG for battery leads) in a few colors. A variety of heat shrink sizes (3mm, 5mm, 8mm, 10mm) is crucial for insulating repairs. Spare XT30/XT60 connectors (male and female) are essential for battery lead repairs or replacing damaged connectors on your quad. JST/GH/Micro JST connectors are vital for receivers, VTXs, and cameras – check which ones your specific components use. Assorted zip ties (small and medium) are indispensable for securing wires, components, and even temporarily reinforcing frame parts.
Mechanical Spares
Propellers are, without a doubt, the most common casualty; carry several full sets (e.g., 3-5 sets). A variety of M2 and M3 screws (different lengths, 4mm-10mm) are needed for motors, frame plates, and component mounting. Nylon standoffs (M3, various lengths) are often sacrificed in crashes to protect more expensive components, so having spares is vital. If your motors allow easy bell replacement (e.g., many EMAX Eco or BrotherHobby motors), carrying a spare motor bell can save an entire motor after a hard impact.
Structural & Frame Spares
Depending on your frame design, consider carrying spare arm braces, small carbon fiber plates, or even a spare arm if your frame allows for quick replacement (e.g., individual arms bolted on). Small pieces of double-sided foam tape (3M VHB is excellent) and Velcro are excellent for re-securing components like receivers, VTXs, or capacitor banks that might have come loose. Having a few spare rubber grommets for stack mounting can also prevent vibration issues after a rebuild.
Adhesive & Securing Solutions
A small tube of threadlocker (Loctite Blue 242 is perfect for preventing screws from vibrating loose, especially on motor mounts) is a must-have. Super glue (CA glue) can offer a temporary fix for minor carbon fiber cracks or re-attaching small plastic parts until a proper repair can be made. A small roll of electrical tape or Kapton tape offers quick insulation, securing, and general utility for various minor fixes.
Organizing Your Kit: Compactness and Accessibility
A fantastic kit is useless if you can't find what you need quickly. Organization is key.
Choosing the Right Case or Pouch
The ideal case is compact, durable, and features internal organization. Tackle boxes with adjustable dividers, dedicated FPV tool rolls (like the Diatone Tool Roll or similar generic options), or even small camera bags work well. Prioritize protection for delicate items like your soldering iron and easy access to frequently used tools like hex drivers. A clear lid on a small tackle box can be helpful for quickly identifying contents.
Categorizing for Quick Access
Organize your tools and spares logically. Group electrical components (wire, heat shrink, connectors) together, mechanical parts (screws, standoffs, props) in another section, and frequently used items (like your main hex driver and snips) easily accessible. Labeling compartments (even with a marker on tape) can save precious time and frustration in the field, especially when you're under pressure.
Weight and Portability Considerations
While comprehensive, your kit shouldn't be a burden. Prioritize multi-use tools and only essential spares. For example, instead of carrying every screw size, focus on the M2 and M3 lengths you use most. Consider the total weight and size, especially if you hike to your flying spots or have to carry your gear long distances. Every gram counts when you're loaded with batteries, goggles, and your quad.
Field Repair Scenarios: Common Crashes and Quick Fixes
Let's walk through some typical field repair situations and how your kit will save the day.
Propeller Damage and Motor Bell Replacement
This is the most common issue after any significant impact. Swiftly replace bent, chipped, or cracked props with fresh ones. If a motor bell is dented, seized, or has a broken magnet, a spare bell (if your motors allow easy replacement) can be swapped out quickly with a hex driver (usually 1.5mm or 2.0mm). This often saves the entire motor, preventing you from having to replace it entirely and getting you back in the air within minutes.
Broken Wires and Connector Re-soldering
Motor wires, battery leads, or signal wires (e.g., for your receiver or VTX) often get ripped or pulled during a crash. With your portable soldering iron (like the TS101), you can quickly strip the insulation, tin the wires, and re-solder connections. This also applies to replacing damaged XT60s or XT30s on your battery lead or quad, ensuring stable power delivery. Remember to use heat shrink for insulation after soldering!
Frame Damage and Standoff Replacement
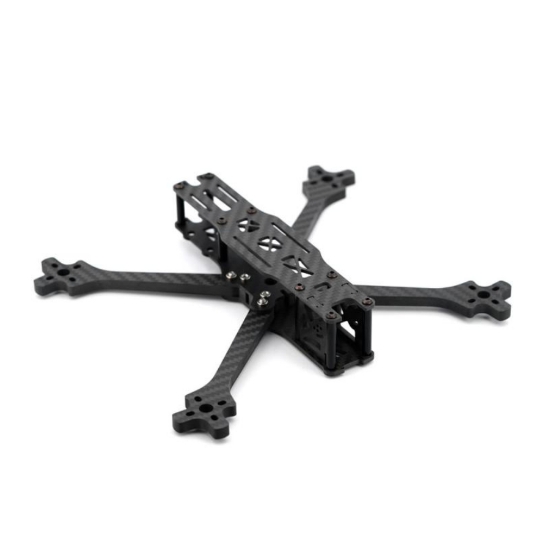
Cracked arms or broken nylon standoffs can compromise flight stability and structural integrity. Use your spare M3 screws and nylon standoffs to reinforce or replace damaged sections. For minor carbon cracks, a small amount of super glue (CA glue) can offer a temporary fix to prevent further propagation until a proper arm replacement can be made at home. For more severe damage, zip ties can sometimes be used as a temporary splint.
VTX/Antenna Issues and Basic Troubleshooting
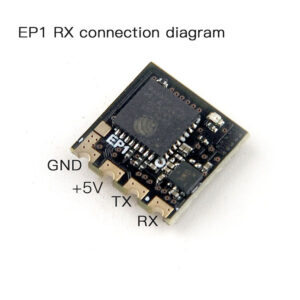
Loss of video signal can often be traced to a damaged VTX antenna or a loose connection. Always carry a spare VTX antenna (e.g., an Lumenier AXII 2 or a generic dipole). Check for loose solder joints on the VTX power or signal pads, and re-solder if necessary. Use your multimeter to ensure power is reaching the VTX. Sometimes, a simple reseat of the antenna connector is all that's needed.
Building Your Ultimate FPV Field Repair Kit: A Buyer's Guide
Pre-built Kits vs. DIY Customization
While some pre-built FPV tool kits exist (e.g., from HGLRC or GEPRC), they often lack specific spares or include tools you don't need, making them less efficient for your specific setup. A DIY approach allows for a highly customized kit tailored to your specific drones, common failure points, and budget. While it takes a bit more time to assemble, it often proves more cost-effective and efficient in the long run, ensuring every item serves a purpose.
Recommended Brands and Budget-Friendly Options
For tools, brands like Wiha, iFixit, and HGLRC offer quality precision drivers that will last. The TS100/TS101 are the go-to portable soldering irons. For spares, stick to reputable FPV retailers for quality parts. Don't always opt for the cheapest; reliability in the field is paramount. Consider buying screw and standoff assortments (e.g., M3 Nylon Standoff Kit or M2/M3 Screw Assortment) to save money and ensure you have a variety of sizes without buying individual packs.
Where to Buy: Online Retailers and Local Hobby Shops
Major FPV online retailers (e.g., GetFPV, RaceDayQuads, Pyrodrone, Banggood, AliExpress) are excellent sources for both tools and spares, often offering competitive prices and wide selections. Local hobby shops can also be great for quick pick-ups of common items like heat shrink, specific screws, or even a basic set of hex drivers when you're in a pinch. Don't forget general hardware stores for items like super glue or electrical tape.
FPV Field Repair Kit FAQs
What are the absolute minimum tools I need for a basic kit?
At a minimum, you'll need hex drivers (1.5mm, 2.0mm, 2.5mm), a small Phillips screwdriver, wire snips, a few spare propellers, and zip ties. This will cover most basic propeller replacements and minor structural fixes, getting you back in the air for simple bumps.
How often should I check and restock my repair kit?
It's good practice to check your kit after every significant repair or once a month, even if you haven't used it much. Replace any used spares (props, screws, wires) and ensure all tools are present and in good condition. A quick inventory before heading out for a major flying session is always a smart move.
Can I really solder in the field effectively?
Yes, with a portable soldering iron (like a TS100/TS101 powered by a LiPo battery) and a steady hand, field soldering is entirely feasible. The key is to practice at home first to get comfortable with the setup and technique in less-than-ideal conditions. Good flux and clean tips are crucial for success.
What's the best way to carry my kit without adding too much weight?
Prioritize multi-functional tools, choose compact versions of larger tools, and only carry spares for the most common failure points relevant to your specific drones. A small, organized pouch or tool roll is usually lighter and more adaptable than a rigid case. Focus on essentials, not every conceivable spare.
Are there any non-obvious items that are surprisingly useful?
Yes! A small piece of sandpaper or a file for deburring carbon fiber edges, a small brush for cleaning debris (especially from motors), and even a small flashlight or headlamp for working in low light can be incredibly helpful. A small magnifying glass can also assist with tiny components or inspecting solder joints.
Stay in the Air: Fly Confidently with Your FPV Field Repair Kit
Building an FPV field repair kit isn't just about carrying tools; it's about investing in your flight time, reducing frustration, and empowering yourself to overcome common obstacles. By preparing for the inevitable, you transform potential flight-ending crashes into minor setbacks, ensuring you maximize every moment in the air. A well-thought-out kit is a testament to your dedication to the hobby and your readiness for anything the skies throw at you.
Don't wait for your next crash to realize you need one. Start building your ultimate FPV field repair kit today and fly with unparalleled confidence! Share your essential kit items in the comments below!
Copyright-safe media generated locally by FPVLovers