Team Profile: Vexcel Spain Drone Team - Spain's DCL Veterans
Learn about Vexcel Spain Drone Team, the Spanish DCL team, their managers, DCL entry year, and diverse pilot lineup.
Team Profile: Vexcel Spain Drone Team - Spain's DCL Veterans
The FPV Racing Rookie's Fast Track: From Simulator Skills to Your First Gate
Introduction: Welcome to the High-Octane World of FPV Racing!
Ever dreamt of flying like a bird, but at breakneck speeds through a futuristic obstacle course? FPV (First Person View) racing offers just that – an adrenaline-pumping, skill-intensive sport that's captivated pilots worldwide. With a tiny camera on your drone feeding live video to goggles strapped to your face, you're not just piloting a drone; you are the drone, weaving through gates and around flags at incredible velocities. If you're ready to strap in and experience the ultimate rush, you've come to the right place. This guide is your fast track to understanding, acquiring, and mastering the basics of FPV racing, designed specifically for rookies eager to hit their first gate.
The Call to the Gates: Understanding FPV Racing
What is FPV Racing and Why is it So Addictive?
FPV racing is a competitive sport where pilots navigate custom-built, high-speed drones through a three-dimensional course marked by gates and flags. The "First Person View" comes from the live video feed transmitted from the drone's camera to the pilot's goggles, creating an immersive experience akin to sitting in the cockpit. The addiction stems from the unique blend of precision control, lightning-fast reflexes, strategic course management, and the sheer exhilaration of speed. It's a true test of skill, pushing both pilot and machine to their limits.
The Core Components of an FPV Racing Setup
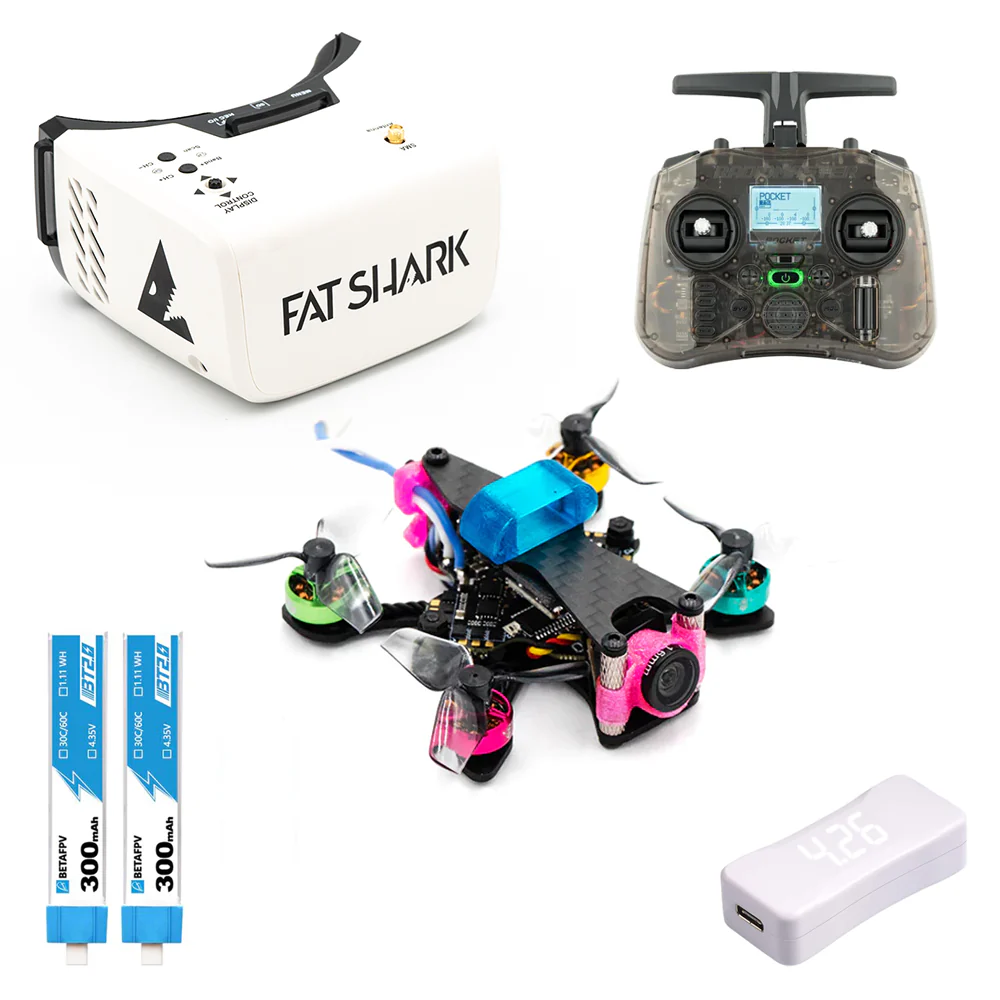
To enter the world of FPV racing, you'll need a few key pieces of equipment that work in harmony:
- FPV Drone: The star of the show! These are typically quadcopters designed for speed and agility, not carrying heavy cameras.
- FPV Goggles: Your window to the drone's perspective, displaying the live video feed.
- Radio Transmitter (Controller): Your connection to the drone, allowing you to send commands.
- LiPo Batteries & Charger: The power source for your drone and often your goggles.
- Tools & Accessories: Propellers, spare parts, basic tools, and a battery checker are essential.
Safety First: Essential Considerations Before You Fly
Before you even think about powering up your drone, safety must be your absolute priority. FPV drones are powerful machines that can cause serious injury if mishandled.
- Understand Local Regulations: Always know and follow the drone laws in your country and region. This includes registration, no-fly zones, and altitude limits.
- Fly in Safe Areas: Choose open, unpopulated spaces, far away from people, animals, and private property. Local FPV clubs often have designated flying fields.
- Always Use a Spotter: Especially as a beginner, having a friend act as a spotter to keep visual line of sight (VLOS) of your drone is crucial. They can alert you to potential hazards that you might not see in your goggles.
- Remove Props During Setup: Never plug in a battery with propellers on your drone unless you are absolutely ready to fly. Accidental arming can lead to severe cuts.
- Know Your Disarm Switch: Always have an easily accessible disarm switch on your radio and know how to use it instantly in an emergency.
- Battery Safety: Charge LiPo batteries in a fire-safe bag or container, never leave them unattended, and always store them at storage voltage.
Your Digital Flight School: Mastering FPV Simulators
Why Simulators are Your Best Friend for Beginners
Imagine learning to drive a race car without ever crashing. That's the power of FPV simulators. They are an absolute necessity for beginners. Simulators allow you to:
- Practice Without Consequences: Crash hundreds of times without damaging your drone or your wallet.
- Develop Muscle Memory: Train your hands and brain to react instinctively to flight situations.
- Experiment Safely: Try different maneuvers and settings without risk.
- Save Money: The cost of a simulator and a decent controller is far less than repairing a crashed drone multiple times.
Practical Tip: Invest in a good quality radio transmitter before buying your drone, and use it with the simulator. This ensures you're building muscle memory on the actual controller you'll use for real flight.
Popular FPV Simulators and How to Choose
Several excellent FPV simulators are available, each with its strengths:
- Velocidrone: Widely regarded as having the most realistic physics, making it a favorite among professional racers. It features excellent track design tools and multiplayer options.
- DRL Simulator (Drone Racing League): Offers a more "game-like" experience with fantastic graphics and challenging courses inspired by the DRL's actual races. Good for getting a feel for competitive racing.
- Liftoff: Known for its beautiful environments and a good balance of realism and accessibility. It offers a variety of drones and customization options.
- Uncrashed: A newer simulator gaining popularity for its excellent physics and stunning visuals, often praised for its "flowy" feel.
Most simulators offer free demos, so download a few and see which one you prefer. Compatibility with your radio transmitter (usually via USB) is key.
Essential Drills: From Hovering to Gate Practice
Start with the basics and progressively challenge yourself:
- Basic Hovering: Learn to maintain a stable hover in one spot. This develops fine throttle and stick control.
- Figure-8s and Circles: Practice smooth, controlled turns in both directions. Focus on maintaining altitude and a consistent line.
- Gate Practice (Slow): Start by slowly flying through simple gates, focusing on entering and exiting cleanly. Don't worry about speed yet.
- Course Navigation: As you get comfortable, try flying pre-designed tracks. Learn to "look ahead" and anticipate your next move.
- Throttle Management: FPV racing isn't just full throttle. Learn to modulate your throttle to maintain speed and altitude effectively through corners and straightaways.
Practical Tip: Dedicate at least 30 minutes to an hour daily to simulator practice. Consistency is more important than long, infrequent sessions.
Gearing Up: A Beginner's Guide to FPV Racing Equipment
Choosing Your First FPV Drone: RTF, BNF, or DIY?
For beginners, the choice often comes down to Ready-To-Fly (RTF), Bind-N-Fly (BNF), or building your own (DIY).
- RTF (Ready-To-Fly) Kits: These are perfect for absolute beginners, as they include everything you need: drone, radio, goggles, and batteries. Examples include the Eachine Novice IV or BetaFPV Cetus Pro FPV Kit. They're a great way to get airborne quickly but offer less room for upgrades.
- BNF (Bind-N-Fly) Drones: These come fully assembled but require you to supply your own radio transmitter and sometimes goggles. They're a good step up from RTF, offering better performance. For 5-inch racing FPV drones, popular beginner-friendly BNF options include the iFlight Nazgul Evoque F5 or GepRC Mark5. These are powerful, durable, and good for outdoor racing.
- DIY (Do-It-Yourself): Building your own drone offers the deepest understanding of the components and makes repairs easier. However, it requires significant technical knowledge and time. Not recommended for your very first drone.
Beyond the standard 5-inch racing drones, you might also consider:
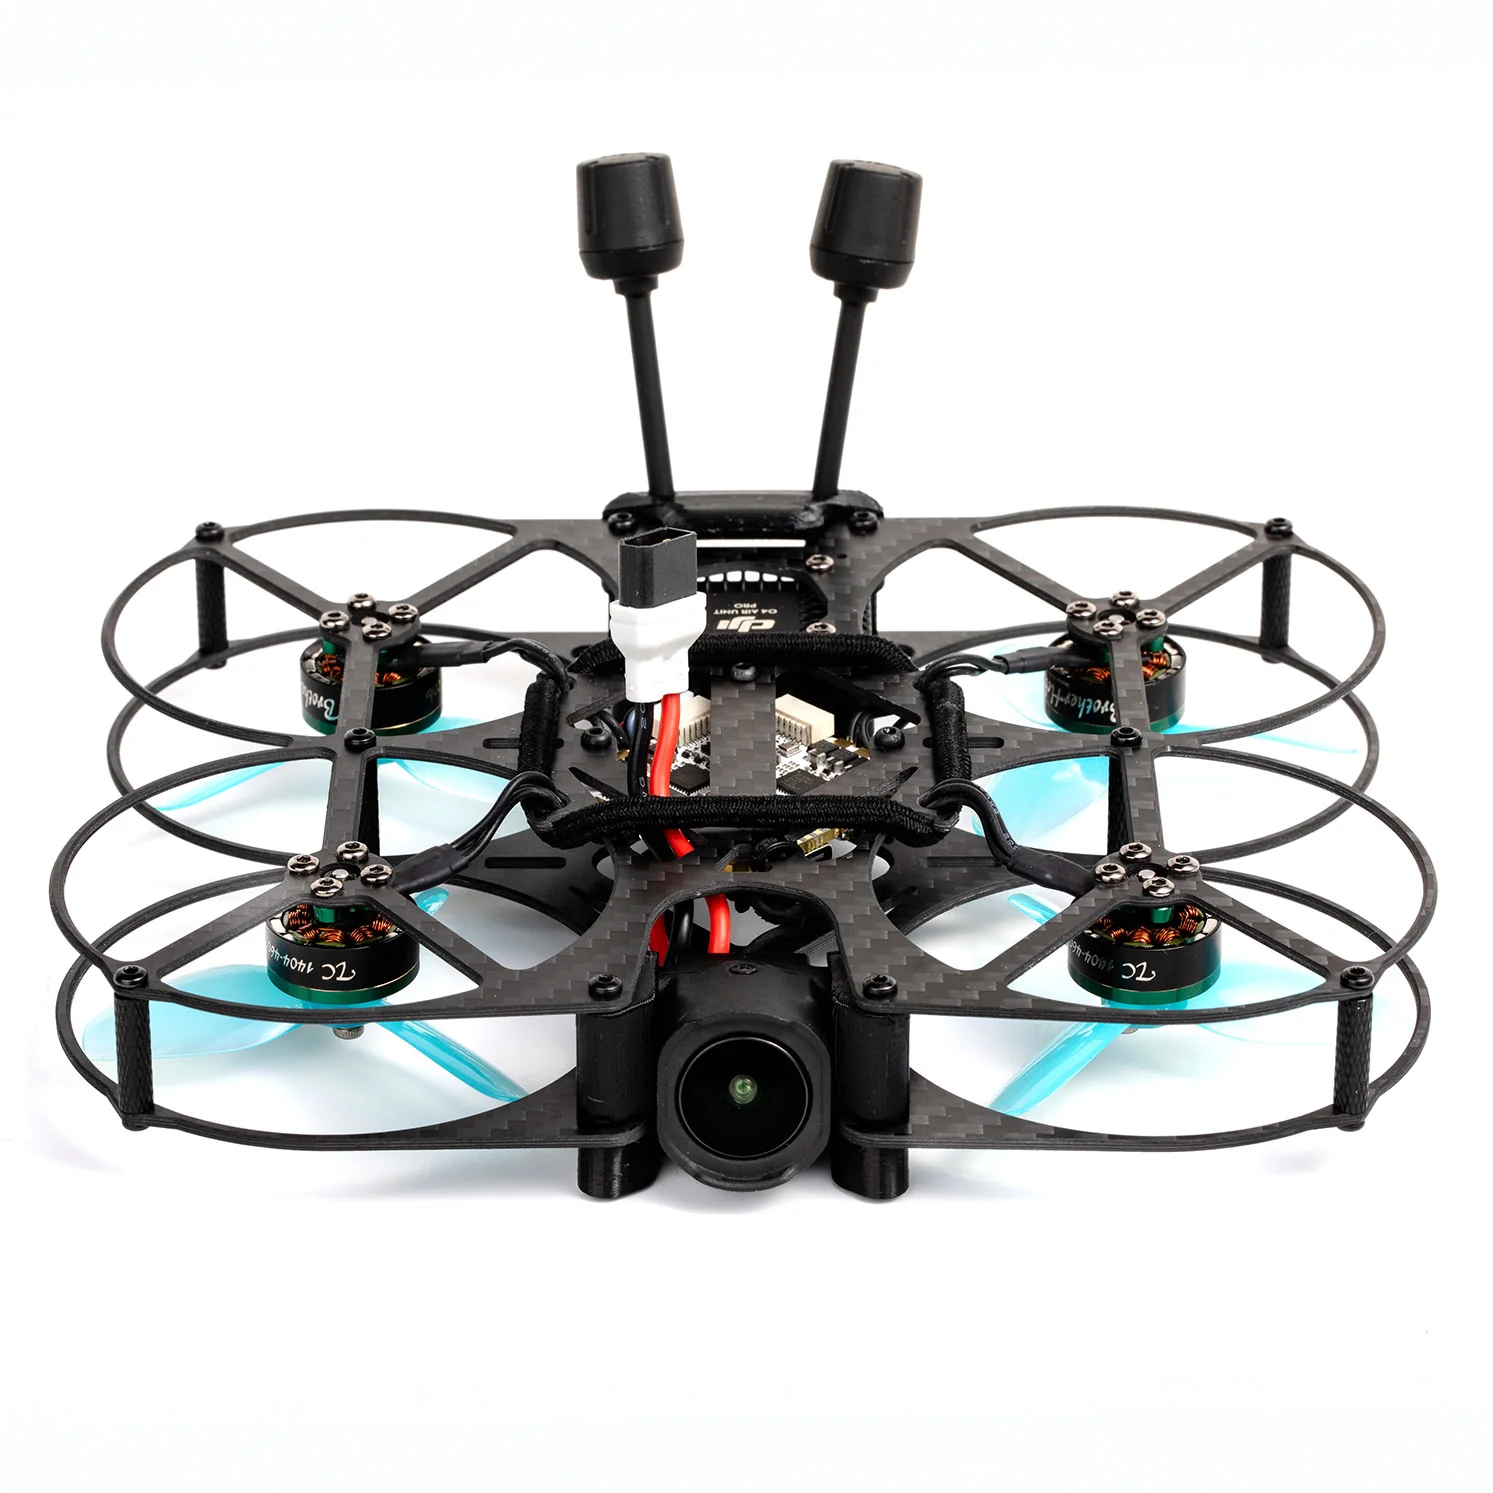
- Tiny Whoops: These are small, lightweight drones (e.g., BetaFPV Meteor75, Mobula7) perfect for indoor FPV drones & parts and backyard flying. They're fantastic for learning fundamental stick control in a less intimidating environment.
- Toothpick FPV Drones: A hybrid category, larger than Whoops but smaller than 5-inchers (e.g., Acrobrat, HappyModel Crux35). They offer good outdoor performance in a smaller, lighter package.
Practical Tip: Start with a Tiny Whoop for indoor practice, then move to a BNF 5-inch for outdoor racing once you're comfortable.
Decoding FPV Goggles: Analog vs. Digital
Your FPV goggles are critical for immersion.
- Analog Goggles:
- Pros: Lower latency (minimal delay), wider compatibility, generally more affordable (e.g., Fat Shark HDO2, Skyzone SKY04X).
- Cons: Lower video resolution, prone to static and interference.
- Best For: Budget-conscious beginners, those prioritizing minimal latency for competitive racing.
- Digital Goggles:
- Pros: High-definition video feed, clear image, often better range and penetration (e.g., DJI Goggles 2, Walksnail Avatar HD, HDZero).
- Cons: Higher latency (though improving rapidly), more expensive, less cross-compatibility between systems.
- Best For: Pilots who want the best visual experience, willing to invest more.
Practical Tip: If budget allows, consider a digital system like DJI. The clarity makes flying much easier for beginners. If not, a good pair of analog goggles will serve you well.
Selecting Your Radio Transmitter: Mode 1 vs. Mode 2
Your radio controller is your direct link to the drone.
- Mode 2: This is the most common stick configuration in Western countries. The left stick controls throttle (up/down) and yaw (left/right), while the right stick controls pitch (forward/back) and roll (left/right).
- Mode 1: Less common, with throttle and pitch on the right stick, and roll and yaw on the left.
Always choose Mode 2 as a beginner unless you have a specific reason or local community preference for Mode 1.
Popular beginner-friendly radio transmitters include:
- Radiomaster Zorro: Compact, ergonomic, and affordable, often available with ELRS (ExpressLRS) radio protocol built-in.
- Jumper T-Pro: Similar compact design to the Zorro, also often available with ELRS.
- Radiomaster Boxer: A larger, full-size radio with excellent gimbals and a robust build, also commonly available with ELRS.
Radio Protocols: Look for radios with ELRS (ExpressLRS), which is currently the most popular and high-performance open-source radio link for FPV, known for its incredible range and low latency. Crossfire is another excellent, albeit proprietary, option.
Powering Your Passion: Batteries, Chargers, and Accessories
- LiPo Batteries: For 5-inch racing drones, you'll typically use 4S (14.8V) or 6S (22.2V) LiPo batteries, with capacities ranging from 1100mAh to 1500mAh. 6S offers more power and efficiency but requires a 6S compatible drone. Always use XT60 connectors for 5-inch drones.
- LiPo Charger: A good balance charger is essential. Look for chargers that can handle multiple cell counts (e.g., 2S-6S) and have a decent wattage output. Examples include the ISDT Q6 Nano or HTRC T240 DUO.
- Parallel Charging Board: Allows you to charge multiple LiPo batteries simultaneously, saving time. Crucial Safety Note: Only parallel charge batteries of the same cell count, similar voltage, and similar capacity.
- LiPo Checker: A small device to quickly check the voltage of individual cells in your LiPo battery.
- Propellers: You'll crash a lot, so buy plenty of spare props (e.g., HQProp, Gemfan).
- Basic Tools: Small hex drivers, a prop tool, and zip ties are invaluable for repairs.
Setting Up Your Race Drone: From Unboxing to First Flight
Initial Inspection and Basic Assembly
When your drone arrives, whether RTF or BNF:
- Inspect for Damage: Check for loose wires, bent motors, or cracked carbon fiber from shipping.
- Mount Props (Carefully!): If they aren't already mounted, attach propellers correctly. Ensure they spin in the right direction (usually "props out" for racing). Double-check motor direction in Betaflight later.
- Secure Components: Ensure antennas (VTX and RX) are securely mounted and not in danger of being chopped by props.
Binding Your Radio Controller to the Drone
This process links your radio to your drone's receiver. The exact steps vary by radio protocol (ELRS, Crossfire, FrSky, etc.), but generally involve:
- Powering on your radio.
- Putting the drone's receiver into "bind mode" (often by holding a button while plugging in the battery, or via Betaflight CLI commands for ELRS).
- Initiating the bind sequence on your radio.
- Confirming a solid light on the receiver, indicating a successful bind.
Practical Tip: For ELRS, you often "bind phrase" your receiver, which means setting a unique phrase in both your radio's ELRS module and the drone's receiver via Betaflight. This makes binding incredibly easy once set up.
Betaflight Basics: PID Tuning, Rates, and OSD Setup
Betaflight is the flight controller software that runs on your drone. It's where you configure almost everything.
- Install Betaflight Configurator: Download and install the Betaflight Configurator software on your computer.
- Connect Your Drone: Plug your drone into your computer via USB.
- Initial Setup:
- Calibrate Accelerometer: In the "Setup" tab, calibrate the accelerometer to ensure the drone knows which way is level.
- Receiver Tab: Verify your radio stick inputs are correctly registering in Betaflight (e.g., throttle moves the throttle bar, roll moves the roll bar). Ensure your channel map is correct (usually AETR1234 for Mode 2).
- Modes Tab: Set up your "Arm" switch (essential for safety!), and other modes like "Angle" (self-leveling, good for beginners), "Acro" (manual mode for racing), and "Beeper."
- OSD (On-Screen Display) Tab: Configure what information you see in your goggles. Essential items include battery voltage, flight time, RSSI (radio signal strength), and a virtual horizon.
- PID Tuning & Rates: For beginners, the stock PIDs are usually excellent. Focus on setting your "Rates" – these determine how sensitive your sticks are. Start with lower rates (e.g., 500-600 deg/s) and gradually increase as you get more comfortable. You can adjust "Expo" to soften the stick response around the center.
Practical Tip: Watch YouTube tutorials specific to your drone and flight controller for detailed Betaflight setup instructions. Don't be afraid to ask questions in FPV forums.
Taking Flight: Fundamental FPV Racing Techniques
Mastering Throttle Control and Line Management
Smooth throttle control is the backbone of FPV racing. Avoid jerky inputs. Learn to use the throttle to maintain a consistent altitude and speed through a course. Line management is about choosing the most efficient path through the gates, maximizing speed while minimizing turns. Always aim for the inside of a corner to shorten your path.
Cornering Techniques: The Key to Speed
- Power Loops: A common maneuver where you fly up, over, and down through a gate or around an obstacle. It requires precise throttle and pitch control.
- Dive Turns: Entering a turn with a slight dive to gain speed, then pulling up through the apex of the turn.
- Power Out: Exiting a turn with increased throttle to accelerate quickly down the next straight.
- Braking: Briefly chopping the throttle or even reversing pitch slightly to slow down for tight turns.
Practical Tip: Think of racing as a dance between speed and control. Smoothness often beats raw speed, especially for beginners.
Navigating Gates and Course Awareness
- Look Ahead: Don't just look at the gate you're currently flying through. Always be looking two or three gates ahead to plan your line.
- Gate Entry/Exit: Aim for a clean entry and exit. Don't be afraid to slow down for a clean run, as a smooth line is faster than a messy, fast one.
- Course Memorization: In a real race, knowing the course layout inside and out is a huge advantage. Walk the course if possible, or fly it slowly in the simulator.
Recovering from Crashes and Basic Troubleshooting
Crashes are inevitable. It's how you learn and grow.
- Disarm Immediately: As soon as you crash, hit your disarm switch. This prevents further damage to motors or props.
- Inspect for Damage: Check props, motor wires, antenna mounts, and the frame. Replace bent props.
- Turtle Mode: If your drone lands upside down, many flight controllers have a "Turtle Mode" (also called "Flip Over After Crash") that allows you to use your motors to flip the drone back over. Set this up in Betaflight.
- Lost Drone Procedures: If you lose sight of your drone, disarm it, listen for the motors, or use your radio's beeper function to locate it.
Practical Tip: Always carry spare props, a small toolkit, and a few zip ties. These will get you back in the air quickly after most minor crashes.
FPV Racing FAQ: Your Questions Answered
How much does it cost to get started with FPV racing?
The entry cost can vary significantly. An all-inclusive RTF kit might start around €250-€400. If you buy a good radio and simulator first, then a BNF drone and goggles, you're looking at €500-€800+ for a decent beginner setup. Remember to factor in spare batteries, props, and tools.
Can I fly FPV racing drones indoors?
Yes! While 5-inch racers are too powerful for most indoor spaces, Tiny Whoops (like the Mobula7 or Meteor75) are specifically designed for indoor flying. They're small, lightweight, and have prop guards, making them safe for flying around furniture and through doorways.
What's the difference between freestyle and racing FPV?
- Racing FPV: Focuses on speed, precision, and efficiency to navigate a defined course as quickly as possible. The goal is to win the race.
- Freestyle FPV: Focuses on creative aerial maneuvers, tricks, and acrobatic flying. The goal is to express pilot skill and create visually stunning footage. While the drones are similar, the flying style and objectives are distinct.
How long does it take to get good at FPV racing?
Like any skill, it depends on your dedication. With consistent simulator practice (30-60 minutes daily) and regular real-world flying, most beginners can become competent within 3-6 months. To become truly competitive, it's a journey of continuous learning and practice, often taking years.
Where can I find other FPV racers or events?
The FPV community is incredibly welcoming!
- Online Forums & Groups: Join FPV-specific Facebook groups, Reddit communities (r/fpv), or forums like Oscar Liang's.
- Local Clubs: Search online for "FPV club [your city/region]" or "drone racing club [your city/region]". Organizations like MultiGP often have local chapters.
- YouTube & Discord: Many FPV YouTubers have Discord servers where you can connect with other pilots.
Conclusion: Your Journey to Becoming an FPV Racer Begins Now!
You're now equipped with the foundational knowledge to embark on your FPV racing adventure. Remember, practice, patience, and persistence are your greatest allies. Don't get discouraged by crashes; they are part of the learning process. Celebrate every small victory, from a smooth corner in the simulator to clearing your first real gate.
The FPV community is vibrant and welcoming, so don't hesitate to connect with local groups or online forums for further guidance and support. There's always someone willing to help a new pilot. Grab your gear, hit the simulator, and prepare for the exhilarating experience of FPV racing. The gates are calling – are you ready to answer? Start your FPV journey today and experience the thrill firsthand!
Copyright-safe media generated locally by FPVLovers