Cinematic FPV vs Freestyle Drones: Frame and Component Differences
A component comparison guide explaining the structural differences between cinematic cinebops/cinewhoops and durable freestyle frames, motor choices, camera mounting, and flight controller tuning filters.
Cinematic FPV vs Freestyle Drones: Frame and Component Differences
Cinematic FPV vs. Freestyle FPV: Mastering the Art of Aerial Expression
Ever watched a breathtaking FPV shot that felt like a scene from a Hollywood movie, or witnessed a pilot defy gravity with impossible flips and dives? These are the two distinct, yet equally mesmerizing, worlds of FPV: Cinematic and Freestyle. While both involve piloting a drone in first-person view, their goals, techniques, and even the drones themselves differ significantly. But what exactly sets them apart, and which path is right for you? Dive in as we break down the fundamental differences, explore the ideal setups, and equip you with the knowledge to master both disciplines.
The Core Philosophies: What Drives Cinematic vs. Freestyle FPV?
At its heart, FPV is about connecting with your drone and the environment. However, the nature of that connection—and the desired outcome—is what truly separates cinematic from freestyle flying.
Cinematic FPV: The Art of Smooth Storytelling
The purpose of cinematic FPV is to capture fluid, stable, and visually stunning footage that tells a story or enhances a scene. Think of it as a flying camera dolly, but with unparalleled freedom of movement. Pilots meticulously plan their shots, focusing on composition, lighting, and camera movement to achieve a 'buttery smooth' aesthetic.
The goal isn't just to fly, but to create art. This might involve gracefully tracking a car through a winding road, soaring over majestic landscapes, or navigating tight spaces to reveal a subject. Every stick input is designed to be imperceptible in the final footage, prioritizing stability and the illusion of effortless motion. The drone becomes an extension of the filmmaker's eye, capturing epic, immersive perspectives that traditional cameras simply cannot.
Freestyle FPV: The Thrill of Aerial Expression
Freestyle FPV, on the other hand, is all about aerial acrobatics, trick execution, and expressive flight. Here, the drone is an instrument for personal expression, a canvas for demonstrating skill and creativity. Pilots push the limits of gravity, performing daring flips, rolls, power loops, inverted maneuvers, and navigating challenging environments with precision and flair.
The focus is on the pilot's personal style, combining complex maneuvers into a seamless "flow." It's a dance in the sky, where the pilot challenges themselves to master increasingly difficult tricks and string them together in an aesthetically pleasing sequence. Crashes are often part of the learning process, and the thrill comes from pushing boundaries and executing seemingly impossible feats of aerial dexterity.
Fundamental Differences in Intent and Execution
The underlying motivations fundamentally dictate how each style is executed. For cinematic FPV, the primary intent is precision and visual impact for the viewer. Flight lines are smooth, predictable, and often slower, designed to frame a shot perfectly. Speed is consistent, and sudden movements are avoided to prevent jarring footage. The pilot acts as a director, orchestrating every movement for the camera.
For freestyle, the intent is agility and trick performance for the pilot. Flight lines are dynamic, often unpredictable, and burst with speed and aggressive angles. The pilot acts as an aerial gymnast, using every inch of the environment as a playground. While the resulting footage can be exhilarating, the primary goal is the execution and personal satisfaction of the flight itself.
Drone Builds & Hardware: Crafting Your Perfect FPV Machine
The contrasting demands of cinematic and freestyle flying necessitate very different drone builds and component choices.
Cinematic Setups: Stability, Payload & Vibration Control
Cinematic drone builds prioritize stability, the ability to carry heavy HD cameras, and exceptional vibration control.
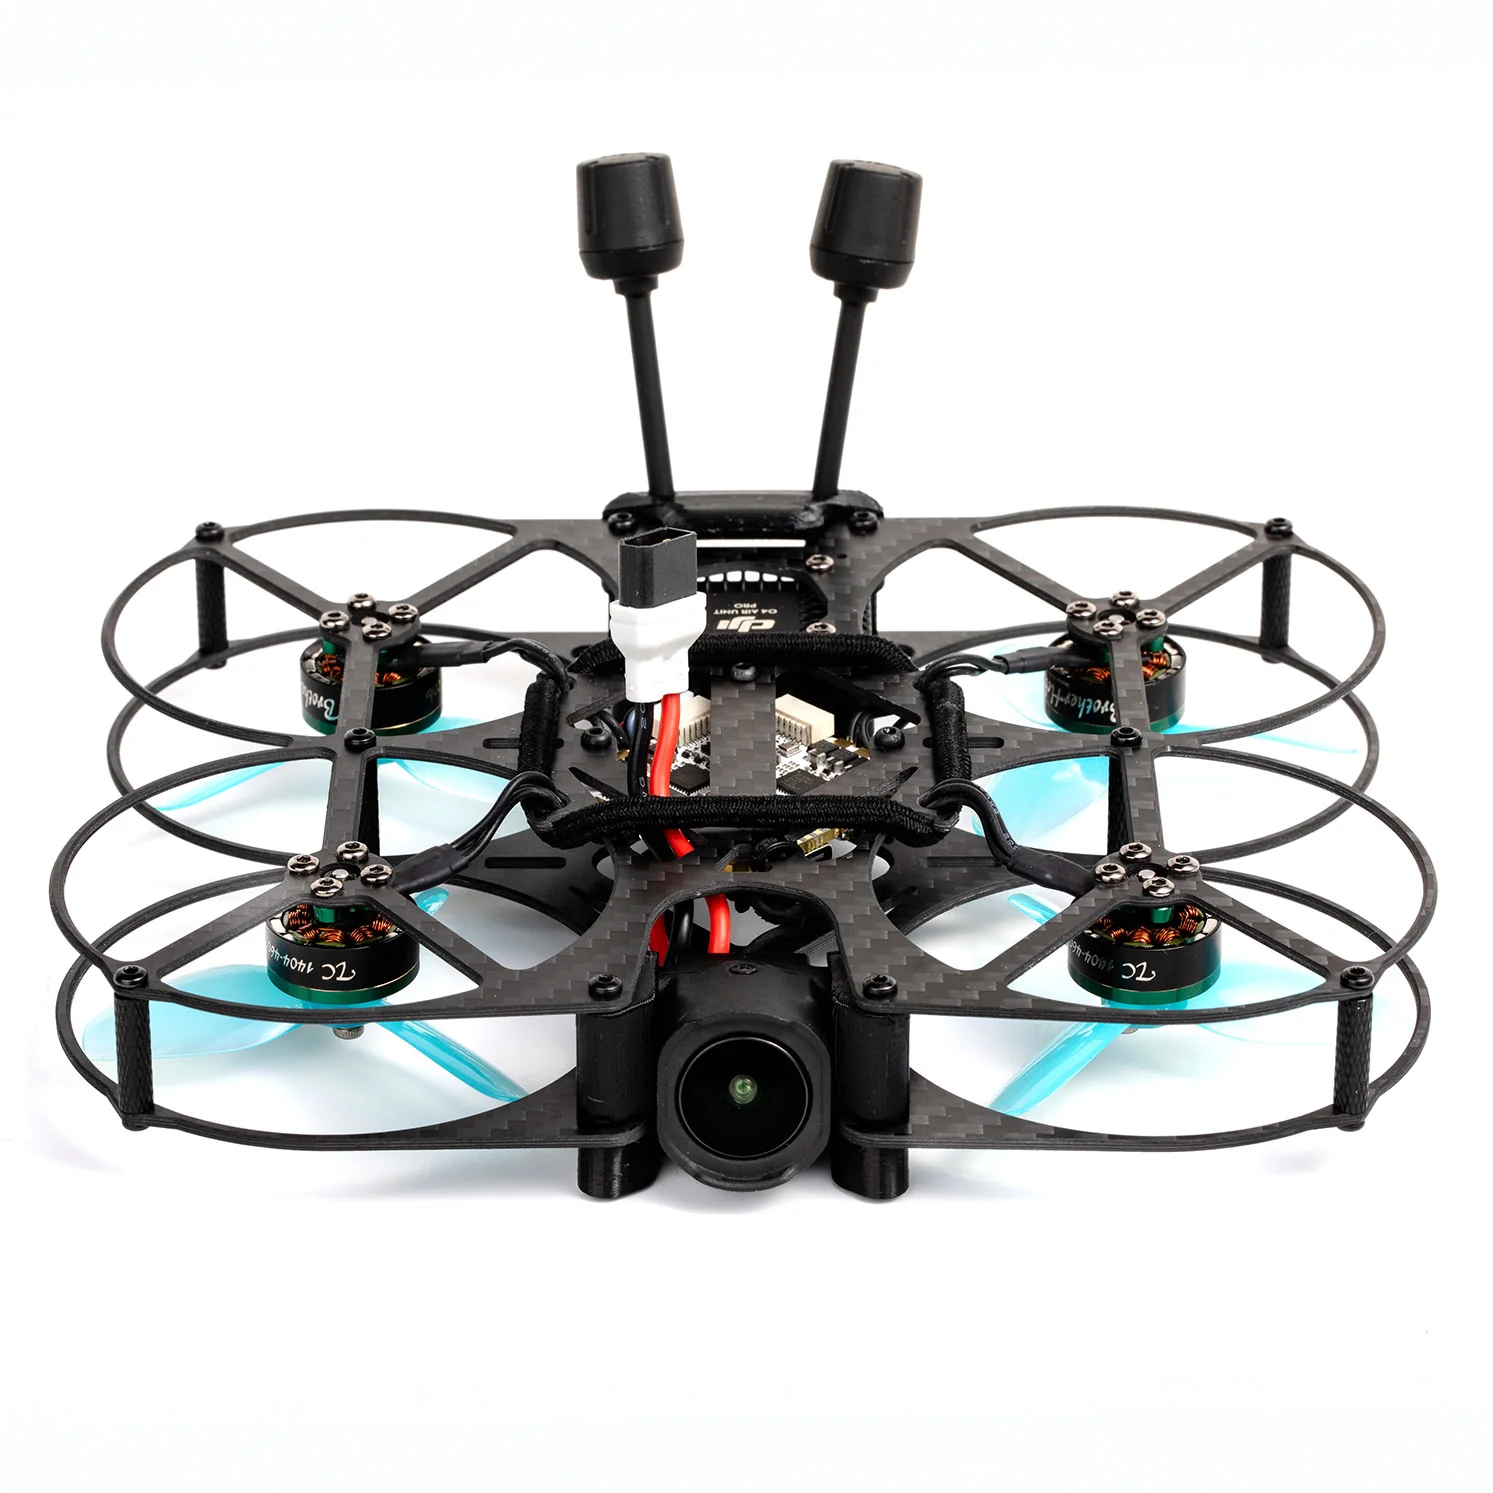
- Frames: You'll often see larger frames, ranging from 5-inch "toothpick" style quads for agility with small cams, to 3-5 inch Cinewhoops (like the GEPRC CineLog35 or iFlight Protector25) with prop guards for safe indoor/proximity flying, all the way up to 7-inch long-range quads (e.g., Lumenier QAV-S 7-inch) or dedicated "Cinelifter" frames for carrying full-size mirrorless cameras like the Blackmagic Pocket Cinema Camera. These larger frames provide a more stable platform.
- Motors: Powerful, often lower KV motors (e.g., 2207-2806.5 for 5-7 inch) are chosen to efficiently lift heavier payloads like a GoPro Hero 11/12 or DJI Action 4, providing ample thrust while maintaining smooth throttle response.
- Vibration Damping: Crucial for jello-free footage, cinematic rigs employ sophisticated soft-mounting techniques for the flight controller, motors, and especially the HD camera. TPU mounts, silicon gummies, and even gyrostabilization software (like Reelsteady Go or Gyroflow) are essential tools.
- GPS: Many cinematic drones, particularly long-range ones, include GPS modules for crucial features like return-to-home and position hold, adding a layer of safety and convenience for critical shots.
Freestyle Setups: Durability, Power & Agility
Freestyle drone builds are engineered for durability, raw power, and maximum agility to withstand aggressive flying and inevitable crashes.
- Frames: Typically, 5-inch X-frames (like the GEPRC Mark5 or iFlight Nazgul Evoque F5D) are the standard. These frames are designed to be compact, lightweight, and incredibly strong, often featuring thick carbon fiber arms that can survive hard impacts. True X or wide X geometries are common for balanced flight characteristics.
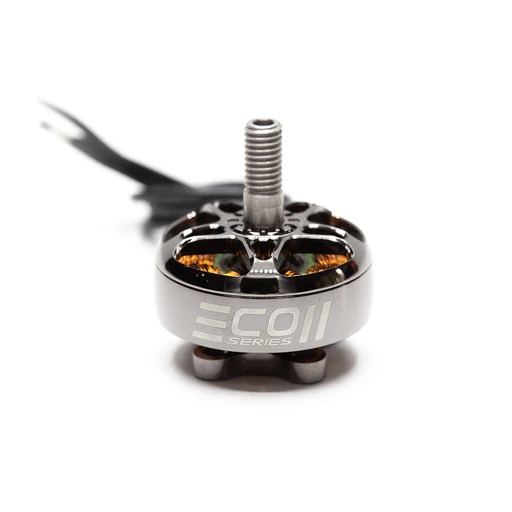
- Motors: High-KV motors (e.g., 2306.5 or 2207 with 1900-2000KV for 4S, or 1700-1800KV for 6S) are preferred for their quick throttle response and "punch," allowing for rapid acceleration and aggressive maneuvers.
- Components: Freestyle drones often use robust, easily replaceable components. The goal is to minimize downtime after a crash, so strong VTX antennas, durable FPV cameras (e.g., RunCam Phoenix 2, Foxeer Predator V5), and protected electronics are key.
Key Component Differences: Frames, Motors, Props, and Cameras
Let's break down the specific component distinctions:
- Frames:
- Cinematic: Often larger, sometimes with integrated dampening, or specific designs like cinewhoops with ducts. Stretched X frames can offer more pitch authority for smooth forward motion.
- Freestyle: Compact, robust X-frames (True X or Wide X) for balanced roll and pitch authority, crucial for complex tricks. Thick arms are standard.
- Motors:
- Cinematic: Lower KV (e.g., 1700-1900KV for 6S 5-inch, 1300-1500KV for 6S 7-inch) for efficiency, smoother throttle control, and longer flight times, especially when carrying heavy cameras.
- Freestyle: Higher KV (e.g., 1900-2100KV for 6S 5-inch) for maximum RPM, quick throttle response, and aggressive power delivery.
- Propellers:
- Cinematic: Often use props with a lower pitch (e.g., Gemfan 5136, HQProp 7x4x3 for long-range) for smoother, more linear thrust. Ducted props for cinewhoops (e.g., Gemfan D90-3) prioritize thrust efficiency in enclosed spaces and prop protection.
- Freestyle: Higher pitch props (e.g., Gemfan 51433, HQProp 5x4.3x3 V1S) provide more "bite" in the air, offering better grip for aggressive maneuvers and quick changes in direction.
- Cameras:
- FPV Camera: Freestyle often uses smaller, lighter FPV cameras (Nano or Micro size) for weight savings and crash resistance. Cinematic builds might use full-size FPV cameras for better image quality, or integrate the FPV camera within a larger camera cage.
- HD Camera: Cinematic rigs always carry a dedicated HD camera (GoPro, DJI Action, Caddx Walnut, or even larger cinema cameras). Freestyle pilots might strap on a lightweight action camera, but it's secondary to the flight itself.
Battery Choices: mAh, C-rating, and Flight Time
Battery selection is pivotal for both styles:
- Cinematic: Prioritizes higher mAh capacity (e.g., 6S 2200-4000mAh for 7-inch, 6S 1100-1500mAh for 5-inch) to achieve longer flight times for extended shots. While a decent C-rating is needed, it's less critical than for freestyle, as power demands are generally smoother.
- Freestyle: Demands high C-ratings (e.g., 6S 1300-1500mAh 100C+) to deliver massive bursts of power instantly for aggressive maneuvers, even if it means shorter flight times (typically 3-5 minutes). The ability to maintain voltage under extreme load is paramount.
Flight Controller & Software: Tuning for Optimal Performance
The flight controller (FC) and its software, primarily Betaflight, are the brain of your drone. How you tune them profoundly impacts flight characteristics.
PID Tuning for Cinematic Smoothness and Precision
PID (Proportional, Integral, Derivative) values are adjusted to achieve stable, drift-free flight, minimize oscillations, and ensure gentle stick response.
- P-gain (Proportional): Kept lower to reduce twitchiness and allow for smoother transitions. Too high, and you'll get oscillations; too low, and it feels sloppy.
- I-gain (Integral): Crucial for holding angles and countering external forces (wind). Set to prevent drift and ensure the drone maintains its commanded attitude.
- D-gain (Derivative): Helps dampen oscillations and smooth out movements. Often slightly higher than freestyle to achieve that "buttery" feel, but carefully balanced to avoid D-term noise.
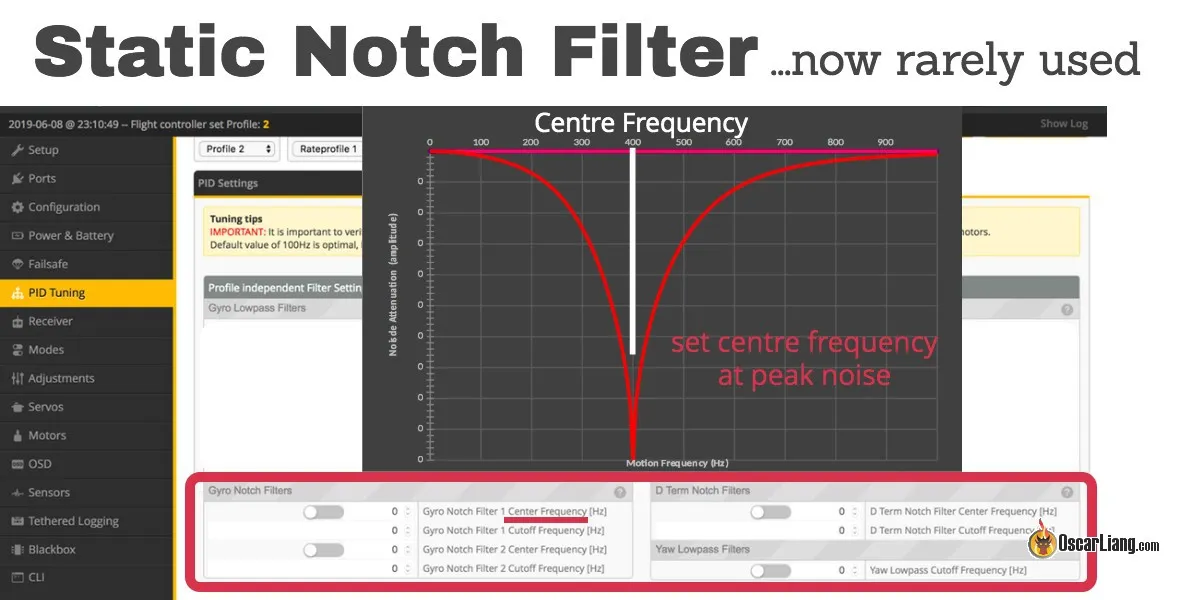
- Filtering: More aggressive filtering (lower Dterm notch frequencies, higher Gyro Lowpass filters) is often used to eliminate motor noise that can cause jello in footage.
- Rates & Expo: Lower rates (e.g., SuperExpo 0.7-0.8, RC Rate 0.9-1.0) and higher expo are used to make stick inputs less sensitive around the center, allowing for incredibly fine adjustments and smooth, sweeping motions.
PID Tuning for Freestyle Responsiveness and Snap
Freestyle PID tuning focuses on quick response, snappy maneuvers, and the ability to hold aggressive angles.
- P-gain: Higher P-gain for a more "locked-in" feel, allowing the drone to quickly snap to and hold desired angles.
- I-gain: Tuned to maintain aggressive angles and prevent washout during high-G maneuvers.
- D-gain: Often higher than cinematic to provide immediate dampening and responsiveness, giving the drone a "crisp" feel. Balancing D-gain is critical to avoid prop wash oscillations.
- Filtering: Less aggressive filtering is generally preferred to reduce latency and allow the FC to react faster. However, modern dynamic filtering in Betaflight helps maintain responsiveness while still cleaning up noise.
- Rates & Expo: Higher rates (e.g., SuperExpo 0.0-0.2, RC Rate 1.2-2.0+) and lower expo (or none at all) provide a more direct, linear relationship between stick input and drone movement, essential for precise trick execution.
Betaflight Settings and Flight Modes Explained
- Rates: Define how fast your drone rotates. Cinematic uses lower rates for smooth motion, while freestyle uses higher rates for quick flips and rolls.
- Expo: Softens the stick response around the center. Cinematic uses more expo for fine control; freestyle uses less for direct, aggressive control.
- Filters: Reduce noise from motors and vibrations. Cinematic uses more aggressive filtering; freestyle balances filtering with responsiveness.
- Flight Modes:
- Acro (Rate Mode): The default for both cinematic and freestyle FPV. The drone holds its last commanded rotation rate, allowing for full 360-degree maneuvers. Essential for creative freedom.
- Angle Mode: Self-levels the drone. Useful for beginners or specific cinematic shots requiring extreme stability where the drone needs to return to level. Not used for freestyle.
- Horizon Mode: A hybrid, self-leveling at low stick inputs but allowing flips/rolls at full stick. Rarely used by experienced pilots.
Mastering the Sticks: Essential Flying Techniques & Practice
Both disciplines require immense stick skill, but the focus of that skill differs significantly.
Cinematic Flight Techniques: Composition, Flow, and Camera Movement
- Smooth Orbits: Flying a perfect circle around a subject, maintaining consistent altitude and distance.
- Tracking Shots: Following a moving subject (car, person, animal) while keeping it in frame, adjusting speed and direction seamlessly.
- Push-ins/Pull-outs: Slowly approaching or retreating from a subject, creating a sense of intimacy or grandeur.
- Reveal Shots: Starting with an obstructed view and slowly revealing a subject or landscape by flying around an obstacle.
- One-Takes: Executing an entire complex shot without cuts, demanding extreme precision and planning.
- Yaw Control: Using yaw (horizontal rotation) sparingly and smoothly for gentle turns, rather than aggressive banking.
- Planning: Pre-visualizing the shot, considering lighting, background, and the story you want to tell. Simulator practice is invaluable for rehearsing complex flight paths.
Freestyle Flight Techniques: Tricks, Gaps, and Acrobatic Flow
- Power Loops: A vertical loop over an object, often ending with a dive.
- Barrel Rolls: A horizontal roll around the drone's longitudinal axis.
- Inverted Flight: Flying upside down, often combined with inverted yaw spins.
- Dives: Aggressive descents, like the "Split-S" (half roll, half loop) or a "Rubik's Cube" dive through a structure.
- Gap Flying: Navigating tight spaces and narrow openings with speed and precision.
- Wall Rides: Flying parallel to a vertical surface, often brushing against it.
- Flow: Linking multiple tricks and maneuvers together seamlessly, creating a continuous, dynamic aerial ballet.
- Muscle Memory: Developing an intuitive feel for the drone's response, allowing for instantaneous reactions.
Effective Practice Drills for Both Disciplines
- Simulator Training: Essential for both! Velocidrone is highly praised for its realistic physics, while Liftoff offers diverse environments and a great community. DRL Simulator is excellent for competitive freestyle.
- For Cinematic:
- Constant Speed/Altitude Drills: Fly long, straight lines or perfect circles at a consistent speed and altitude.
- Object Tracking: Practice following a slow-moving car or person, keeping them perfectly centered.
- Smooth Yaw Turns: Execute turns using minimal roll, primarily with smooth yaw inputs.
- For Freestyle:
- Gate Practice: Set up gates or hoops and fly through them, gradually increasing speed and complexity.
- Figure-8s: Practice tight figure-8 patterns to improve cornering and control.
- Power Loop Progression: Start with wide, slow power loops and gradually tighten them around smaller objects.
- Gap Drills: Find natural gaps (tree branches, windows, fence posts) and practice flying through them.
The Hybrid Pilot: Can One Drone Rule Them All?
The idea of a single drone that excels at both cinematic and freestyle flying is appealing, but often involves compromises.
The Pros and Cons of a Versatile FPV Build
- Pros:
- Cost-effective: Only one drone to build and maintain.
- Convenience: No need to swap drones for different flight styles.
- Learning Curve: Allows a pilot to explore both styles without significant initial investment.
- Cons:
- Compromised Performance: A drone optimized for one will always outperform a hybrid in its specialty. A freestyle drone will struggle with buttery-smooth cinematic shots, and a cinematic rig will feel sluggish for aggressive tricks.
- Durability vs. Smoothness: The robust nature of freestyle builds often means less vibration damping for cinematic, while a delicate cinematic build is prone to damage in freestyle crashes.
- Weight: Carrying a heavy HD camera for cinematic adds weight, hindering freestyle agility.
Adapting Your Setup for Dual-Purpose Flying
If you insist on a single drone, here's how you can make a 5-inch freestyle quad more versatile:
- Adjustable Camera Angle: Use a mount that allows easy adjustment of your HD camera's tilt angle. Lower angles for cinematic, higher for freestyle.
- Swappable Props: Keep a set of lower-pitch props for smoother cinematic flights and higher-pitch props for freestyle.
- PID Profiles (if supported): Some flight controllers or Betaflight versions allow for multiple PID profiles. You could have one tuned for cinematic and another for freestyle, switching via an OSD menu or switch on your radio.
- Soft Mounting: Ensure your FC and motors are soft-mounted well to reduce vibrations for cinematic footage, even if it's primarily a freestyle frame.
Remember, even with these adaptations, a hybrid drone will always be a jack-of-all-trades, master of none.
When to Invest in Dedicated Rigs
As your skills grow and your flying goals become clearer, you'll likely reach a point where dedicated rigs become beneficial or even necessary:
- Professional Work: If you're doing paid cinematic work, a dedicated cinematic rig is non-negotiable for quality and reliability.
- Competitive Freestyle: For competitive freestyle or pushing the absolute limits of tricks, a purpose-built, lightweight, and powerful freestyle drone is essential.
- Frustration with Compromise: When you find yourself constantly wishing your drone was smoother for cinematic or punchier for freestyle, it's time to consider separate builds.
- Budget Allows: Once your budget permits, having specialized tools for specialized jobs always yields better results and greater satisfaction.
Choosing Your Path: Recommended Gear for Cinematic & Freestyle
Starting with the right gear can make a world of difference.
Top Drone Recommendations for Cinematic FPV
- Cinewhoops (3-5 inch): Excellent for proximity, indoor, and medium-speed outdoor shots.
- GEPRC CineLog35 V2: A popular 3.5-inch cinewhoop, capable of carrying a full-size GoPro. Known for its smooth flight characteristics.
- iFlight Protector25: A durable 2.5-inch option for smaller spaces.
- Flywoo CineRace20: A lightweight 2-inch cinewhoop, great for tight gaps.
- Long-Range/Mid-Range Quads (5-7 inch): For open spaces, tracking, and epic landscape shots.
- Lumenier QAV-S 7-inch: A classic long-range frame known for stability.
- Custom 5-inch builds with lower KV motors (e.g., 2207 1700-1900KV) and softer props (e.g., Gemfan 5136).
Top Drone Recommendations for Freestyle FPV
- 5-inch Freestyle Quads: The gold standard for acrobatic flying.
- GEPRC Mark5: A highly recommended and durable freestyle frame, excellent for aggressive flying.
- iFlight Nazgul Evoque F5D: Another top-tier freestyle drone, known for its robust build and performance.
- Apex HD (by ImpulseRC): A highly regarded, premium frame known for its exceptional durability and flight characteristics.
- Source One V5 (by Team BlackSheep): An open-source, affordable, and incredibly durable frame, perfect for beginners and advanced pilots alike.
Essential Accessories and Upgrades for Both Styles
Regardless of your chosen path, certain accessories are universally vital:
- FPV Goggles: Invest in quality digital (e.g., DJI Goggles 2/V2, Walksnail Avatar HD, HDZero Goggles) or analog goggles for the best immersive experience.
- Radio Transmitter: A reliable radio with good gimbals (e.g., Radiomaster Zorro, TX16S, Jumper T-Pro V2) is your direct link to the drone.
- Battery Charger: A smart charger (e.g., SkyRC Q200, ISDT K4) that can balance multiple batteries is crucial for battery health and safety.
- Spare Parts: Props, motors, VTX, antennas, and frame components are necessities, as crashes are inevitable.
- Tools: A basic toolkit with hex drivers, pliers, and soldering iron will be your best friend.
- Action Camera: For cinematic, a GoPro Hero series or DJI Action series is a must. For freestyle, a Caddx Peanut or Insta360 Go 3 offers lightweight HD recording.
Frequently Asked Questions About Cinematic vs. Freestyle FPV
What's the steepest learning curve: cinematic or freestyle?
While both require dedication, many find freestyle's aggressive maneuvers, constant risk of crashing, and the need for raw stick agility initially steeper. Cinematic demands precision, an "eye" for composition, and a deep understanding of smooth camera movement, which is a different kind of challenge. Mastering the art of cinematic FPV can be just as difficult as mastering complex freestyle tricks.
Can I use my freestyle drone for cinematic shots?
Yes, to an extent. A well-tuned 5-inch freestyle drone can capture decent cinematic footage, especially if you fly smoothly and use a high-quality action camera with good stabilization (like a GoPro with Reelsteady Go or Gyroflow). However, it won't be as inherently stable, carry heavier cameras as effectively, or provide the same level of vibration isolation as a dedicated cinematic rig. You'll likely encounter more "jello" or micro-vibrations in your footage.
How important is PID tuning for each style?
PID tuning is absolutely critical for both. For cinematic, it ensures buttery-smooth footage free from jitters, oscillations, and unwanted drift, making the drone feel like an extension of your creative vision. For freestyle, it dictates how responsive, "locked-in," and stable your drone feels during aggressive maneuvers, allowing for precise trick execution and recovery. Different styles require distinctly different tuning philosophies to achieve optimal performance.
What simulators are best for practicing these styles?
Simulators like DRL Simulator, Velocidrone, and Liftoff offer excellent environments for practicing both styles. Velocidrone is often praised for its highly realistic physics, making it great for practicing precise stick inputs for both cinematic flow and freestyle tricks. Liftoff offers diverse, visually appealing environments and a strong community. DRL Simulator is fantastic for competitive freestyle and learning aggressive lines. Investing in a good simulator and spending consistent time on it is the fastest way to improve.
Do I need different batteries for cinematic vs. freestyle?
Often, yes. Cinematic drones, especially those carrying heavier cameras or designed for long-range, might prefer higher mAh batteries (e.g., 6S 2200-4000mAh) for extended flight times, even if they have a slightly lower C-rating. Freestyle drones, however, prioritize high C-ratings (e.g., 6S 1300-1500mAh 100C+) for maximum power output and minimal voltage sag during aggressive maneuvers, even if it means shorter flight times. Using a low C-rating battery for freestyle can lead to poor performance and even battery damage.
Conclusion
Cinematic FPV focuses on smooth, storytelling footage with stable builds and precise flight, while freestyle FPV thrives on acrobatic expression with durable, agile drones. Each style demands specific hardware, tuning, and flying techniques. While a hybrid approach is possible, dedicated rigs often yield the best results for their respective disciplines. Ultimately, the choice depends on your creative vision and flying goals.
Whether your passion lies in crafting visually stunning narratives or pushing the limits of aerial acrobatics, the world of FPV offers endless possibilities. By understanding the nuances of cinematic vs. freestyle FPV, you can make informed decisions about your gear, practice, and ultimately, your flight style. So, which path will you choose, or will you dare to master both? Grab your goggles, hit the sticks, and start your FPV journey today!
Source: droneracing.fai.org
droneracing.fai.org