Cinematic FPV Orbit Techniques: Mastering the 3D Glide Path
A masterclass guide on executing orbital paths for cinematic capture. Learn mechanical tilting synchronization, 180-degree shutter ND filtering calculations, propwash avoidance, and Gyroflow post-production workflows.
The Allure of the Perfect Arc: Why Cinematic Orbits Captivate
There's an undeniable magic to the cinematic FPV orbit. It's more than just flying in a circle; it's a ballet of precision, a fluid dance around a subject that tells a story without words. This maneuver, when executed flawlessly, transcends mere drone footage, transforming into a captivating visual experience that highlights the subject with unparalleled grace and immersion. For any FPV pilot aspiring to elevate their craft from raw freestyle to refined artistry, mastering the cinematic orbit is a crucial milestone.
Beyond the Drone Shot: Defining the 'Cinematic' in FPV Orbits
What truly differentiates a "cinematic" orbit from a casual circle? It's the intentionality, the smoothness, and the unwavering focus on the subject. Cinematic FPV isn't about showcasing the drone's agility; it's about using that agility as a brush to paint a scene. A truly cinematic orbit features consistent speed, a stable altitude, and a subject held perfectly in the frame, creating a sense of professional production value often associated with Hollywood-grade camera work. Think less "action cam" and more "feature film."
The Technical Challenge: Why Orbits Demand Precision
Executing a perfect orbit is deceptively difficult. It requires a nuanced understanding of your quad's dynamics, coupled with highly coordinated, almost subconscious stick inputs. Unlike a simple straight line or a dive, an orbit demands continuous, simultaneous adjustments across all axes: yaw, roll, pitch, and throttle. The challenge lies in harmonizing these inputs to create a seamless, consistent arc while battling external factors like wind and maintaining visual lock on your subject. It's a true test of a pilot's control and spatial awareness.
Your FPV Canvas: Understanding the Subject-Centric Approach
At the heart of every cinematic orbit is the subject. Whether it's a person, a landmark, a car, or a natural formation, the orbit's purpose is to showcase it from every angle, revealing its form and context. This subject-centric approach dictates your flight path, speed, and framing. Before even arming, mentally trace the perfect arc around your chosen subject, considering its most compelling features and how the light interacts with them throughout the orbit. This pre-visualization is the first step in crafting a truly impactful shot.
Deconstructing the Core Mechanics: The Quad's Perspective
To fly a perfect orbit, you must first understand how your quad interprets your commands and how its physical properties influence its movement. We're talking about more than just pushing sticks; it's about understanding the forces at play.
The Axis of Control: Yaw, Roll, Pitch, and Throttle in Harmony
An FPV quad operates on four primary control axes:
- Yaw: Rotation around the vertical axis (like spinning on a turntable). This is your primary tool for keeping the subject centered.
- Roll: Rotation around the longitudinal axis (tilting left or right). This generates the horizontal force needed to turn.
- Pitch: Rotation around the lateral axis (tilting forward or backward). This controls forward/backward movement and can influence speed.
- Throttle: Controls the overall thrust, dictating altitude and vertical momentum.
For an orbit, these axes don't work in isolation. You're constantly blending them. For instance, to turn left, you'll apply left roll, but to maintain altitude and a consistent arc, you'll also need to adjust throttle, and crucially, use yaw to keep the camera pointed at your subject. This intricate dance is where the magic (and the challenge) lies.
The Invisible String: Maintaining Consistent Distance and Speed
Imagine your quad is tethered to your subject by an invisible, inelastic string. Your goal is to keep that string taut and at a constant length while orbiting. This means maintaining a precise distance and speed throughout the entire arc. Inconsistent distance leads to a "wobbly" or "drifting" look, while varying speed results in jerky, unprofessional footage. This consistency is achieved through minute, continuous adjustments to throttle, roll, and pitch, counteracting any tendency for the quad to drift inward or outward. Fresh battery packs are essential here; a sagging battery can make consistent throttle response difficult, especially with a power-hungry 5-inch quad like an iFlight Nazgul Evoque F5 or a GEPRC Mark5.
Anticipation and Flow: Reading Your Subject's Movement
While many cinematic orbits are around stationary objects, orbiting a moving subject (like a car or a person walking) adds another layer of complexity. Here, anticipation is key. You need to predict your subject's path and speed, constantly adjusting your orbit to match their movement. This creates a dynamic, flowing shot that feels organic rather than stiff. It's less about reacting and more about flowing with the subject, often requiring slight modifications to your orbital radius or speed mid-shot.
Precision Stick Inputs: Orchestrating the Fluid Dance
This is where theory meets practice. Mastering the cinematic orbit comes down to incredibly precise and synchronized stick inputs.
Yaw Control: The Centering Maestro – Keeping the Subject Locked
Yaw is arguably the most critical input for a cinematic orbit. While your quad is rolling and pitching to create the arc, your yaw stick is constantly, subtly adjusting to keep the subject precisely in the center of your frame.
- The Technique: As you initiate your roll (say, to the left), your quad's nose will naturally want to point slightly outward from the center of the orbit. You must simultaneously apply a small, continuous amount of opposite yaw (right yaw in this case) to counteract this drift and keep the camera lens pointed directly at your subject.
- Common Pitfall: Too much or too little yaw will cause your subject to drift out of frame or appear to "spin" around the center. It needs to be a smooth, consistent input that matches your orbital speed.
- Pilot Tip: Think of your yaw stick as a fine-tuning knob for your camera's aim. Small, constant pressure is key, not jerky corrections.
Roll & Pitch: Sculpting the Arc and Angle – Crafting the Orbital Path
Roll and pitch work in tandem to define the shape and angle of your orbit.
- Roll for the Turn: To initiate a turn, you apply roll in the direction you want to orbit. The amount of roll dictates the sharpness of your turn – more roll for a tighter radius, less for a wider arc.
- Pitch for Speed and Drift: Pitch primarily controls your forward/backward speed. While orbiting, you'll often have a slight forward pitch to maintain momentum. However, pitch can also be used subtly to correct for inward or outward drift. If you're drifting inward, a tiny bit of backward pitch can push you slightly out. If drifting outward, a touch of forward pitch can pull you in. This is a very advanced and sensitive correction.
- Synchronicity: The roll input creates the banking angle, generating the centripetal force needed for the turn. Your pitch input then adjusts the forward velocity along that banked path. Without enough roll, you'll drift outward; without enough forward pitch, you'll lose momentum and drop.
- Pilot Tip: Start with a very gentle roll and pitch, establishing a wide, slow orbit. Gradually tighten the radius and increase speed as your stick coordination improves.
Throttle Management: The Altitude Anchor – Consistent Height and Momentum
Throttle is your altitude and momentum control. For a perfect cinematic orbit, your throttle input needs to be incredibly consistent.
- Counteracting Roll-Induced Drop: When you apply roll, your quad loses some vertical thrust component. You must subtly increase throttle to compensate for this and maintain a consistent altitude. The steeper your roll angle, the more throttle you'll need.
- Maintaining Momentum: Consistent throttle also ensures consistent speed around the orbit. Any fluctuations will result in a "wobbly" or "surging" effect.
- Pilot Tip: Think of throttle as a baseline setting. Once you've established your desired altitude and orbital speed, make only the tiniest, most imperceptible adjustments to keep it locked. Avoid large, sudden throttle changes. Using a fresh Tattu R-Line V5 1400mAh 6S or similar high-C-rating battery will help maintain consistent power delivery.
The Synchronicity: Blending Inputs for Unrivaled Smoothness
The true art of the cinematic orbit lies in the seamless blending of these inputs. It's not about executing them sequentially, but simultaneously and proportionally.
- The Mental Model: Imagine you're drawing a perfect circle with your quad. Your roll determines the curve, your pitch determines the speed along that curve, your throttle maintains your altitude, and your yaw keeps the pencil (camera) pointed directly at the center of the circle.
- Practice: This takes hours of practice. Start with a slow, wide orbit, focusing on making each input smooth and continuous. Gradually increase speed and decrease radius as your muscle memory develops. The goal is for your hands to move as one, orchestrating a fluid, uninterrupted motion.
Camera Angles & Settings: Framing the Narrative
Beyond stick inputs, your camera setup plays a vital role in the final cinematic look.
FOV and Lens Choice: Wide Vistas vs. Intimate Perspectives
- Wide FOV (e.g., GoPro SuperView/Wide): Ideal for showcasing the environment around your subject, creating a grand, immersive feel. Great for large landscapes or architectural orbits. However, it can make your subject appear smaller if you're not close enough.
- Narrower FOV (e.g., GoPro Linear/Narrow): Excellent for bringing the subject closer and emphasizing detail. Creates a more intimate, focused perspective. Requires tighter proximity for impact.
- Lens Choice (for interchangeable lenses): While most FPV pilots use fixed-lens action cameras, some specialized cinematic drones (like the DJI Avata or custom builds with specific mounts) can accommodate different lenses. A wider lens (e.g., 2.8mm) gives a broader view, while a slightly narrower one (e.g., 2.5mm or even 2.3mm) can provide a more focused, less distorted image, especially for proximity.
Tilt Angle: Dynamic Horizons and Subject Emphasis
Your camera's tilt angle (up-tilt) is crucial.
- Standard Up-tilt (20-30 degrees): Common for general flying, but for orbits, it can lead to too much sky or ground, or a subject that's too low in the frame.
- Reduced Up-tilt (10-20 degrees): Often preferred for cinematic orbits. By reducing the up-tilt, you bring the horizon line lower in the frame, giving more prominence to your subject and the surrounding environment. This also allows for smoother yaw adjustments without the horizon line dipping or rising dramatically.
- Dynamic Horizons: Experiment with slight variations in tilt. A very low tilt can make the subject feel imposing, while a slightly higher tilt might emphasize speed or height.
Post-Stabilization Considerations: Gyroflow and Beyond for Glassy Footage
Even the smoothest pilot will benefit from post-stabilization.
- Gyroflow: This open-source software has revolutionized FPV stabilization. It uses the drone's internal gyroscope data (logged by the flight controller) to perfectly de-shake recorded footage from cameras like the GoPro Hero 9/10/11/12, DJI Action 3/4, Caddx Peanut, or RunCam Thumb Pro. The result is incredibly smooth, "glassy" footage that looks like it was shot on a gimbal.
- ReelSteady GO (now integrated into GoPro Player): GoPro's proprietary stabilization software for their cameras. Also highly effective but specific to GoPro footage.
- Workflow: Always record with Gyrodata enabled on your camera (if supported) and log blackbox data on your flight controller. This data is essential for Gyroflow to work its magic, transforming good footage into incredible footage.
Mastering Orbit Variations: Beyond the Basic Circle
Once you've nailed the basic flat orbit, it's time to explore more dynamic variations.
The Proximity Orbit: Intimacy in Motion and Enhanced Drama
This is where FPV truly shines. A proximity orbit involves flying incredibly close to your subject, often weaving through or around obstacles.
- Increased Stakes: The closer you are, the more pronounced any slight wobble or inconsistency becomes. This demands even greater stick precision and confidence.
- Enhanced Drama: The intimacy created by proximity draws the viewer in, making the subject feel more tangible and the shot more impactful.
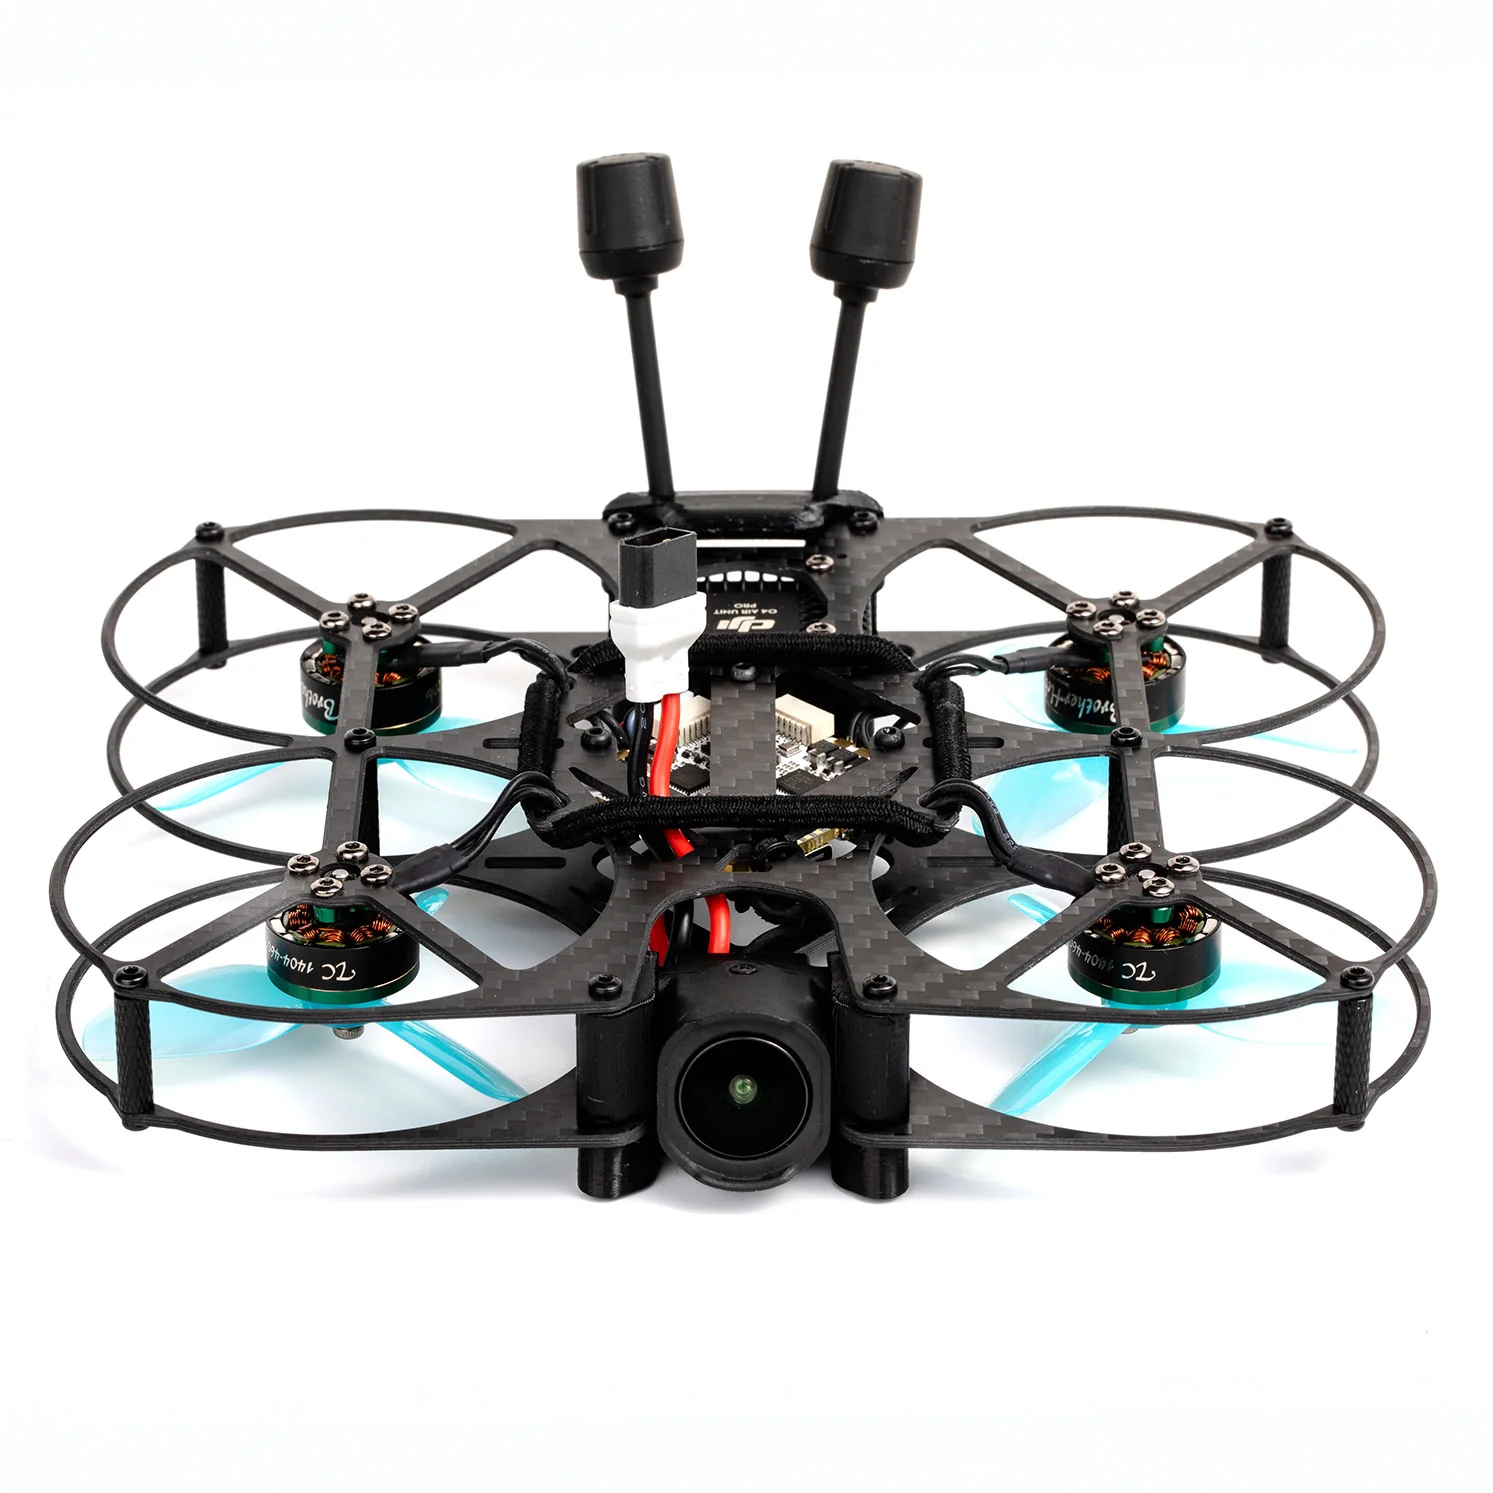
- Pilot Tip: Always start wider and gradually tighten your radius. Fly a 3.5-inch cinewhoop like a Cinelog35 for indoor or very tight proximity, or a well-tuned 5-inch for outdoor close-ups. Be acutely aware of prop wash and environmental factors.
Ascending & Descending Spirals: Adding Dynamic Verticality
Instead of a flat circle, these orbits change altitude as they go around the subject.
- Ascending Spiral: Gradually gain altitude as you orbit, revealing more of the subject's top or the surrounding landscape.
- Descending Spiral: Slowly lose altitude, creating a sense of descent or focusing on details at the base of the subject.
- Technique: Integrate a very subtle, consistent increase or decrease in throttle input into your regular orbital stick movements. The key is consistency in the vertical movement, avoiding jerky ups or downs.
The Reverse Orbit: Unconventional Perspectives and Creative Transitions
A reverse orbit is simply orbiting in the opposite direction you normally would.
- Breaking the Mold: It can feel unnatural at first but offers a fresh perspective.
- Creative Transitions: Useful for transitioning between shots or when you need to change direction smoothly without stopping your orbital motion.
- Pilot Tip: Practice both clockwise and counter-clockwise orbits equally. Developing ambidextrous control is a hallmark of advanced FPV piloting.
Troubleshooting & Refinement: Polishing Imperfections
Even seasoned pilots encounter issues. Learning to diagnose and correct them is part of the journey.
Diagnosing Jerky Movements and Wobbles: Stick Input Analysis
- Cause: Often due to inconsistent stick inputs – sudden, large corrections rather than smooth, continuous adjustments. Can also be slight stick "twitching" or PID settings that are too aggressive or too soft.
- Solution: Focus on gentler, more gradual stick movements. Record your stick inputs if your radio supports it (e.g., Radiomaster TX16S logs). Analyze your blackbox data for sudden spikes in control inputs. If the quad itself feels unstable, check PID tuning, but usually, it's pilot input. Ensure your rates are comfortable – not too high for precision work.
Drifting and Inconsistent Distance: Recalibrating Your Mental Model
- Cause: Insufficient or excessive roll/pitch for the desired arc and speed. Lack of proper throttle compensation for roll. External factors like wind.
- Solution: Reinforce the "invisible string" mental model. Actively feel the quad's tendency to drift. If it drifts outward, you need more roll or slightly less forward pitch. If it drifts inward, you need less roll or slightly more forward pitch. Consciously adjust throttle to maintain consistent altitude, especially during turns. Practice in calm conditions first.
Subject Loss: The Art of Peripheral Vision and Anticipation
- Cause: Inadequate yaw control, or simply losing track of the subject in your goggles.
- Solution: This is where peripheral vision comes into play. While your eyes are fixed on the subject, your brain needs to process the quad's overall trajectory and position relative to the subject. Anticipate the subject's position as you orbit. If you're losing it, slow down your orbit and widen your radius until you regain control. Use your yaw stick as a fine adjustment tool, not a blunt instrument.
The Path to Mastery: Practice Methodologies for Flawless Orbits
Mastery isn't accidental; it's the result of deliberate, structured practice.
Simulator Drills: Building Muscle Memory in the Virtual Realm
Simulators like VelociDrone, DRL Simulator, or Liftoff are invaluable.
- Repetition Without Risk: Practice hundreds of orbits without fear of crashing.
- Focused Training: Many simulators offer specific "gate" or "track" modes that can be adapted for orbit practice, forcing you to maintain a consistent path.
- Pilot Tip: Set up a simple object in the simulator and spend an entire session doing nothing but orbits around it, varying speed and radius. Pay close attention to your stick inputs.
Real-World Progression: From Wide to Tight, Slow to Fast
- Start Simple: Begin with a large, stationary object in an open field. Fly wide, slow orbits.
- Gradual Refinement: As you gain confidence, slowly decrease the orbital radius and increase speed.
- Introduce Complexity: Once comfortable, add variations like ascending/descending spirals or proximity elements.
- Pilot Tip: Don't be afraid to record every flight. Reviewing your footage is the ultimate feedback loop.
Analyzing Your Footage: The Ultimate Feedback Loop for Improvement
- Critical Eye: Watch your recorded footage with a critical eye. Identify precisely where the orbit becomes jerky, where the subject drifts, or where altitude fluctuates.
- Compare to Ideal: Compare your footage to examples of perfect cinematic orbits. What are the subtle differences?
- Self-Correction: Use these observations to inform your next practice session. Focus on correcting one specific flaw at a time. This iterative process is how true mastery is achieved.
Frequently Asked Questions About Cinematic FPV Orbits
Here, we address some of the most common questions pilots have when tackling cinematic orbits.
How do I maintain a consistent distance and speed during an FPV orbit?
Maintaining consistent distance and speed is achieved through a delicate balance of roll, pitch, and throttle. Your roll angle determines the sharpness of your turn; more roll for a tighter turn. Your pitch input dictates your forward momentum along that arc. Crucially, as you roll, you must increase throttle proportionally to counteract the loss of vertical lift and maintain altitude. Consistent throttle input is key to consistent speed. Think of it as a constant, gentle push on the throttle while making minute adjustments to roll and pitch to keep the "invisible string" taut.
What are the optimal stick inputs for a smooth cinematic FPV orbit?
Optimal stick inputs are continuous, subtle, and simultaneous.
- Yaw: Constant, gentle opposite yaw to your roll direction to keep the subject centered.
- Roll: Consistent roll input in the direction of the orbit to maintain the arc.
- Pitch: Slight forward pitch to maintain momentum, with very small adjustments to correct inward/outward drift.
- Throttle: Constant throttle, slightly increased during the roll, to maintain altitude and speed. The key is to avoid jerky, reactive inputs. Anticipate the quad's movement and apply smooth, proportional pressure across all sticks.
How can I prevent jerky movements or 'wobbles' when performing FPV orbit shots?
Jerky movements and wobbles often stem from inconsistent or abrupt stick inputs. To prevent them:
- Smoothness over Speed: Prioritize slow, smooth orbits initially.
- Fine Motor Control: Focus on making tiny, continuous adjustments rather than large, sudden corrections.
- PID Tuning: Ensure your PID settings are well-tuned for smoothness, not just aggressive freestyle. A slightly softer tune can be beneficial for cinematic work.
- Fresh Battery: A healthy battery ensures consistent power delivery, which helps the flight controller maintain stability.
- Wind Awareness: Avoid strong, gusty winds until your technique is rock-solid.
What camera settings and angles are best for cinematic FPV orbits?
- Resolution & Frame Rate: 4K at 30/60fps is standard for cinematic quality. Higher frame rates (e.g., 60fps) allow for smoother slow-motion in post.
- FOV: Experiment with Wide or Linear modes on your action camera (GoPro Hero, DJI Action) depending on whether you want to emphasize the environment or the subject. Linear reduces distortion.
- Tilt Angle: A slightly reduced camera up-tilt (10-20 degrees) often works best, bringing the horizon lower in the frame and giving more prominence to your subject.
- Protune/Color Profile: Use a flat color profile (e.g., GoPro Flat, DJI D-Cinelike) for maximum flexibility in post-production color grading.
- Shutter Speed: Aim for 1/60s (for 30fps) or 1/120s (for 60fps) with an ND filter for natural motion blur.
- Stabilization: Always record with Gyrodata for Gyroflow or use in-camera stabilization like GoPro HyperSmooth or DJI RockSteady (though Gyroflow with blackbox data is superior for FPV).
How do I keep the subject perfectly centered throughout an FPV orbital shot?
Keeping the subject perfectly centered is primarily the domain of your yaw stick. As your quad rolls to create the orbit, its nose will naturally want to point away from the subject. You must continuously apply opposite yaw (e.g., if orbiting left, apply gentle right yaw) to counteract this and keep the camera pointed directly at the subject. It requires constant, subtle micro-adjustments to the yaw stick, like a skilled photographer tracking a moving target with their lens. Practice this yaw control in isolation, trying to keep a stationary object centered while slowly circling it.
Conclusion: Elevate Your FPV Storytelling
The cinematic FPV orbit is more than just a trick; it's a fundamental storytelling tool that can profoundly impact the emotional resonance of your footage. It demands patience, precision, and a deep understanding of your machine, but the rewards are truly spectacular.
Recap: The Synergy of Skill and Vision
We've covered the critical elements: the coordinated dance of yaw, roll, pitch, and throttle; the strategic choice of camera angles and settings; the dynamic variations that add flair; and the systematic troubleshooting and practice methodologies that pave the way to mastery. Remember, it's the synergy of technical skill and creative vision that transforms a mere flight path into a compelling cinematic narrative.
Your Next Flight: Applying These Techniques
Don't just read about it – go fly it! Take these insights to your next session. Start slow, focus on one aspect at a time, and gradually build your proficiency. Be patient with yourself; the perfect orbit doesn't happen overnight.
The FPV ORACLE's Challenge: Share Your Masterpiece
We challenge you, the FPV community, to put these techniques into practice. Capture your most fluid, most captivating cinematic orbits. Share your masterpieces with us at fpvlovers.com.tr and show the world the beauty and precision of truly cinematic FPV. The skies are your canvas; go paint your story.
Copyright-safe media generated locally by FPVLovers