FPV Drone Anatomy: The Complete Structural & Electrical Guide
A complete beginner-first structural and electrical breakdown of a standard FPV drone, explaining how frames, motors, ESCs, flight controllers, receivers, and VTX interact.
FPV Drone Anatomy: The Complete Structural & Electrical Guide
Unpacking the Beast: Why Understanding Drone Anatomy Elevates Your FPV Game
Ever wondered what truly makes your FPV drone a high-flying, agile marvel? It's more than just a collection of parts; it's a meticulously engineered ecosystem where every component plays a critical role in a symphony of flight. This isn't merely a parts list; it's an exploration into the why each element exists, how it interacts, and what impact its selection has on the overall flight envelope and reliability.
For the intermediate pilot, understanding the intricate internal structure of your quadcopter isn't just academic; it's empowering. It transforms you from a mere operator into a diagnostician, a tuner, and an architect of your own flying experience. You'll gain the insight to troubleshoot complex issues, optimize performance beyond stock settings, and make informed choices for future builds. Prepare to dive deep into the intricate architecture of FPV quadcopters, transforming your understanding from basic assembly to true mastery of your machine's inner workings. Let's peel back the layers and reveal the genius behind the flight.
The Skeleton and the Wings: Frame Architecture and Propeller Dynamics
Frame Designs: The Backbone of Your Build
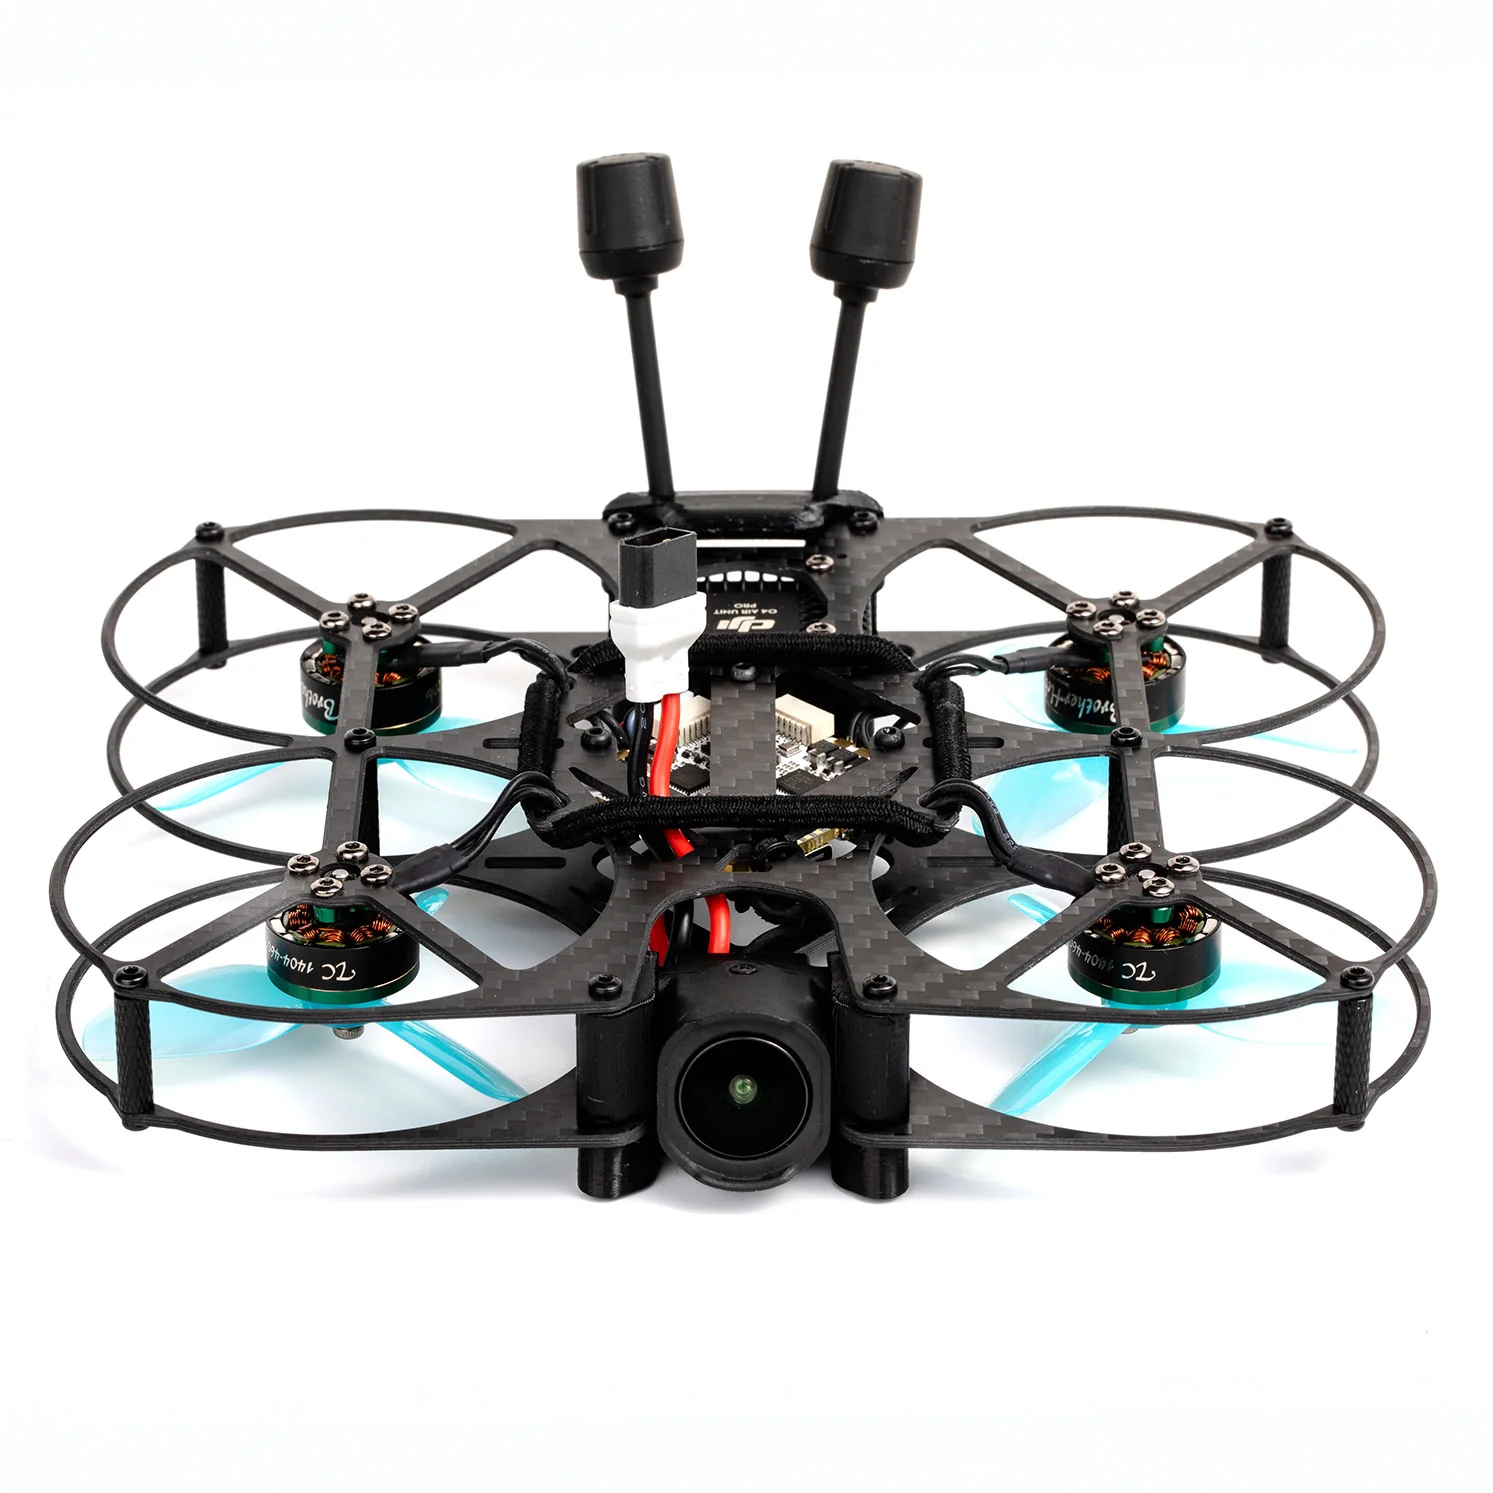
The drone frame is undeniably the backbone of your build. It's more than just a mounting platform; it dictates your drone's rigidity, weight distribution, vibration characteristics, and crucially, its crash resilience.
Common frame types include:
- True-X: All motors are equidistant from the center, forming a perfect 'X'. This design offers balanced thrust distribution and predictable flight characteristics, often favored for freestyle and racing due to its symmetrical feel. Frames like the Apex HD or iFlight Nazgul Evoque often utilize variations of this.
- Stretched-X: The front-to-back motor distance is longer than the side-to-side. This provides a longer moment arm for pitch, leading to better stability and smoother control during fast forward flight and high-speed turns, making it a favorite among racers seeking superior pitch authority.
- H-Frame: Motors are arranged in an 'H' shape, with longer arms extending forward and backward. This design can offer more space for components and often keeps propellers further out of the FPV camera's view, which is advantageous for cinematic applications (e.g., GEPRC Cinelog series).
- Deadcat/Squashed-X: A variant of the H-frame where the front arms are significantly swept back. This design prioritizes keeping props entirely out of the FPV camera's view, ideal for capturing unobstructed footage, but can sometimes compromise agility slightly compared to a true-X.
Material choices are paramount. Carbon fiber is the industry standard due to its incredible strength-to-weight ratio. The thickness of the carbon fiber (e.g., 5mm arms vs. 6mm) directly impacts durability against crashes. Thicker arms generally mean more weight but significantly improved resilience. However, carbon fiber is conductive and can block radio signals, necessitating careful antenna placement. Some frames incorporate composite materials or even aluminum parts for specific stress points. Understanding the structural integrity here is paramount for a stable flight platform that can withstand the inevitable impacts of FPV flying.
Propellers: Translating Power into Thrust
Often underestimated, propellers are the unsung heroes converting rotational energy into lift and thrust. They are a critical interface between your motor's power and the air.
Key propeller specifications include:
- Diameter: The overall length of the prop from tip to tip (e.g., 5-inch, 7-inch). Larger diameters generally produce more thrust but require more power and spin slower.
- Pitch: The theoretical distance the propeller would move forward in one revolution if it were moving through a solid (e.g., 3.5, 4.0, 5.0). Higher pitch equals more aggressive bite into the air, leading to higher top speeds but potentially less efficiency at lower RPMs and more current draw.
- Blade Count: The number of blades (e.g., 2-blade, 3-blade, 4-blade, 5-blade). More blades generally provide more thrust and smoother flight at lower RPMs but can be less efficient and noisier. A common choice for freestyle is a 3-blade prop like the Gemfan Freestyle 3 or HQProp R38.
- Material Composition: Most FPV props are made from durable polycarbonate or nylon composites, designed to flex and absorb impact rather than shatter. Different blends offer varying degrees of stiffness and durability.
The subtle art of prop selection involves matching your motor's KV (discussed later) and battery voltage for optimal performance. A higher KV motor on a higher cell count battery (e.g., 6S) typically benefits from a lower pitch prop to keep current draw manageable and avoid over-stressing the motors. Conversely, a lower KV motor might prefer a higher pitch prop to generate sufficient thrust. Experimentation with different props (e.g., Azure Power, HQProp, Gemfan) is key to finding the perfect balance of efficiency, responsiveness, and noise for your flying style.
Mounting and Dampening: Mitigating Vibrations
Vibrations are the nemesis of clean FPV footage and stable flight. They can wreak havoc on your flight controller's gyroscopic sensors, leading to 'noisy' data, poor flight performance, and even desyncs.
- Motor Mounting: Ensure motor screws are appropriately sized and tightened snugly but not over-tightened, which can warp the motor bell. Using thread locker (Loctite blue) on motor screws is a common practice to prevent them from backing out mid-flight.
- Soft-Mounting Flight Controllers: This is crucial. Most modern FCs are designed to be soft-mounted using M3 rubber grommets or silicone standoffs. These absorb high-frequency vibrations from the frame, providing the IMU (Inertial Measurement Unit) with a cleaner signal. A cleaner signal means more accurate flight control and less need for aggressive software filtering, resulting in a more direct and responsive flight feel.
- Dampening Materials: Strategic use of foam or silicone pads can help isolate other sensitive components like gyros on a separate board (if applicable) or even the FPV camera from frame vibrations, improving video quality.
- Cable Management: Securely routing wires to prevent them from vibrating against the frame also contributes to overall vibration reduction. Loose wires can also chafe and short.
Proper isolation of sensitive electronics can drastically improve flight performance, reduce prop wash oscillations, and prolong component lifespan by reducing stress on solder joints and chips.
The Heart and Muscles: Power Distribution, ESCs, and Motors
LiPo Batteries: The Lifeblood of Your Quad
Lithium Polymer (LiPo) batteries are the powerhouse of your FPV drone, known for their high energy density and impressive discharge rates. Understanding their specifications is fundamental:
- Cell Count (S-rating): Denotes the number of cells in series (e.g., 4S means 4 cells * 3.7V/cell nominal = 14.8V; 6S means 6 cells = 22.2V). Higher S-ratings provide more voltage, leading to higher motor RPMs and more power, but require lower KV motors to stay within safe operating limits.
- Capacity (mAh): Milliampere-hours, indicating how much charge the battery can hold. Higher mAh means longer flight times but also more weight. Common sizes for 5-inch quads are 1300mAh to 1500mAh for 4S, and 1050mAh to 1300mAh for 6S.
- Discharge Rate (C-rating): Represents how quickly the battery can safely discharge its energy. A 100C rating on a 1300mAh battery means it can theoretically deliver 130 Amps continuously (1.3 Ah * 100C). Higher C-ratings are crucial for FPV drones that demand bursts of high current, ensuring minimal voltage sag under load. Look for reputable brands like Tattu R-Line, GNB, or CNHL.
Safety protocols are non-negotiable: Always charge LiPos on a fire-resistant surface, preferably in a LiPo safety bag (e.g., ISDT Safe Bag), and never leave them unattended. Store them at 'storage voltage' (3.8V/cell) to prolong their lifespan. Over-discharging or over-charging can be dangerous.
Electronic Speed Controllers (ESCs): The Motor's Maestro
Electronic Speed Controllers (ESCs) are the critical link between the flight controller's commands and the motors' rotation. Each motor has its own ESC, or they can be integrated onto a single 4-in-1 board.
- Architecture: ESCs consist of a microcontroller and MOSFETs (Metal-Oxide-Semiconductor Field-Effect Transistors) that rapidly switch the current to the motor windings, creating the rotating magnetic field that spins the motor.
- Firmware: Modern FPV ESCs primarily use BLHeli_32 or AM32 firmware. These firmwares offer advanced features like bidirectional DShot, variable PWM frequency, and excellent motor synchronization. BLHeli_32, for instance, supports 32-bit microcontrollers, enabling higher RPMs and more precise control than older 8-bit versions.
- Key Features:
- Current Sensing: Many ESCs (especially 4-in-1s) provide current data back to the FC, crucial for OSD and battery monitoring.
- DShot Protocols: Digital communication protocols (e.g., DShot600, DShot1200) send motor commands from the FC to the ESCs. DShot is highly noise-immune and provides precise timing, eliminating the need for ESC calibration and improving responsiveness over older analog protocols like OneShot or MultiShot.
- Active Braking (Damped Light): This feature rapidly slows down the motor by shorting its phases, leading to quicker motor response and tighter control.
Understanding how ESCs precisely control motor speed and direction is key to achieving the responsive, locked-in flight feel that FPV pilots crave. Quality ESCs like the Hobbywing XRotor or T-Motor Velox series ensure reliable power delivery.
Brushless Motors: The Powerhouse of Propulsion
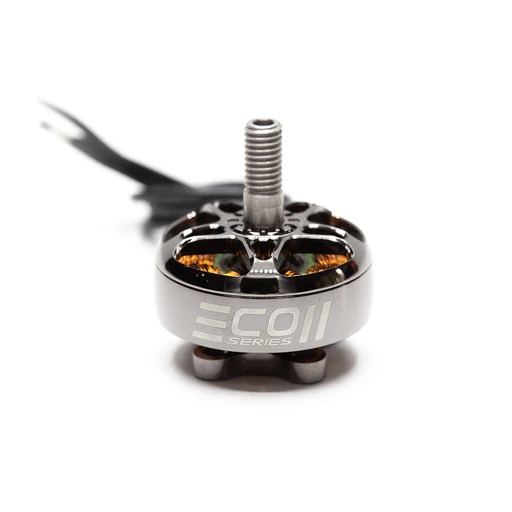
Brushless DC motors are the workhorses of FPV drones, converting electrical energy into mechanical rotation. Unlike brushed motors, they use electronic commutation (via the ESC) instead of physical brushes, making them more efficient, powerful, and durable.
- KV Rating: Kilovolts per RPM. This is the motor's RPM per volt when unburdened. A 1700KV motor on a 6S battery (22.2V nominal) will spin at roughly 37,740 RPM (1700 * 22.2). Higher KV motors spin faster but draw more current; lower KV motors are more efficient at generating torque.
- Stator Size: Indicated by two numbers (e.g., 2207, 2306). The first two digits are the stator's diameter in mm, the last two are its height in mm. Larger stators generally mean more torque and power, but also more weight. A common 5-inch freestyle motor is a 2207 or 2306.
- Magnet Configuration: Stronger magnets (e.g., N52H) provide more torque and efficiency.
- Bearings: High-quality bearings are essential for smooth operation and longevity.
Selecting motors that perfectly complement your propeller and battery setup is vital for maximum thrust and agility. For a 6S 5-inch freestyle build, a 2207 or 2306 motor with a KV around 1700-1900 is common. For 4S, a KV of 2400-2700 is typical. Brands like Emax ECO II, T-Motor F-series, and BrotherHobby Returner are popular choices for their performance and reliability.
Power Distribution & Voltage Regulation: The Electrical Grid
The Power Distribution Board (PDB) or, more commonly now, an integrated power system on a 4-in-1 ESC or flight controller, is the central electrical hub.
- Current Flow: Current flows from the LiPo battery (typically via an XT60 connector) to the PDB/integrated system. From there, the full battery voltage goes directly to the ESCs to power the motors.
- Voltage Regulators (BECs): Sensitive electronics like the Flight Controller, FPV Camera, and Video Transmitter cannot handle the full LiPo voltage. Battery Eliminator Circuits (BECs) are integrated voltage regulators that step down the battery voltage to common operating levels (e.g., 5V for the FC and receiver, 9V or 12V for the VTX and camera). These BECs are crucial for providing stable and clean power, free from voltage spikes that could damage components.
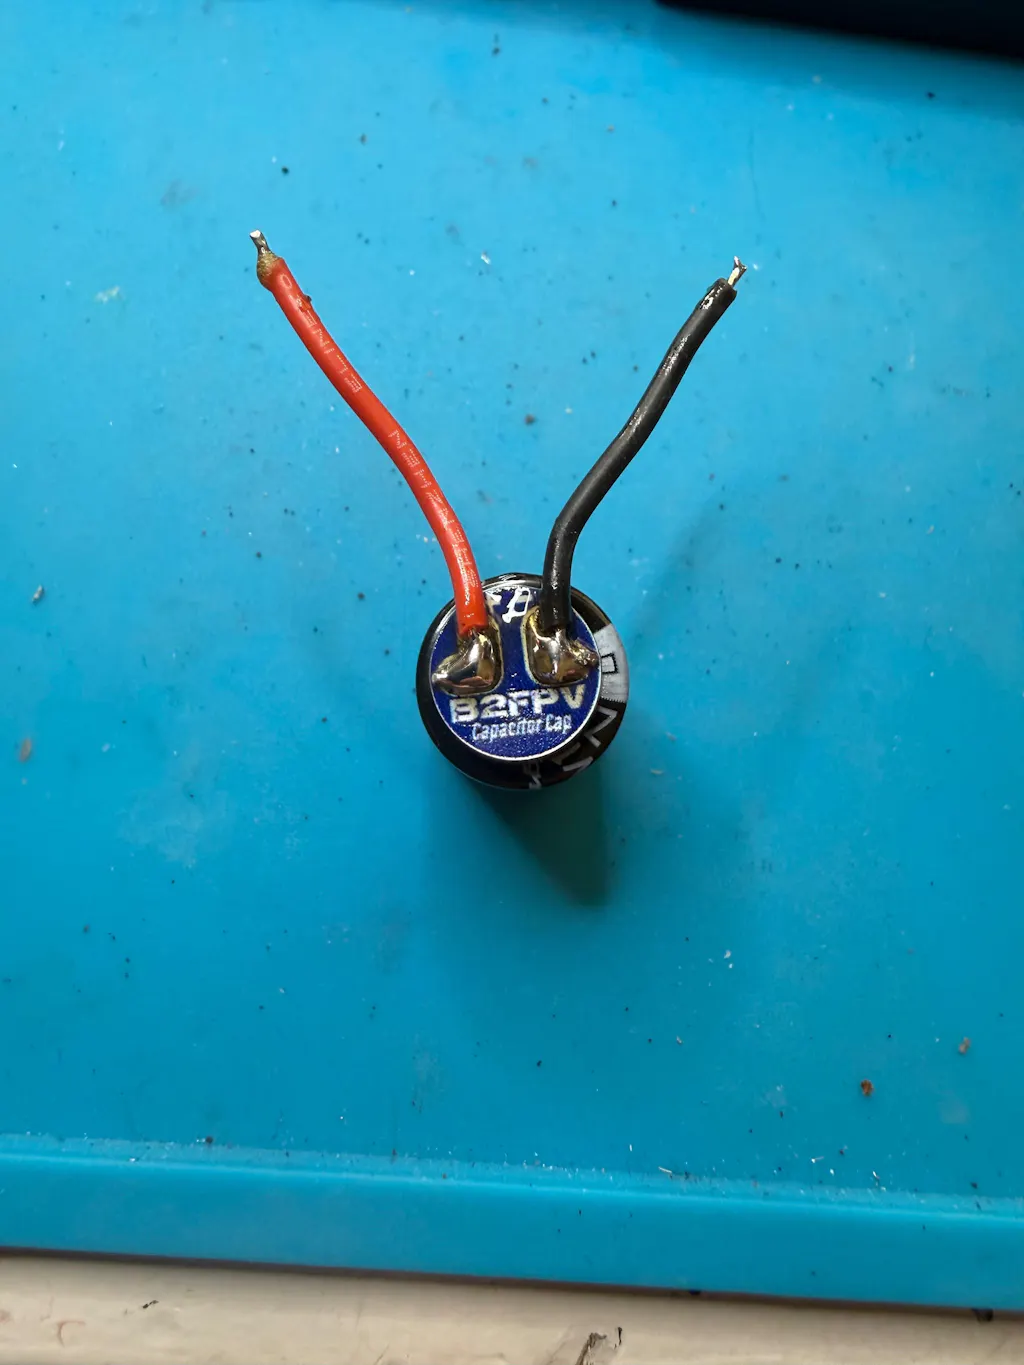
- Filtering: Many PDBs and FCs include LC filters (Inductor-Capacitor) to smooth out electrical noise, especially for the FPV camera and VTX, which are highly susceptible to "dirty" power causing lines or static in the video feed. Adding a high-quality low ESR capacitor (e.g., Panasonic Low ESR) directly across the main battery pads is a standard practice to further filter noise and protect against voltage spikes.
- Wiring Best Practices: Use appropriately gauged wires (e.g., 12AWG for main battery leads, 20-22AWG for ESCs to FC), minimize wire length, and ensure all solder joints are clean and strong to prevent resistance, heat, and potential electrical issues.
The Brain and Nerves: Flight Controller and Radio Receiver
The Flight Controller (FC): The Central Nervous System
The Flight Controller (FC) is undeniably the brain of your drone. It's a miniature computer processing a torrent of sensor data and executing commands at lightning speed.
- MCU (Microcontroller Unit): The primary processor (e.g., F4, F7, H7). Newer MCUs like the STM32F7 or H7 offer more processing power, faster loop times, and more UARTs (serial ports) for connecting peripherals, allowing for more complex algorithms and features.
- IMU (Inertial Measurement Unit): This critical component contains a gyroscope (measures angular velocity) and an accelerometer (measures linear acceleration and gravity). Popular IMUs include the MPU6000, ICM20689, and newer, more robust BMI270. The IMU provides the FC with real-time data on the drone's orientation and movement in 3D space.
- Input/Output Ports (UARTs): These serial ports allow the FC to communicate with other components like the radio receiver, VTX, GPS, and external LEDs. More UARTs mean more flexibility for your build.
- Firmware: Software like Betaflight (the most popular for FPV), EmuFlight, or iNav (for GPS-enabled long-range flights) runs on the FC. Betaflight, for example, takes your stick inputs from the radio receiver, combines them with IMU data, runs them through its PID (Proportional-Integral-Derivative) control loop, and then sends precise digital commands (DShot) to the ESCs to adjust motor speeds. This complex process happens thousands of times per second, translating your subtle stick movements into agile flight.
A high-quality FC, like the Matek H743 or SpeedyBee F405 V3, offers reliability and the processing power needed for advanced filtering and features.
Radio Receiver Protocols: Your Link to Control
The radio receiver is your crucial link, translating your transmitter's commands into signals the FC can understand. The choice of receiver and its protocol significantly impacts range, latency, and reliability.
Popular protocols and systems include:
- ExpressLRS (ELRS): A relatively new, open-source long-range system operating on 2.4GHz or 900MHz. Known for incredibly low latency, high refresh rates, and excellent range, it has rapidly become the gold standard for FPV.
- Crossfire (TBS Crossfire): A highly robust 900MHz long-range system known for its rock-solid link, excellent penetration, and telemetry capabilities. While slightly higher latency than ELRS, its reliability is legendary.
- FrSky ACCESS/ACCST: Older 2.4GHz protocols. While widely used, they can be more susceptible to interference and have higher latency compared to ELRS or Crossfire.
- Tracer (TBS Tracer): A 2.4GHz system from Team BlackSheep, offering low latency and high refresh rates, designed for racing and freestyle.
Antenna placement is critical. For ELRS and Crossfire, the receiver antenna (often a T-antenna for ELRS, or a dipole for Crossfire) should be mounted away from carbon fiber, which can block signals, and ideally positioned to maximize line-of-sight to your transmitter. Diversity receivers (with two antennas) further enhance signal reliability.
OSD and Telemetry: Real-time Flight Data
- On-Screen Display (OSD): This system overlays critical flight data directly onto your FPV video feed, providing instant situational awareness. Essential OSD elements include battery voltage, current draw, flight time, RSSI (Received Signal Strength Indicator for your radio link), and often artificial horizon or GPS data. Modern FCs (e.g., with an integrated AT7456E chip) handle OSD.
- Telemetry: This refers to the drone sending vital information back to your radio transmitter. Protocols like CRSF (Crossfire/ELRS) or FPort (FrSky) enable your radio to display real-time battery voltage, current, RSSI, GPS coordinates, and even FC warnings. This enhances flight safety by allowing you to monitor your drone's health without constantly looking at the OSD.
The Eyes and Voice: FPV Camera and Video Transmission System
FPV Cameras: Your Window to the World
The FPV camera is your window to the world, directly impacting your visual experience and flight precision.
- Sensor Types:
- CMOS: The dominant sensor type in modern FPV cameras (e.g., RunCam Phoenix 2, Caddx Ratel 2). They offer excellent image quality, wide dynamic range, and often come in smaller packages.
- CCD: Older technology, less common now. Known for their excellent low-light performance and lack of 'jello' (rolling shutter artifacts), but generally have higher latency and are more expensive.
- Aspect Ratios:
- 4:3: Provides a taller field of view, which some pilots prefer for seeing obstacles above/below.
- 16:9: A wider field of view, matching modern display aspect ratios, favored by others for a more cinematic feel.
- Field of View (FOV): Measured in degrees. Wider FOV (e.g., 150-170 degrees) allows you to see more but can introduce a 'fisheye' effect.
- Latency: The delay between the camera seeing something and it appearing in your goggles. Crucial for responsive flying, FPV cameras strive for minimal latency (e.g., <10ms).
- Low Light Performance: Determines how well the camera performs in dim conditions. Many cameras feature adjustable settings for WDR (Wide Dynamic Range) and DNR (Digital Noise Reduction).
Different camera choices significantly impact your visual experience and flight precision, especially in varying light conditions.
Video Transmitters (VTX): Broadcasting Your Perspective
The Video Transmitter (VTX) is responsible for sending your FPV camera's feed to your goggles.
- Power Output (mW): Measured in milliwatts (e.g., 25mW, 200mW, 800mW, 1W+). Higher power output generally means better range and penetration, but also more heat and current draw. 25mW is typically the legal limit for racing in many regions, while higher power is used for freestyle or long-range.
- Frequency Bands: Most FPV VTXs operate on the 5.8GHz frequency band, with various channels within that band.
- SmartAudio/Tramp Protocols: These protocols allow you to change VTX settings (channel, power output) directly from your FC's OSD or Betaflight Configurator, eliminating the need for fiddly VTX buttons.
- Clean Power Filtering: The VTX is highly sensitive to noisy power. Ensuring it receives clean, regulated power (often 9V or 12V from a BEC) is vital for clear, static-free video. An LC filter can further improve video quality. Popular VTXs include the TBS Unify Pro32 Nano and Rush Tank Solo for their reliability and features.
Understanding these elements is vital for clear, reliable video transmission, which is paramount for safe and enjoyable FPV flight.
Antennas: The Unseen Connection
Antennas are often overlooked but are paramount for video link quality and range. They are the conduits for your video signal.
- Linear vs. Circular Polarized (CP) Antennas:
- Linear: Simple dipole antennas. Good for short distances and specific scenarios, but susceptible to multipath interference (reflections causing signal cancellation).
- Circular Polarized (CP): The standard for FPV (e.g., Foxeer Lollipop, Lumenier AXII 2). They transmit a signal that spins either clockwise (RHCP) or counter-clockwise (LHCP). Matching polarization on both transmit and receive antennas significantly reduces multipath interference and improves signal quality and penetration.
- Common Types:
- Omnidirectional (e.g., Pagoda, Lollipop, Cloverleaf): Radiate signal in all directions, ideal for freestyle and general flying where the drone's orientation is constantly changing.
- Directional (e.g., Patch, Crosshair): Focus the signal in a specific direction, offering greater range and penetration when aimed correctly. Often used on FPV goggles for long-range flying or improved signal reception in challenging environments.
Optimal placement involves mounting VTX antennas away from carbon fiber, ESCs, and motors to minimize interference and ensure an unobstructed signal path. For goggles, using a combination of an omnidirectional and a directional antenna (diversity setup) offers the best of both worlds.
Optimizing Your Build: Component Synergy and Selection
Matching Components: The Art of Balance
A high-performance drone isn't just about expensive parts; it's about how well they work together. This is where the art of component synergy comes in.
- Power System Balance: Your motor KV, propeller size, and battery S-rating must be perfectly matched. For example, a 6S battery with a low KV motor (e.g., 1700KV 2207) and a 5-inch, medium-pitch prop will yield an efficient yet powerful setup. Trying to run a high KV motor (e.g., 2700KV) on 6S with a large prop would lead to excessive current draw, overheating, and potential component failure.
- Thermal Management: Ensure your ESCs and motors are not constantly running hot. This is a sign of an unbalanced power system or overly aggressive tune.
- Weight-to-Thrust Ratio: Aim for a healthy ratio, where your motors can produce significantly more thrust than the total weight of your drone. This provides the 'punch' and agility FPV pilots desire.
Practical tip: Use online calculators (e.g., eCalc) or community recommendations as a starting point, but always verify performance with real-world testing and current logging.
Weight Distribution and Center of Gravity
The physical placement of components significantly impacts flight characteristics. An optimal center of gravity (CG) is crucial for stable flight, sharp turns, and overall maneuverability.
- Battery Placement: The battery is often the heaviest single component. Its position (typically centered on top or bottom) is key to achieving a balanced CG. Experiment with sliding the battery slightly forward or backward.
- Component Layout: Distribute other components (FC, VTX, camera) as symmetrically as possible around the frame's center.
- Impact: A perfectly balanced CG means the drone pivots effortlessly around its center, leading to a more locked-in feel and better response to stick inputs. An imbalanced CG can lead to drift, requiring constant stick correction, and making tuning difficult.
Future-Proofing Your Rig: Modularity and Upgradability
Consider how component choices can enable easier repairs, upgrades, and modifications, saving you time and money in the long run.
- Modular Designs: Opt for stackable FC/ESC systems rather than all-in-one boards if you prefer easier individual component replacement. If one part fails, you don't have to replace the entire stack.
- Accessible Wiring: Plan your wiring layout to allow easy access to solder pads and connectors. Use appropriate connectors (e.g., XT60 for battery, JST-SH for peripherals) that are standard and readily available.
- Broad Compatibility: Choose components that adhere to common standards and protocols (e.g., Betaflight-compatible FCs, DShot ESCs, SmartAudio VTXs). This ensures your drone can evolve with your skills and new technologies without requiring a complete rebuild.
- Frame Design: Some frame designs are inherently easier to work on, with more space and accessible mounting points. For example, a frame with a removable top plate makes maintenance much simpler.
Frequently Asked Questions About Drone Anatomy
What are the core electronic components of an FPV drone and their specific roles?
The core electronic components include the Flight Controller (brain, processes sensor data and pilot commands), Electronic Speed Controllers (muscle control, precisely regulating motor speed), Brushless Motors (propulsion, generating thrust), LiPo Battery (power source, supplying electrical energy), FPV Camera (eyes, capturing the real-time video feed), Video Transmitter (video broadcast, sending the camera feed to goggles), and Radio Receiver (pilot input, translating transmitter commands). Each plays a distinct, interconnected role in processing, powering, and communicating for flight.
How does a flight controller communicate with ESCs and motors to achieve stable, responsive flight?
The flight controller (FC) uses its IMU sensors (gyroscope and accelerometer) to continuously detect the drone's orientation and movement in 3D space. Based on this sensor data and the pilot's stick inputs from the radio receiver, the FC calculates the necessary speed adjustments for each motor. These commands are then sent digitally via high-speed protocols like DShot (e.g., DShot600, DShot1200) to the Electronic Speed Controllers (ESCs). The ESCs then precisely regulate the power delivered to each brushless motor, adjusting their RPMs thousands of times per second to achieve the desired flight dynamics, maintain stability, and execute pilot commands.
What's the optimal way to integrate FPV camera and video transmitter systems for clear, low-latency feeds?
Optimal integration involves ensuring the FPV camera and VTX receive clean, regulated power, typically from a dedicated BEC (e.g., 9V) on the Flight Controller or 4-in-1 ESC. This minimizes electrical noise that can cause static or lines in the video feed. Proper antenna selection (e.g., circular polarized antennas like Lollipop or Pagoda for multipath rejection) and strategic placement are crucial. Mount antennas vertically and away from carbon fiber, large metal objects, and other noisy electronics to ensure an unobstructed signal path. Using protocols like SmartAudio or Tramp for VTX control simplifies channel changes and power adjustments directly from your OSD or Betaflight.
How do different frame designs and material choices impact drone durability and flight characteristics?
Frame designs (e.g., True-X, Stretched-X, H-frame, Deadcat) affect weight distribution, propeller wash interaction, and overall rigidity. A True-X offers balanced flight, while a Stretched-X provides better pitch authority for racing. A Deadcat design keeps props out of view for cinematic footage. Material choices like carbon fiber offer high strength-to-weight ratios and rigidity, improving flight feel and crash resistance, but can block radio signals if antennas are poorly placed. Thicker carbon fiber (e.g., 5mm arms) enhances durability but adds weight. A stiffer frame generally provides a more direct, "locked-in" flight feel and better crash resilience, while lighter frames improve agility and battery efficiency.
Can you explain the complete power delivery system from battery to motors in a quadcopter, including voltage regulation?
The power delivery system begins with the LiPo battery (e.g., 4S or 6S), which connects via an XT60 plug to the main power pads on the Flight Controller (FC) or 4-in-1 ESC. From these pads, the full battery voltage is routed directly to the Electronic Speed Controllers (ESCs), which then power the motors. For sensitive components like the FC, radio receiver, FPV camera, and Video Transmitter (VTX), Voltage Regulators (BECs) are integrated into the FC or 4-in-1 ESC. These BECs step down the high battery voltage (e.g., 22.2V for 6S) to their required operating levels, typically 5V for the FC and receiver, and 9V or 12V for the VTX and camera. This ensures stable, clean, and safe power delivery to all components, often supplemented by a large low ESR capacitor across the main battery pads to filter electrical noise.
Mastering the Machine: Beyond the Build
You've journeyed through the intricate FPV drone anatomy, from its structural bones to its electronic brain and sensory organs. This deep dive isn't just about knowing the parts; it's about understanding their symbiotic relationship, the 'why' behind every component choice, and the 'how' of their collective performance.
Armed with this comprehensive knowledge, you're not just a pilot; you're an architect, a diagnostician, and a true master of your flying machine. This understanding empowers you to build better, troubleshoot smarter, and push the boundaries of FPV flight with confidence. The skies await your informed command.
Ready to apply your newfound knowledge? Share your most challenging build or troubleshooting experience in the comments below, or explore our advanced tuning guides to further refine your flight. Join the FPV ORACLE community and elevate your craft!
Copyright-safe media generated locally by FPVLovers